

Starwheel Granny Square
By Janne Kleivset // Joy of Motion Crochet
CONTACT
If you have any questions about the pattern please contact me via email: help@joyofmotioncrochet.com
WEBSITE: joyofmotioncrochet.com
NEWSLETTERS: joyofmotioncrochet.com/newsletter
INSTAGRAM: @joyofmotion
LEGAL
This copy is for personal use only. You cannot resell, reprint or share any parts of this pattern as your own. All my crochet patterns can be used to produce & sell handmade, however you are required to credit Joy of Motion Crochet/Janne Kleivset as the designer by linking back to joyofmotioncrochet.com. Our photos cannot be used in promotion of your handmade product.
DISCLOSURE
To be able to serve you the best when it comes to finding the yarn suggested for this pattern, I have added affiliate links that lead you to the materials needed. This means I will get a small commission for leading you to the yarn, but it does not affect your price & you will be able to grab the yarn as quickly as possible.
Looking to crochet a Starwheel granny square? You have found just what you need, because here is a step-by-step Starwheel granny square tutorial, with a photo for every step.
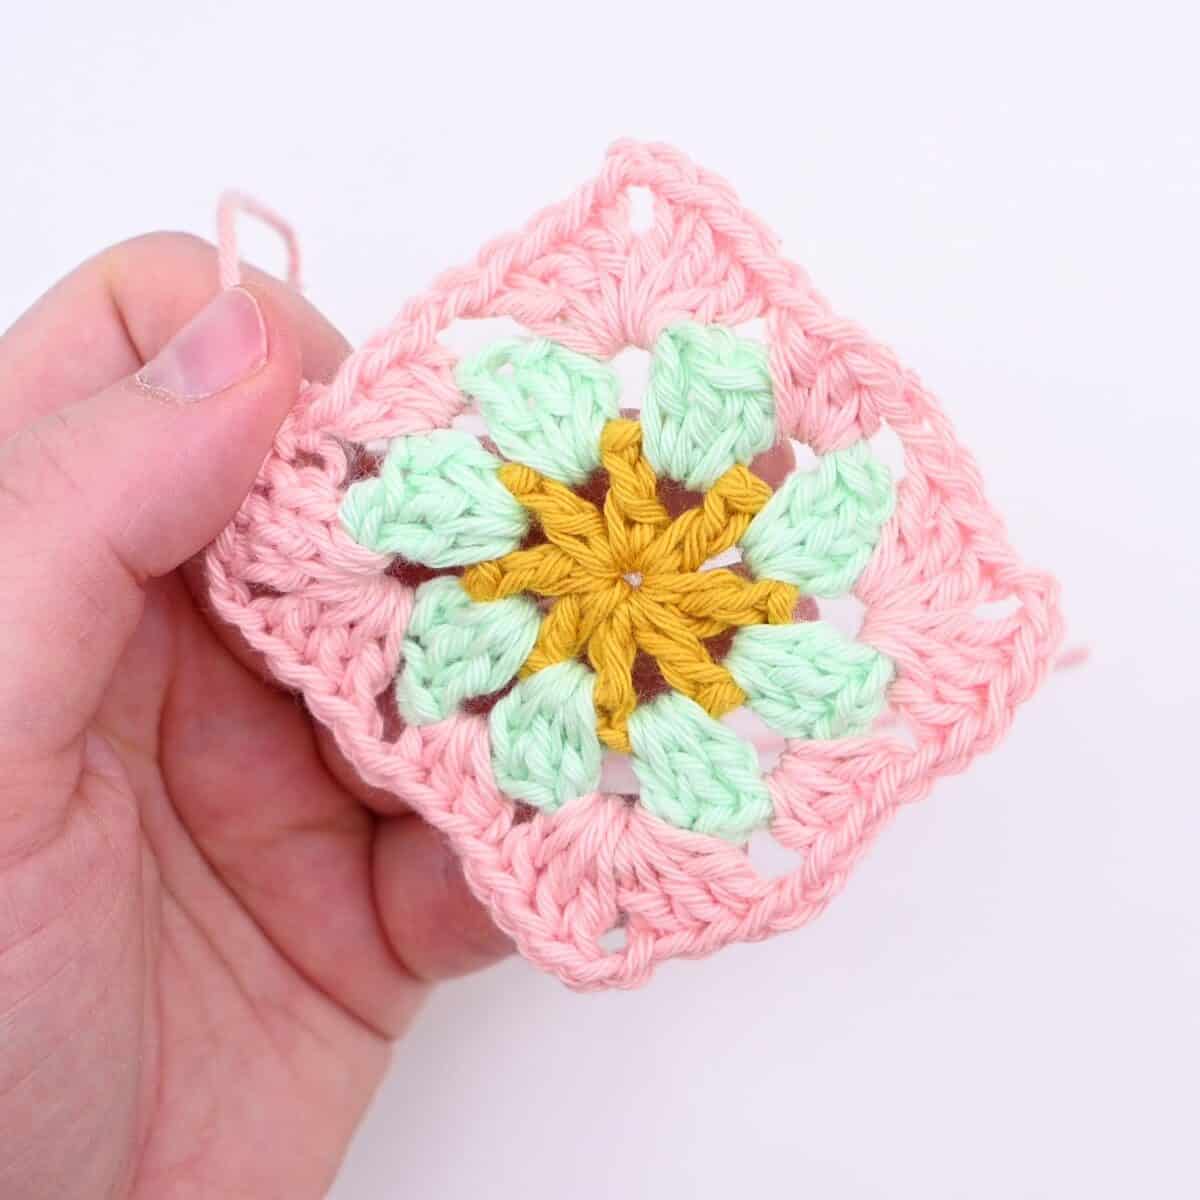
In this crochet tutorial you will learn how to crochet a Starwheel granny square: a star of double crochets in the middle, a round of double crochet groups around it and a square border.
The Starwheel granny square is a fun alternative to the classic granny square and great if you like everything related to granny squares.
Find more: Different Granny Squares.
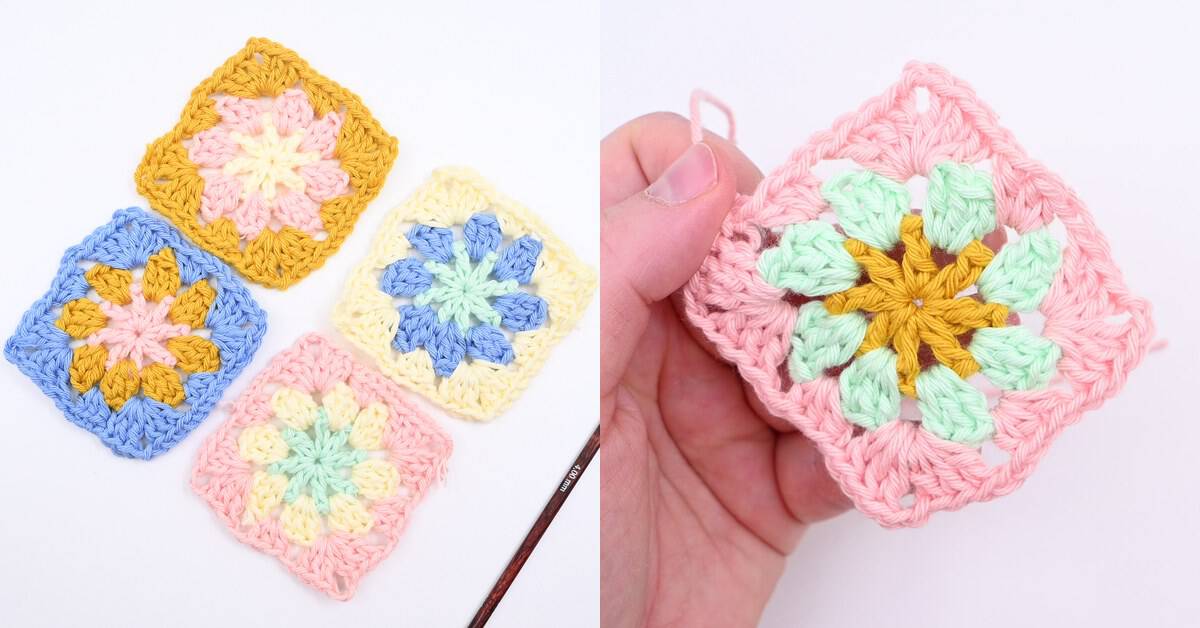
Table of Contents

Crochet a Starwheel Granny Square
The Starwheel granny square is crocheted from the middle outwards in three rounds, with a new color on each round.
The first round is the star: 8 double crochets worked in one base chain, with a chain 1 between them.
The second round puts a group of 3 double crochets in each chain space. The third round turns the circle into a square, with double crochet corners and half double crochet sides, like a traditional granny square.
This granny square is easy enough for beginners to give a go at.
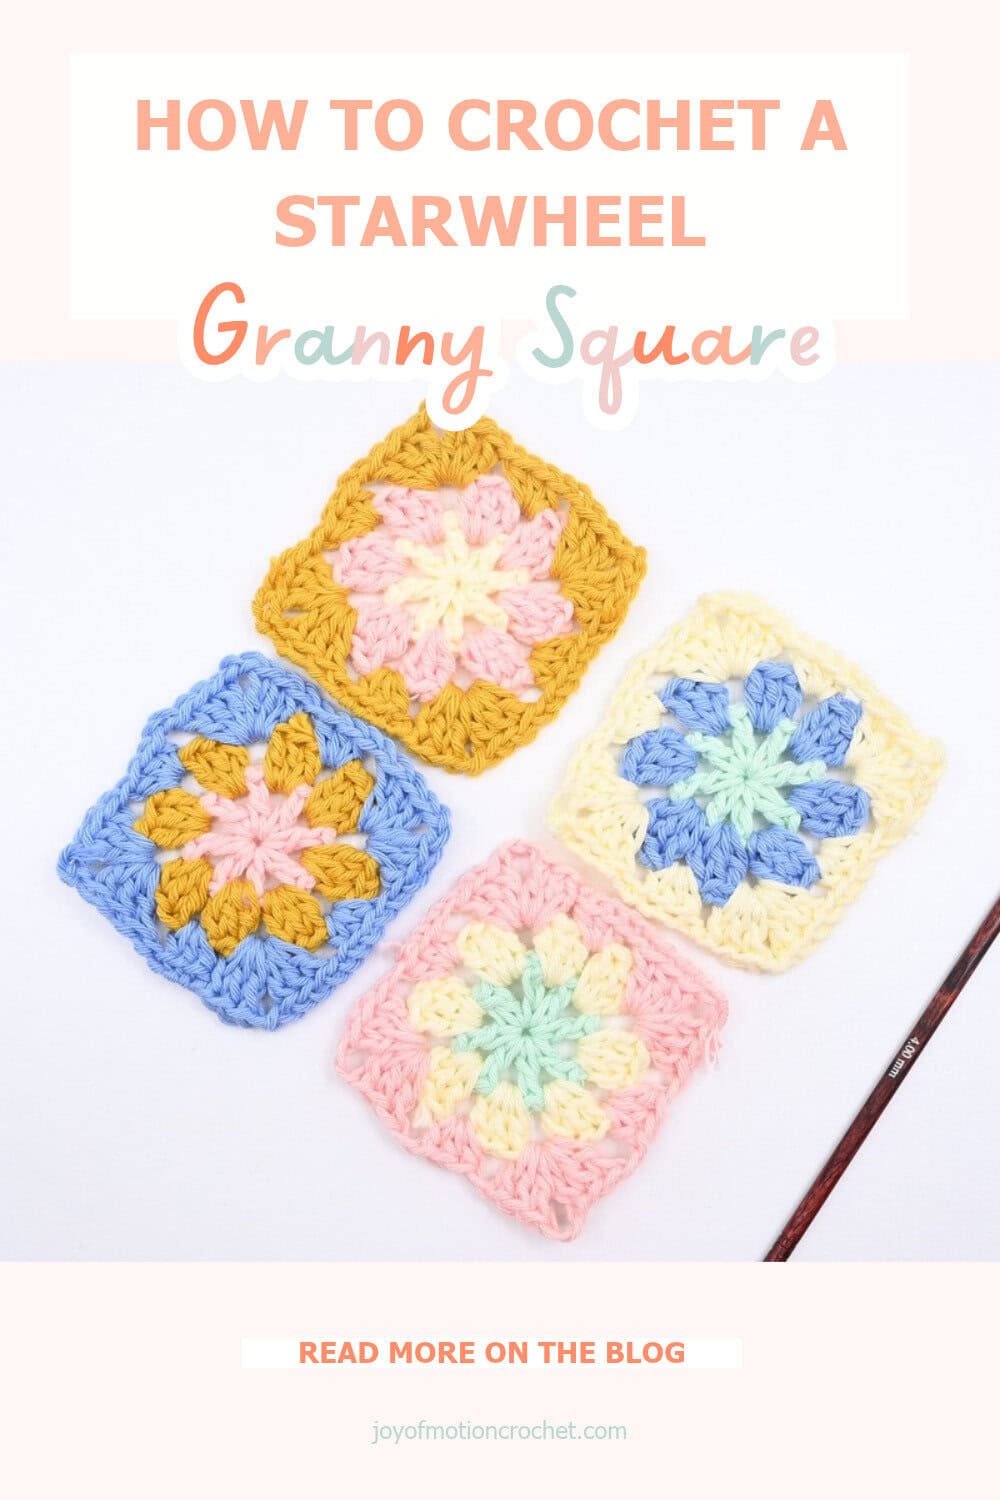
If you like this granny square pattern, save it on Pinterest!
Materials & Tools for Granny Squares
To crochet granny squares and granny square shapes, you can use any size/mm crochet hook and yarn.
You can use any yarn fiber, like cotton, wool or acrylic yarn.
However, it’s most common to use either 3 light yarn (dk weight yarn) or 4 medium weight yarn (aran or worsted weight yarn).
Here are a couple of yarns I’d recommend to crochet granny squares:
- Lion Brand – Wool Ease
- Lion Brand – 24/7 Cotton
- Red Heart – Super Saver
These yarns come in many beautiful colors & work for a range of granny square patterns.
Next, you’ll need a crochet hook that matches the yarn weight & a granny square blocking board is helpful when you block the finished pieces.
Best Tips for Crocheting Granny Squares
There are several factors that can help you have success when crocheting granny squares.
- Count stitches: Make sure you got each round right by counting stitches after finishing one round or side of the granny square.
- Weave in yarn tails as you crochet: Don’t leave weaving in yarn tails until you finish crocheting all your granny squares. Make a habit of weaving them in before you crochet another granny square, which will make weaving in ends less overwhelming.
- Use colors that contrasts well with each other. This will give you an overall more stunning look.
- Block your granny squares: Make sure you get a professional finish by blocking your granny squares.
Would you like to save this?
We will email this pattern to you, so you can come back to it later.
Free, and you can unsubscribe any time.
Starwheel Granny Square
About the Starwheel Granny Square
Learn how to crochet a Starwheel granny square with this step by step photo tutorial. It takes only three rounds, so it works up quickly. Use the Starwheel granny square on its own, or join more of them into projects like a Granny Square Cardigan, Granny Square Dishcloth or Granny Square Ottoman.
Project level: Easy
Materials
Crochet Hook Size
Use any crochet hook size that works with your yarn.
For this tutorial I used 4 mm (US: G-6 UK: 8).
Crochet Pattern Notes
- This pattern is written in US terms (learn how to change to UK terms).
- The crochet granny square is crocheted in rounds with the right side facing at all times.
- This crochet granny square can be crocheted with any crochet hook size and yarn.
- Use it as a full project itself, or make many for a combined crochet project.
- You can swap the chains in the beginning for a magic ring/magic circle if you prefer that.
- The square is worked from the center out, in a new color on each round. Mix and match the colors to fit your style.
Abbreviations
- beg = beginning
- CA = color A
- CB = color B
- CC = contrasting color / color C
- ch = chain
- ch-1-sp = chain space created by 1 chain
- ch-sp = chain space
- dc = double crochet
- hdc = half double crochet
- sl st = slip stitch
- st = stitch(es)
We try our best to include all crochet abbreviations in the list above for the crochet pattern, but sometimes we may forget one or two.
Learn more about crochet abbreviations & find a complete list on our Crochet Abbreviations & Terms post.
Crocheting from this pattern?
Members follow it with no ads between the rows, and print it the way they like, according to their member level.
See the Levels
Instructions for the Starwheel Granny Square
Written Instructions:
Round 1 with CA: Ch 5 (counts as base ch + 1st dc + ch 1), *dc 1 in base ch, ch 1*, repeat from *to* 6 more times, sl st in 4th ch from beg of round (=16 st).
Fasten off & cut yarn.
Round 2 with CB: Make slip knot. *dc 3 in next ch-1-sp, ch 1*, repeat from *to* 7 more times, sl st in 1st st (=32 st).
Fasten off & cut yarn.
Round 3 with CC: Make slip knot. *dc 3 in next ch-1-sp, ch 2, dc 3 in same ch-sp, ch 1, hdc 3 in next ch-1-sp, ch 1*, repeat from *to* 3 more times, sl st in 1st st (=52 st).
Fasten off and weave in ends with a yarn needle.
The Rest of This Crochet Pattern is for Subscribers
Pop your email in below and the full pattern opens up right away.
Free, and you can unsubscribe any time.
Step-by-Step Photo Instructions
Round 1 with CA
Make a slip knot.
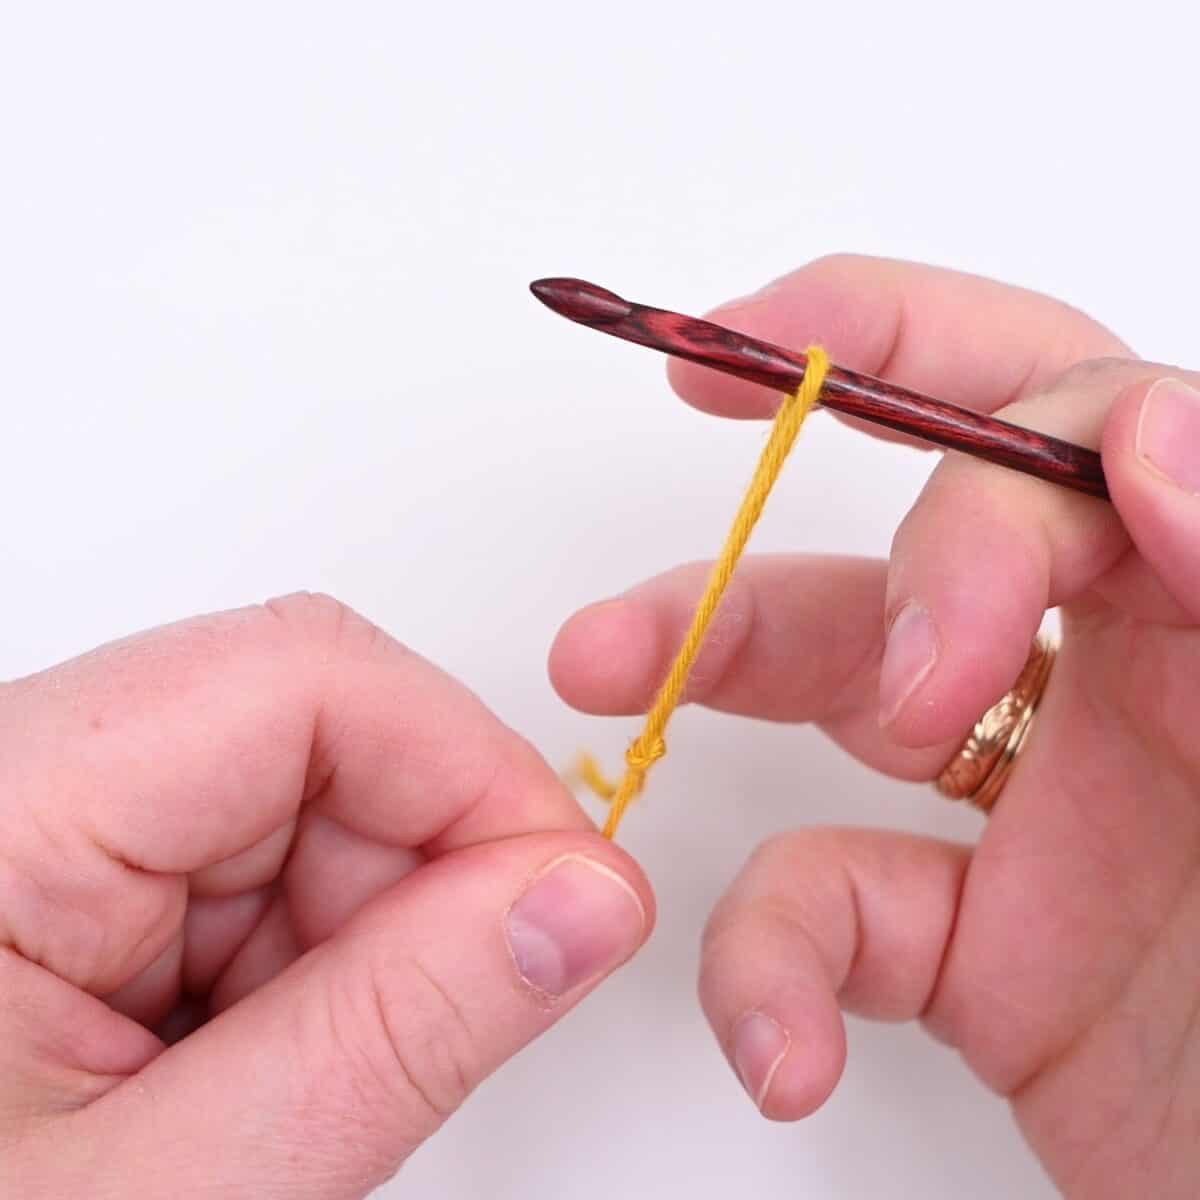
Chain 5.
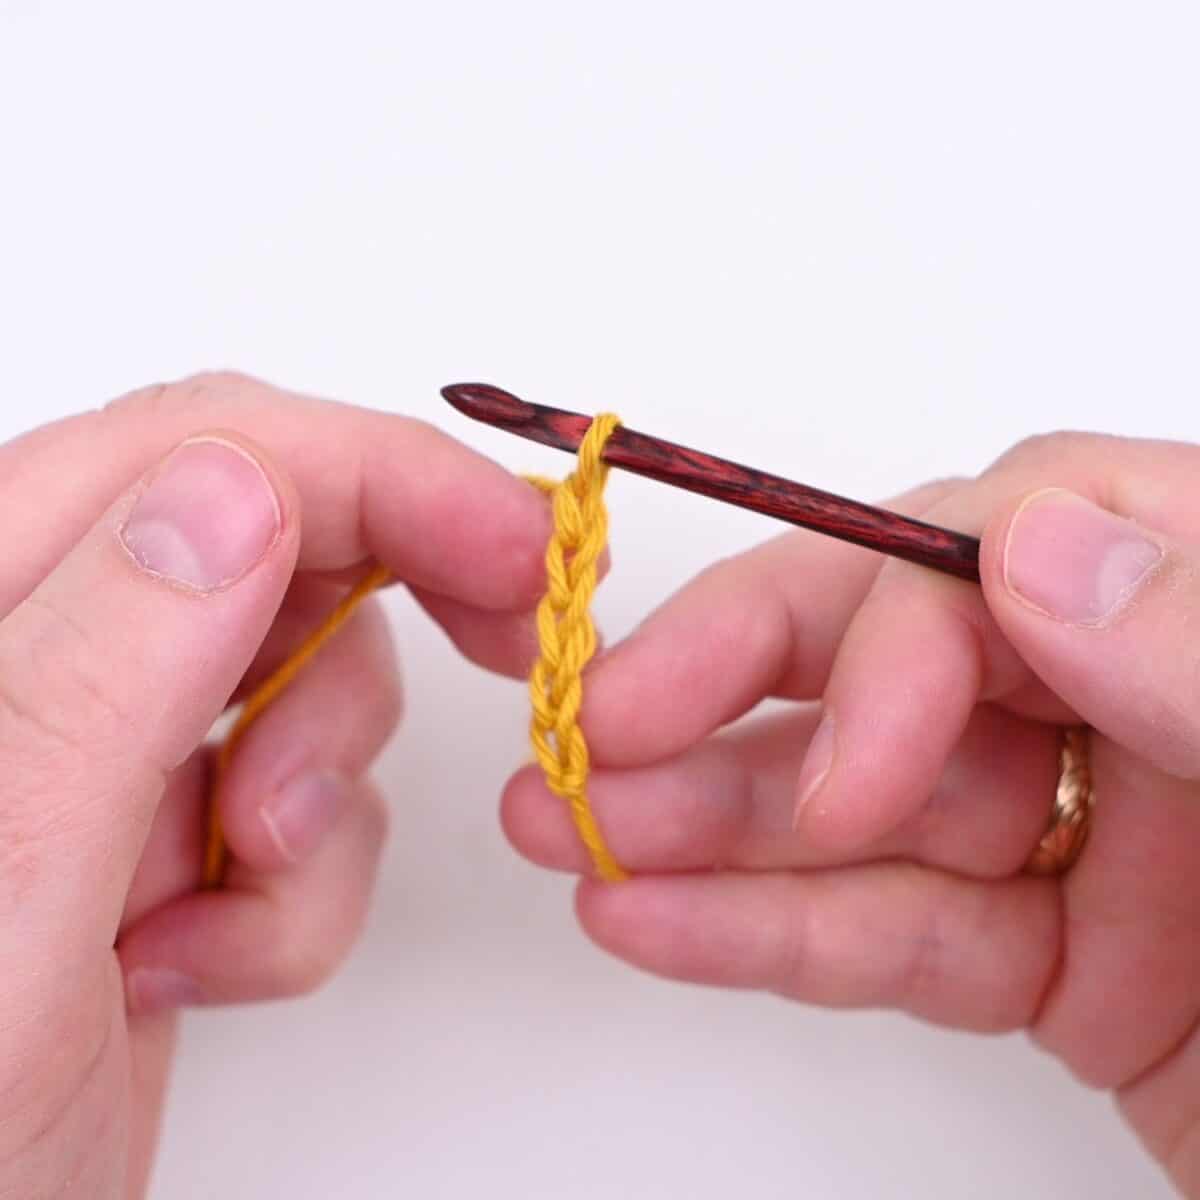
Yarn over, insert the hook in the base chain.
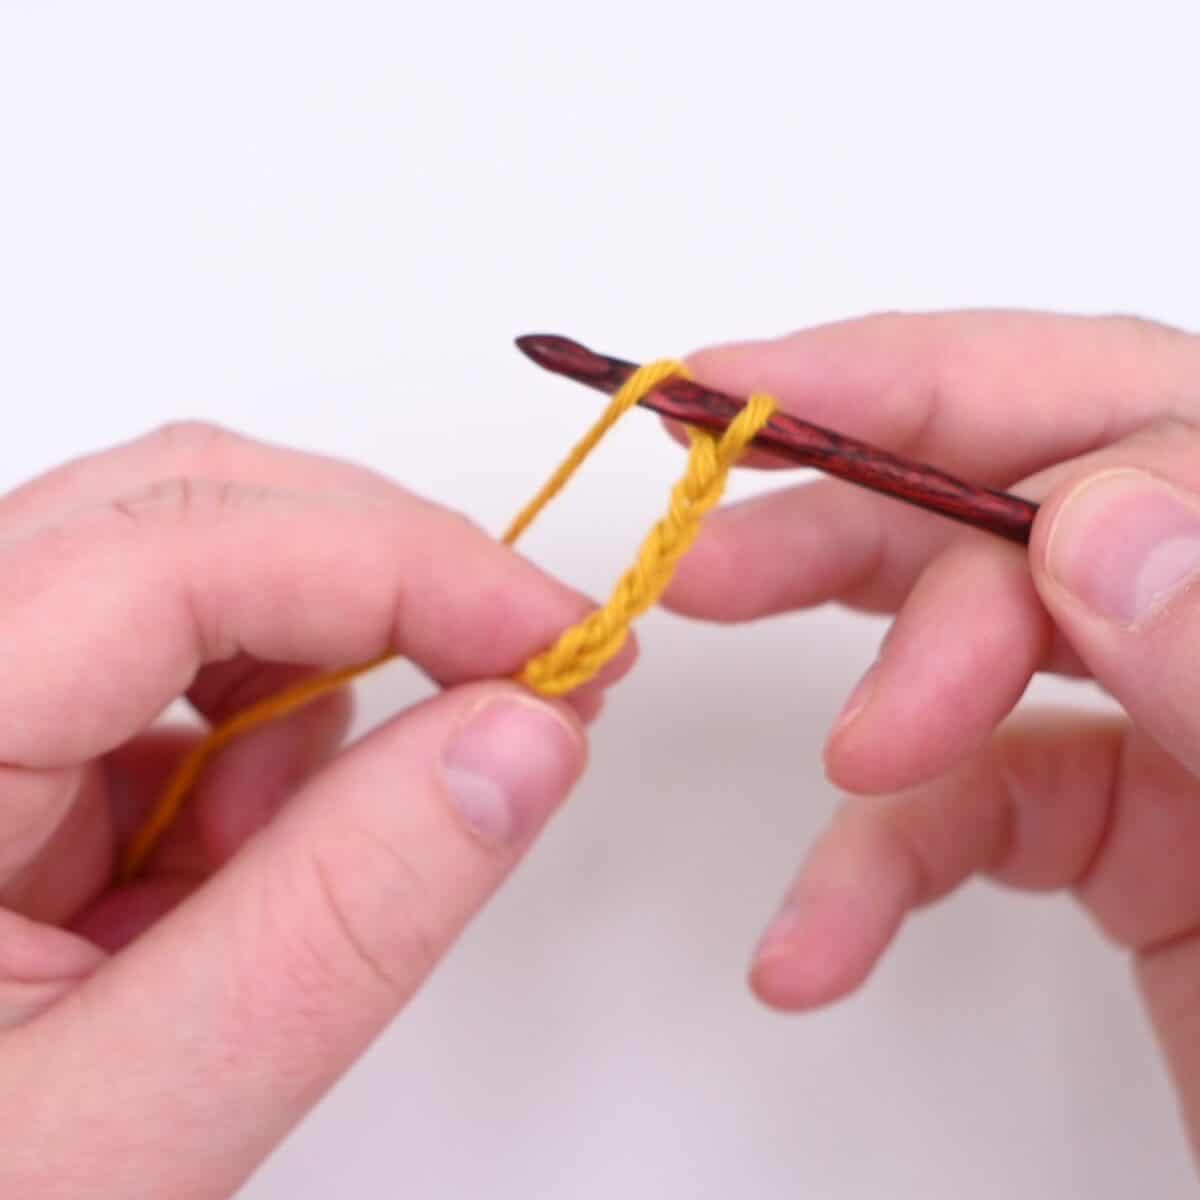
Work the first double crochet.
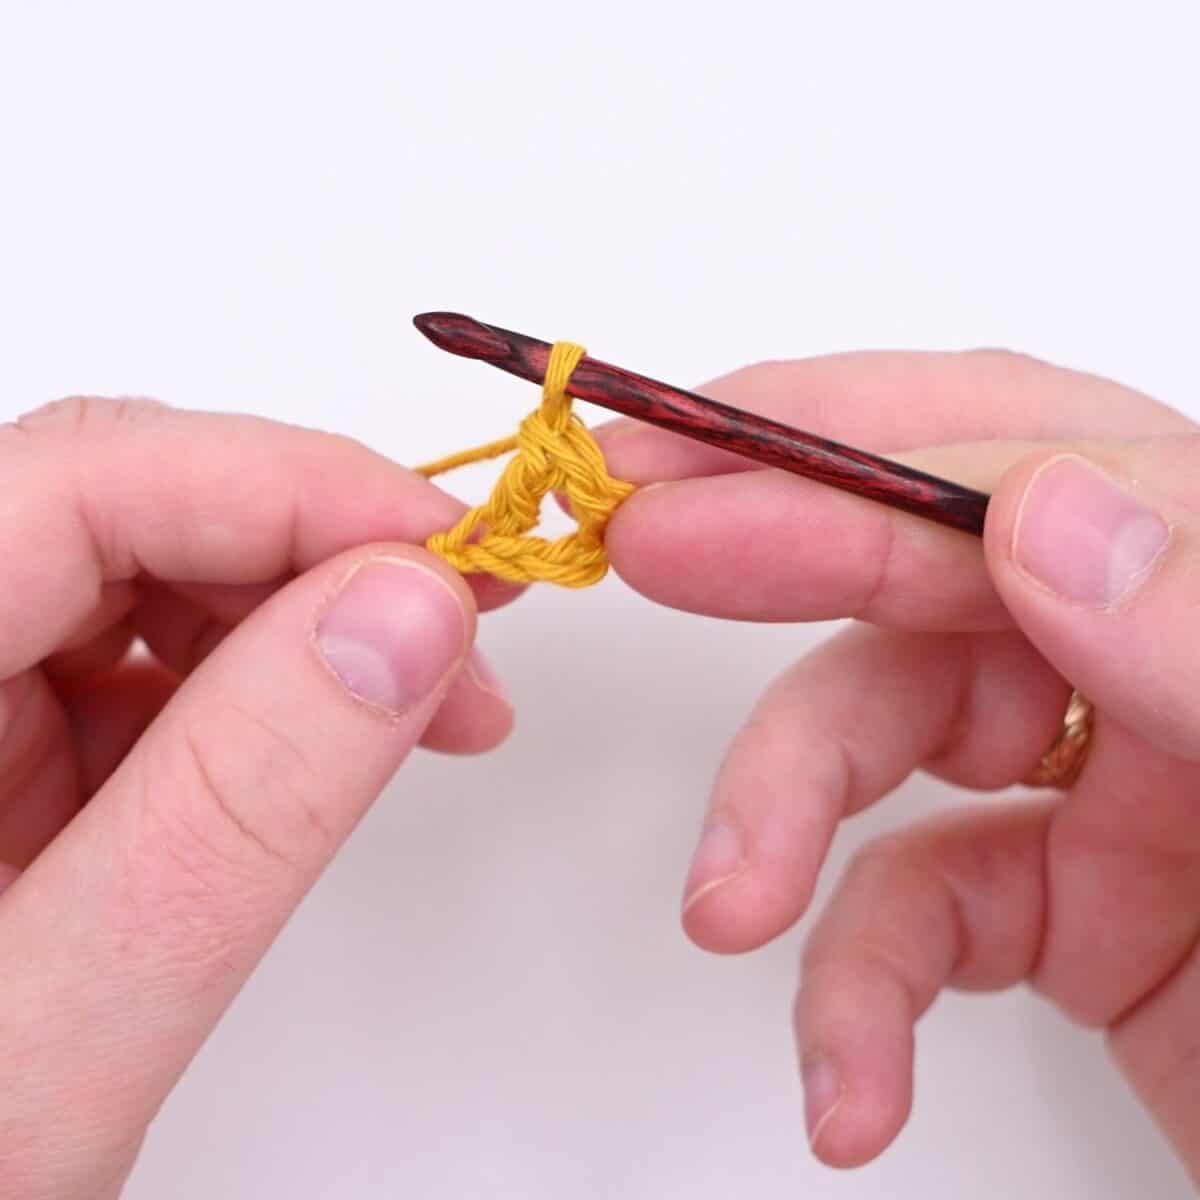
Double crochet and chain 1, all the way around.
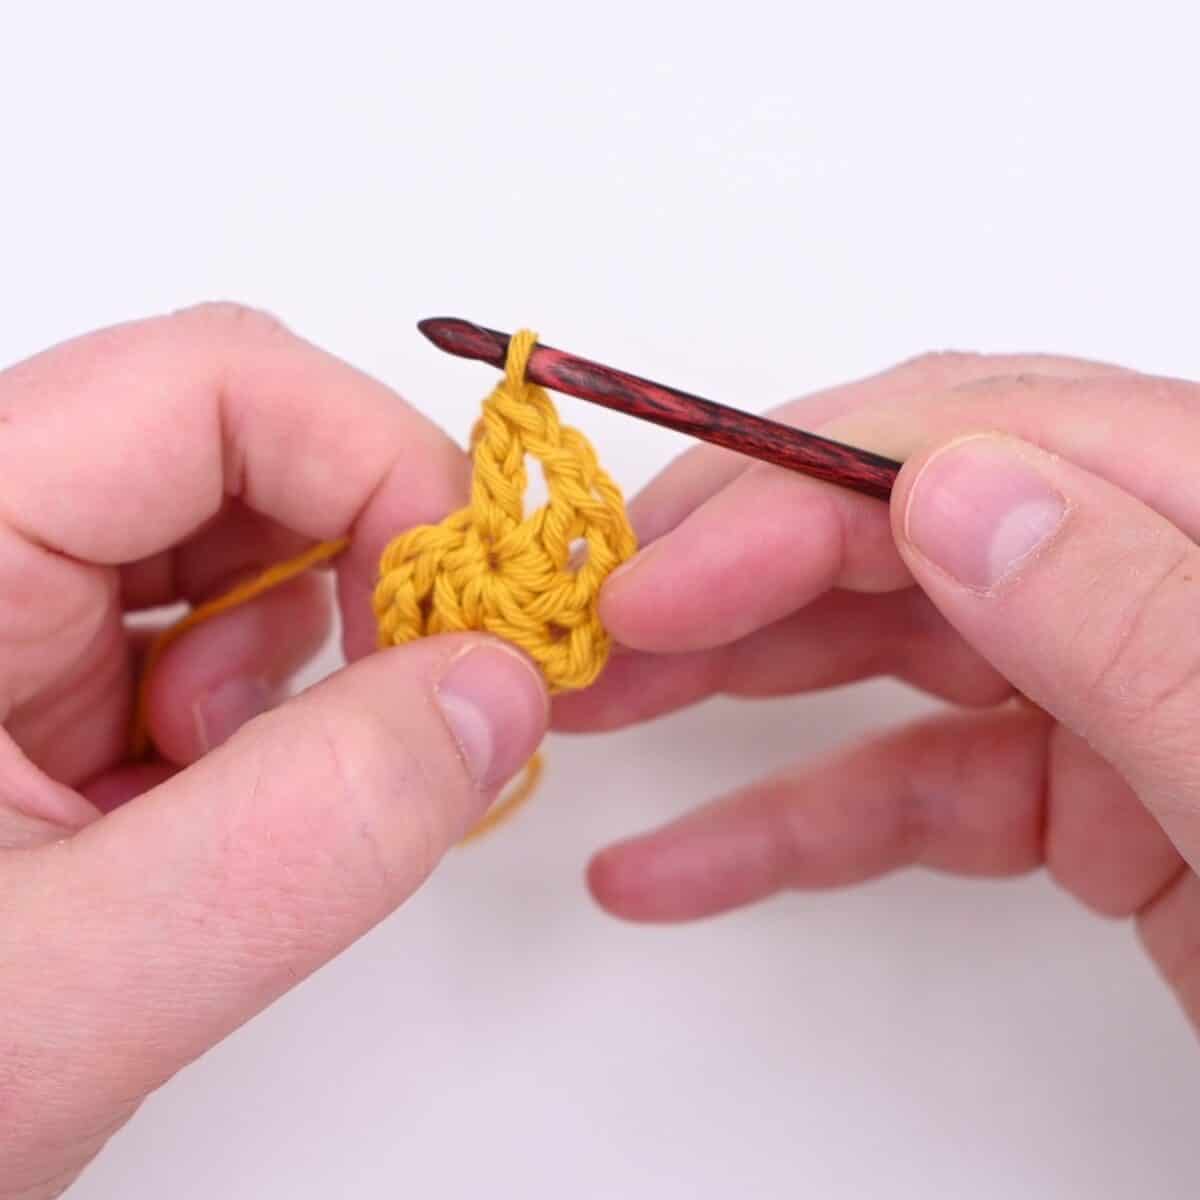
Join with a slip stitch in the 4th chain & fasten off.
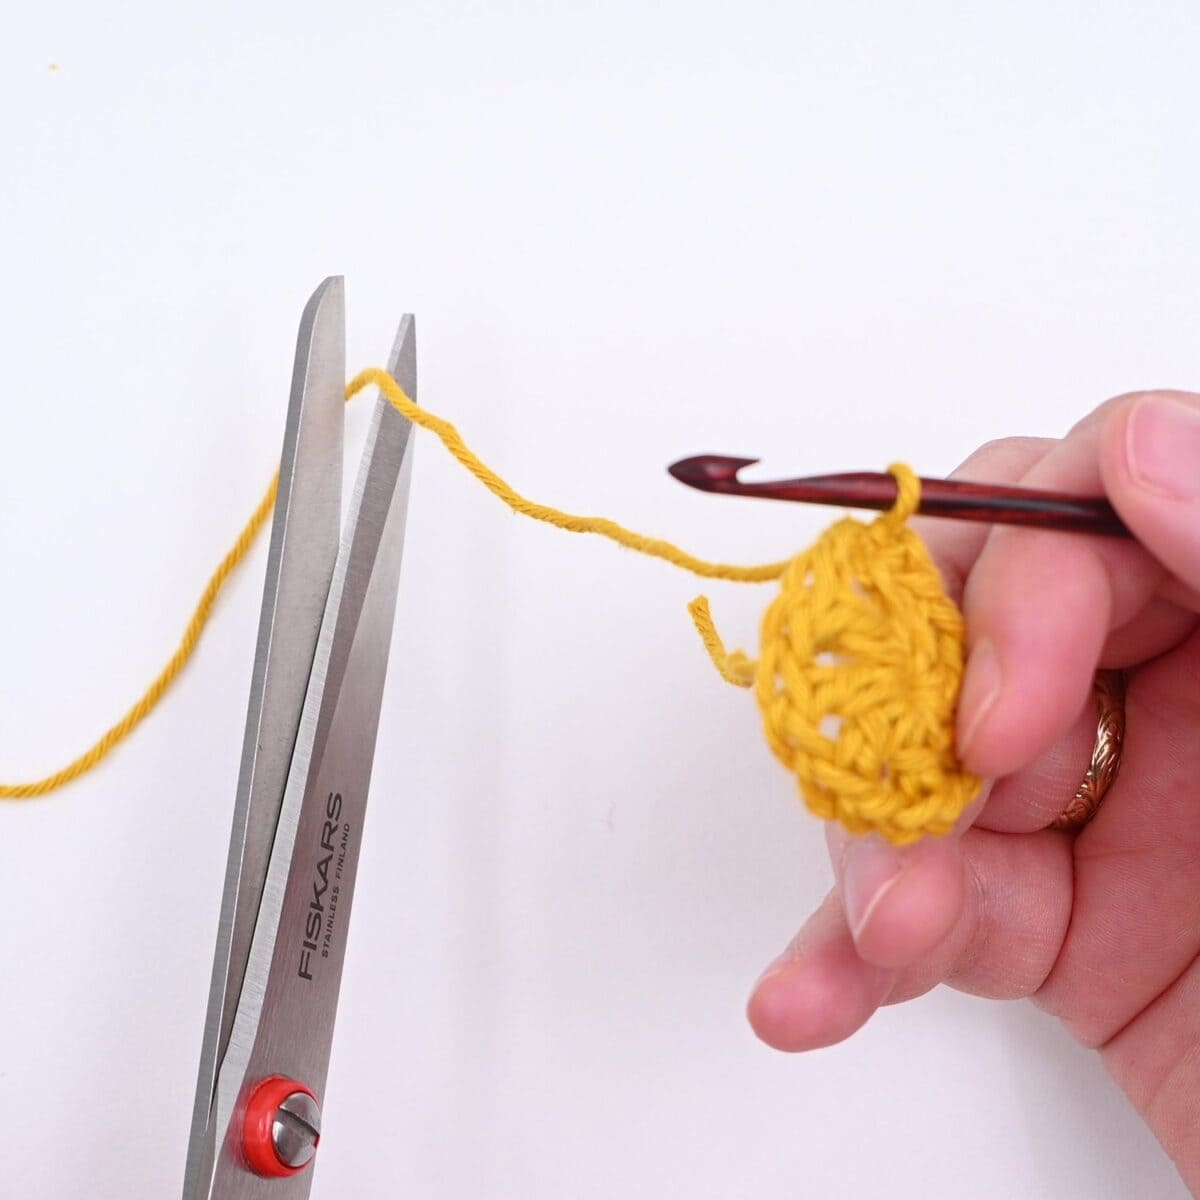
Round 1 is done.
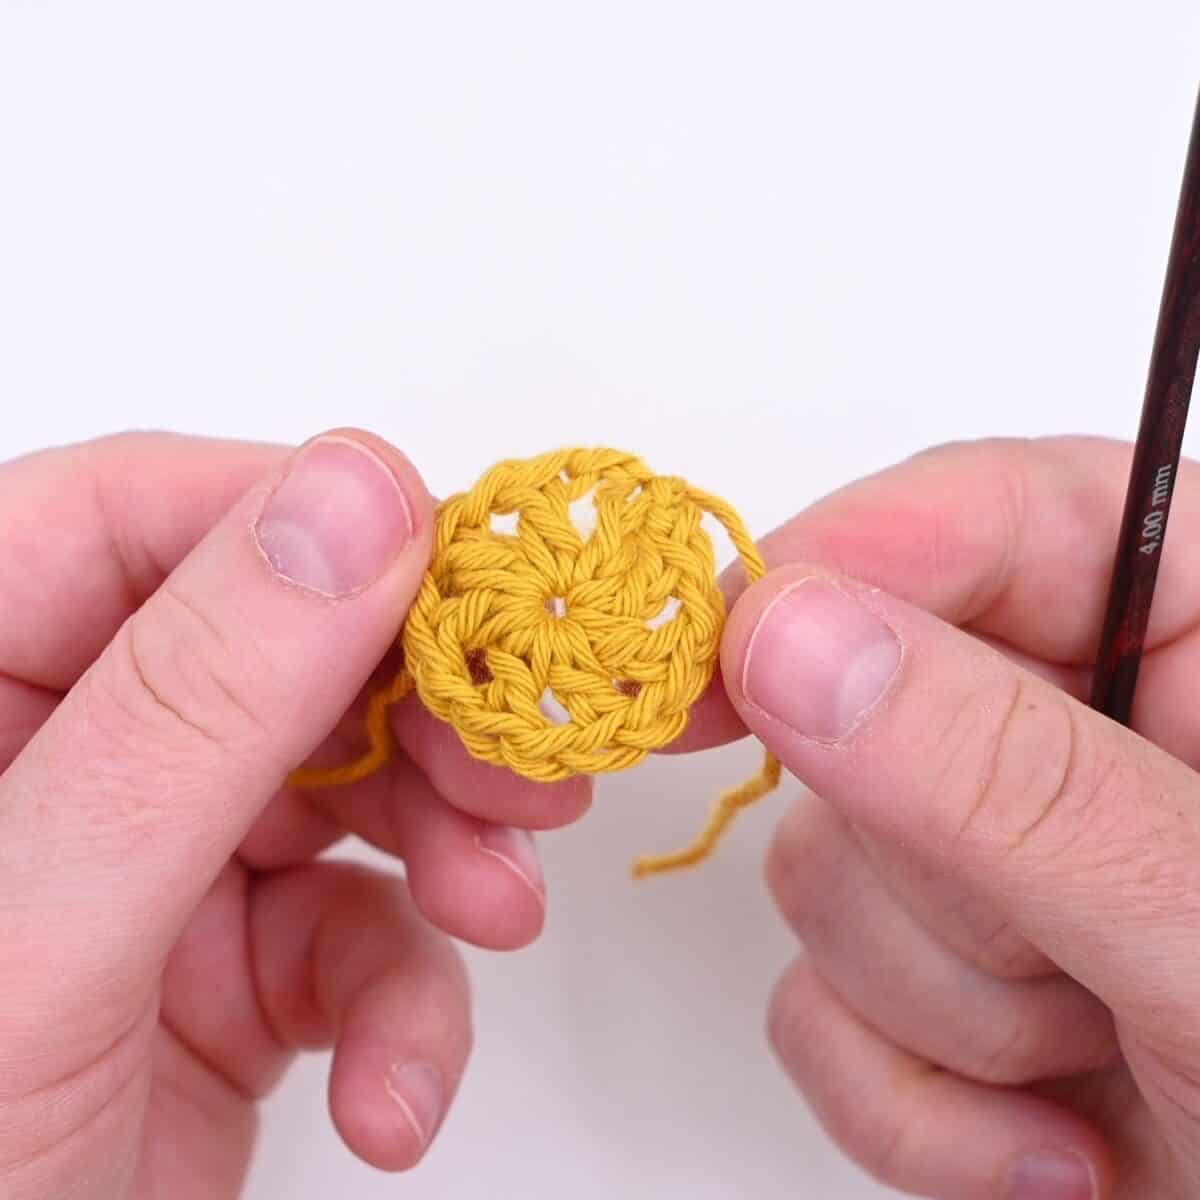
Round 2 with CB
New color: Make a slip knot.
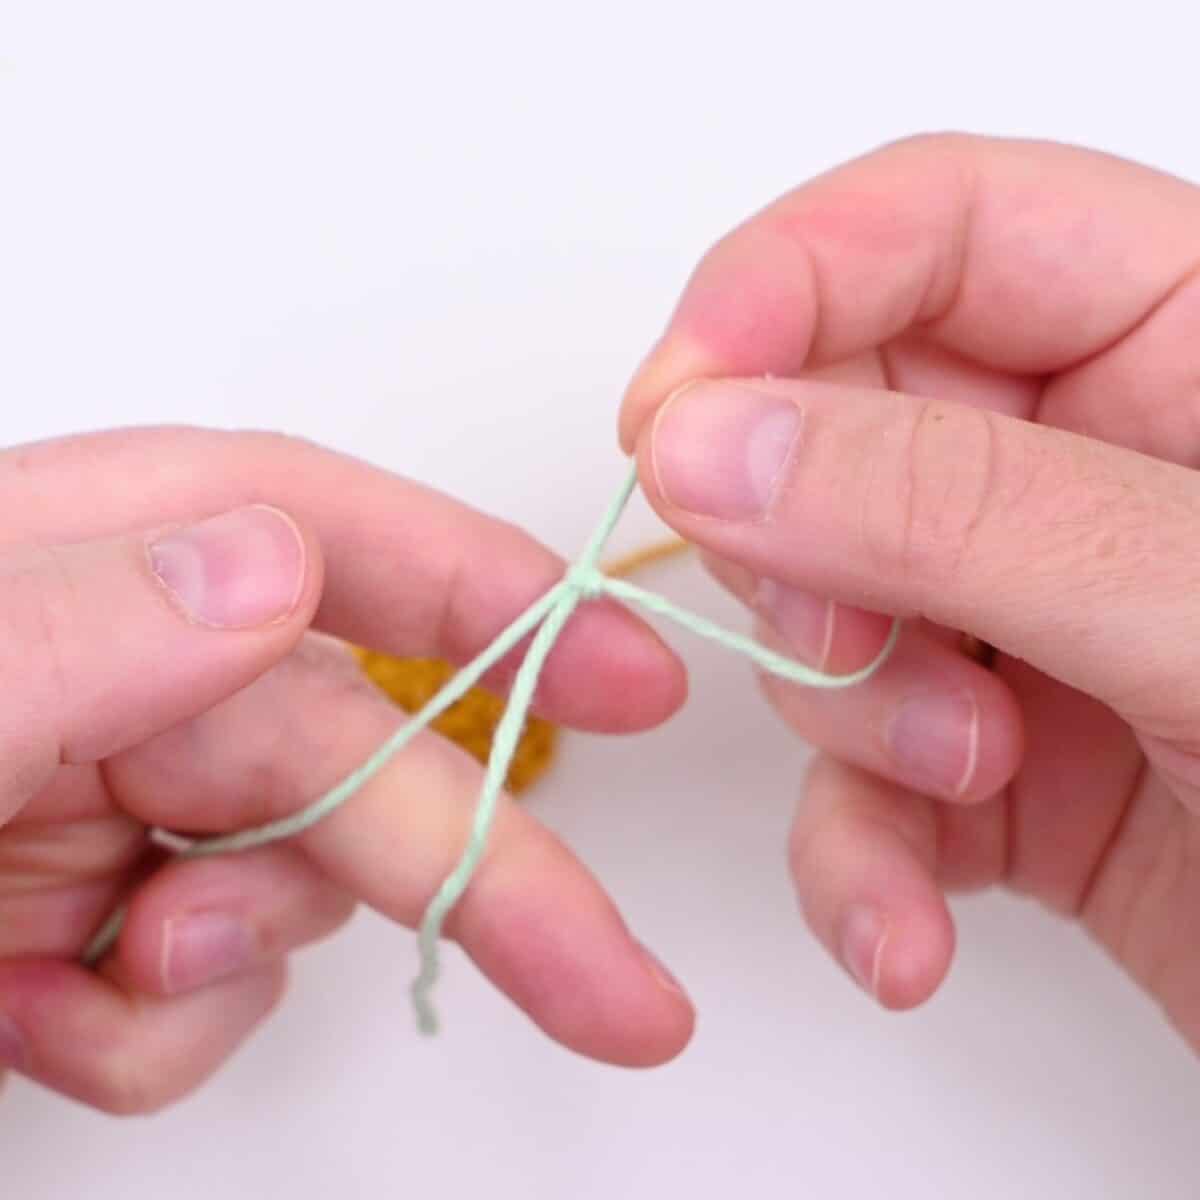
Yarn over and work the first double crochet into any chain space.
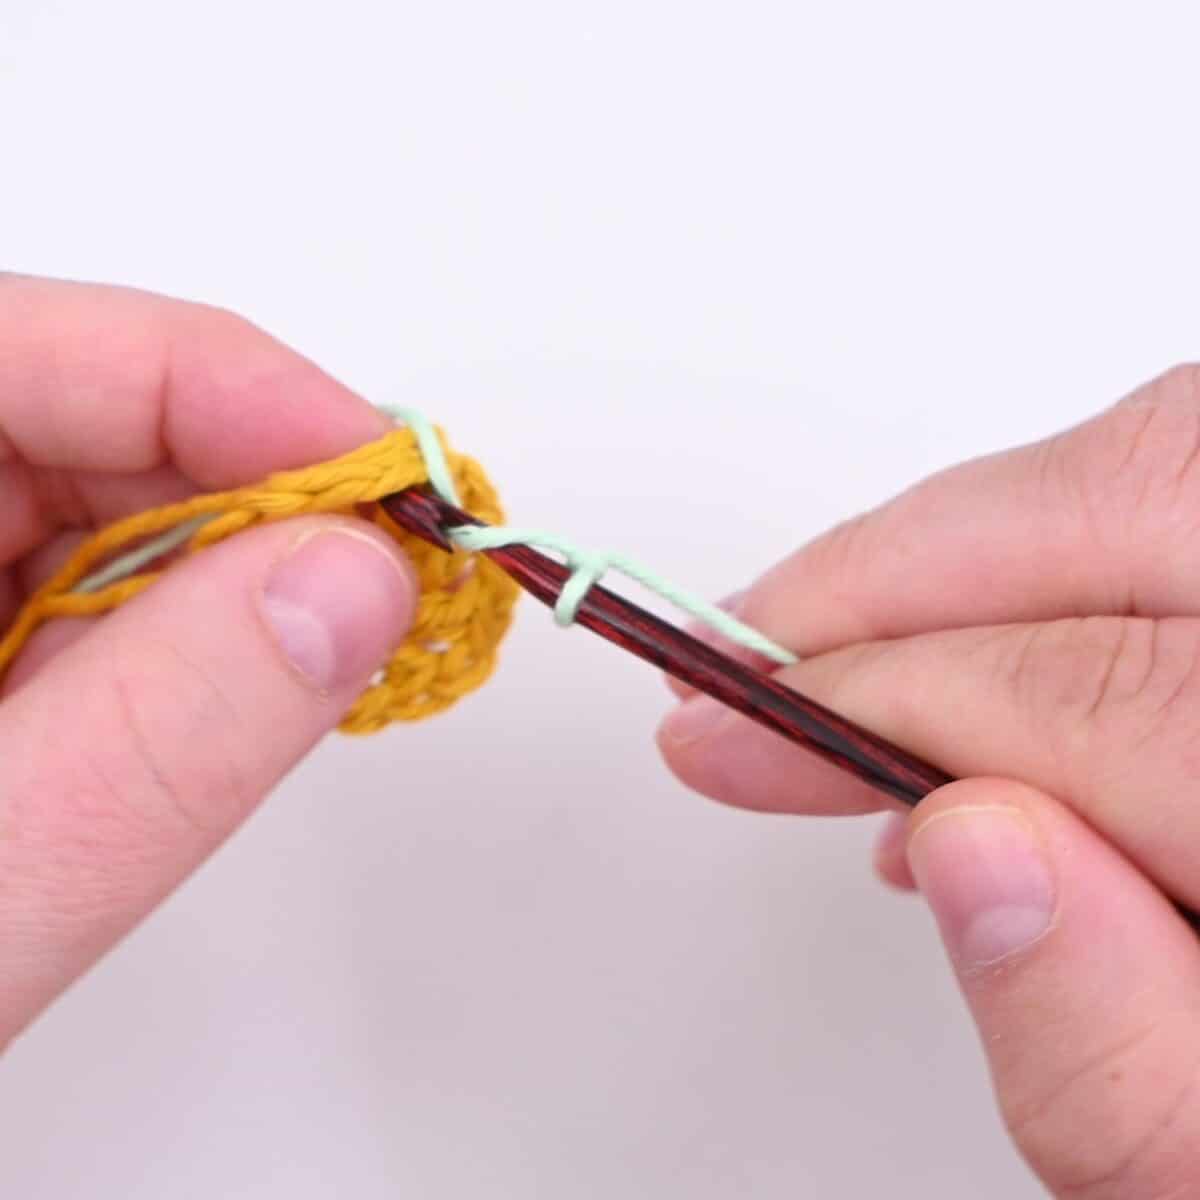
3 double crochet in chain space and chain one, repeat around.
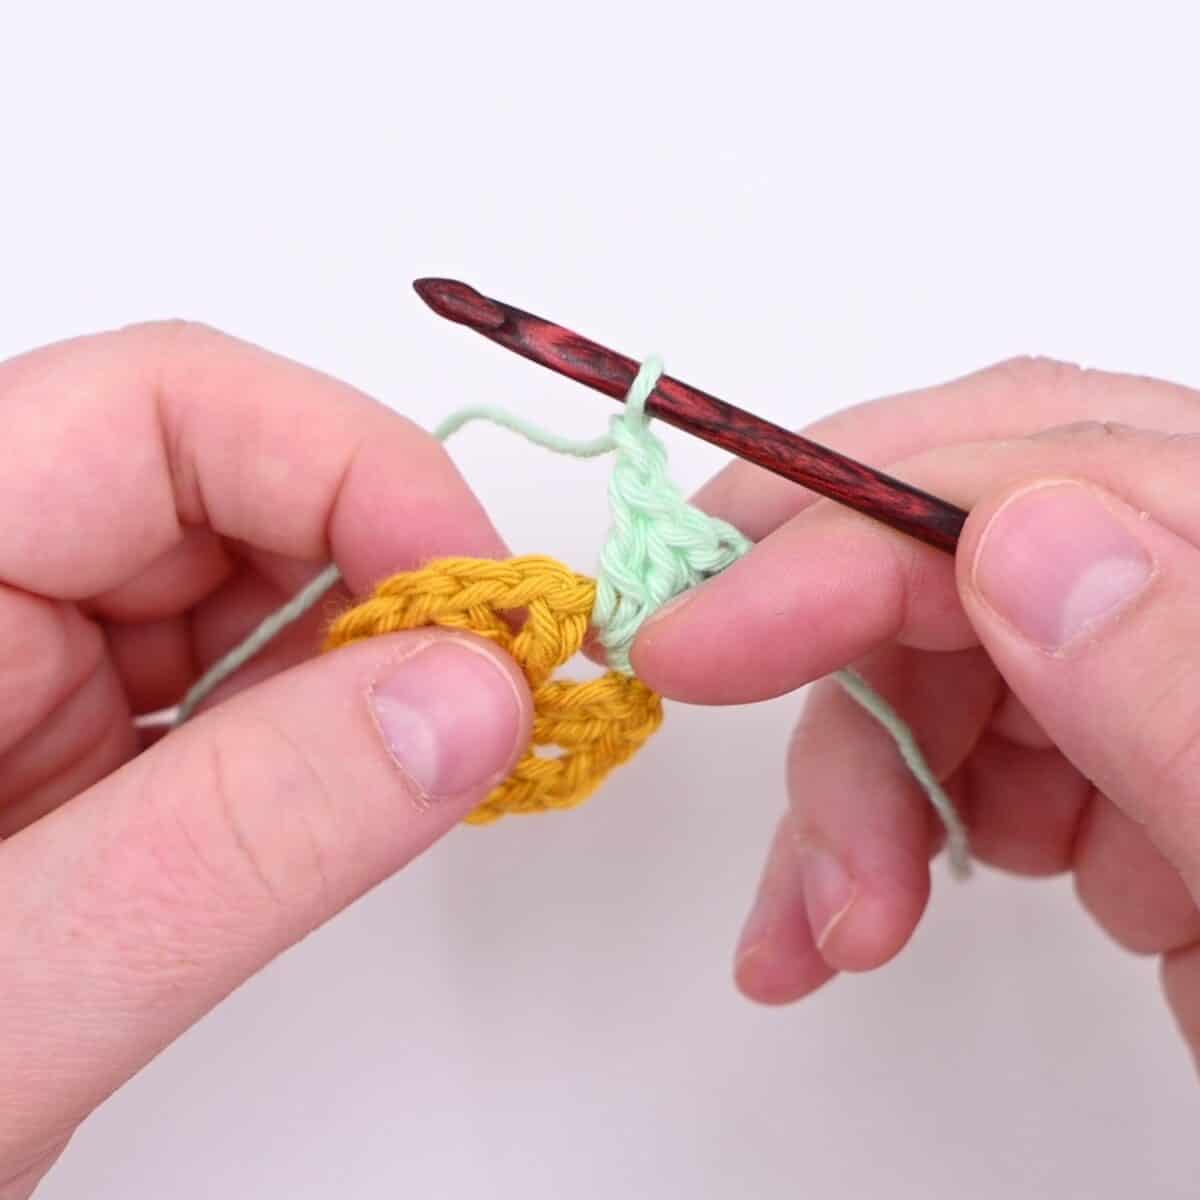
Join with a slip stitch.
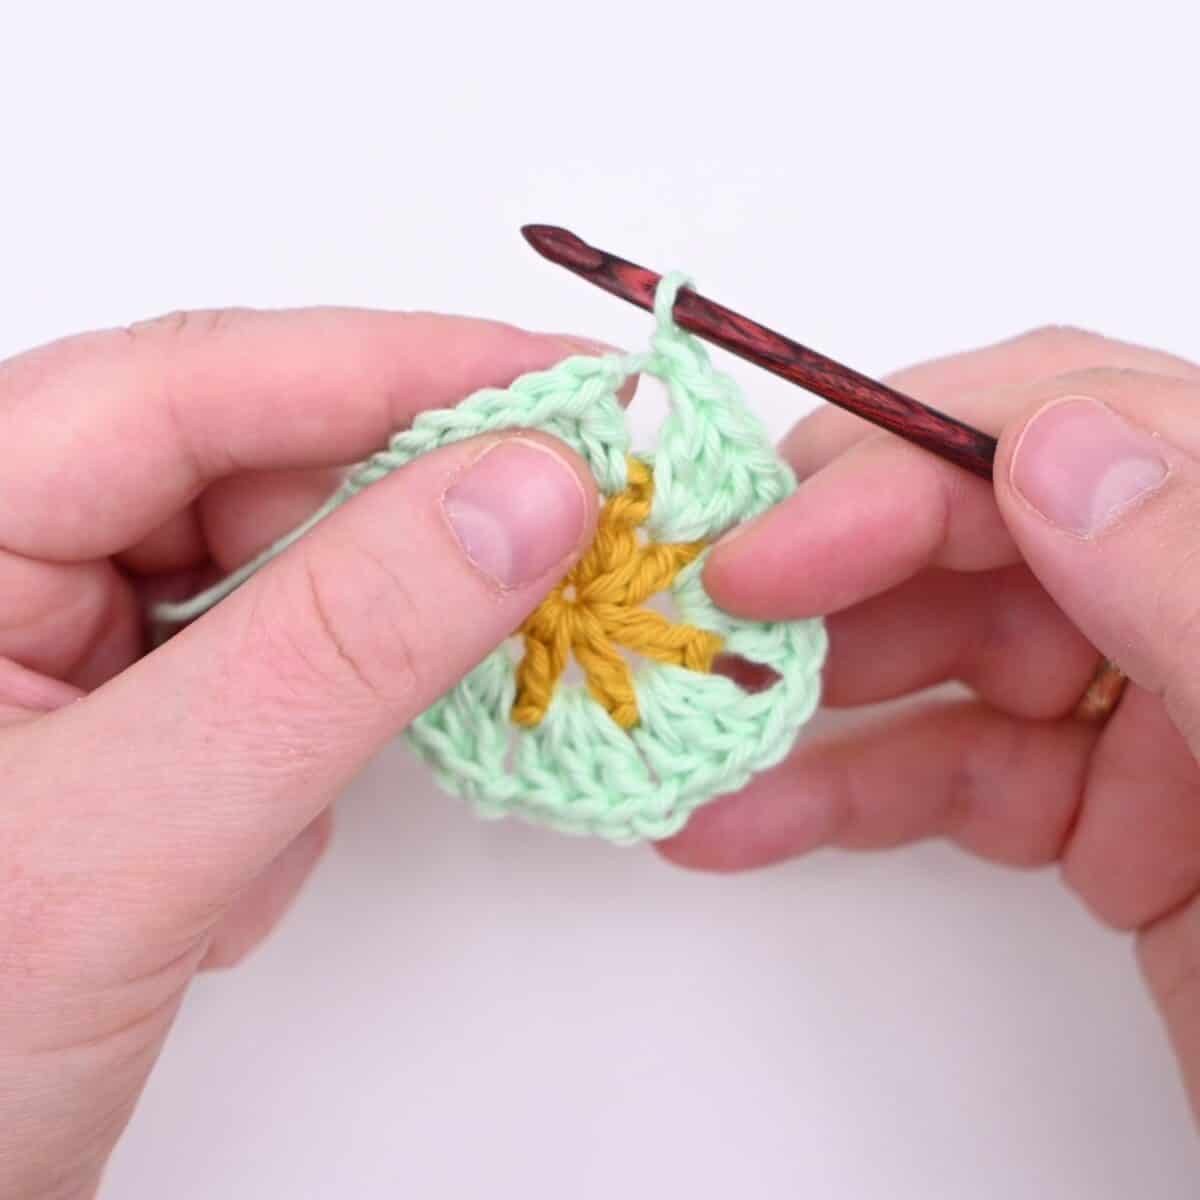
Round 2 is done.
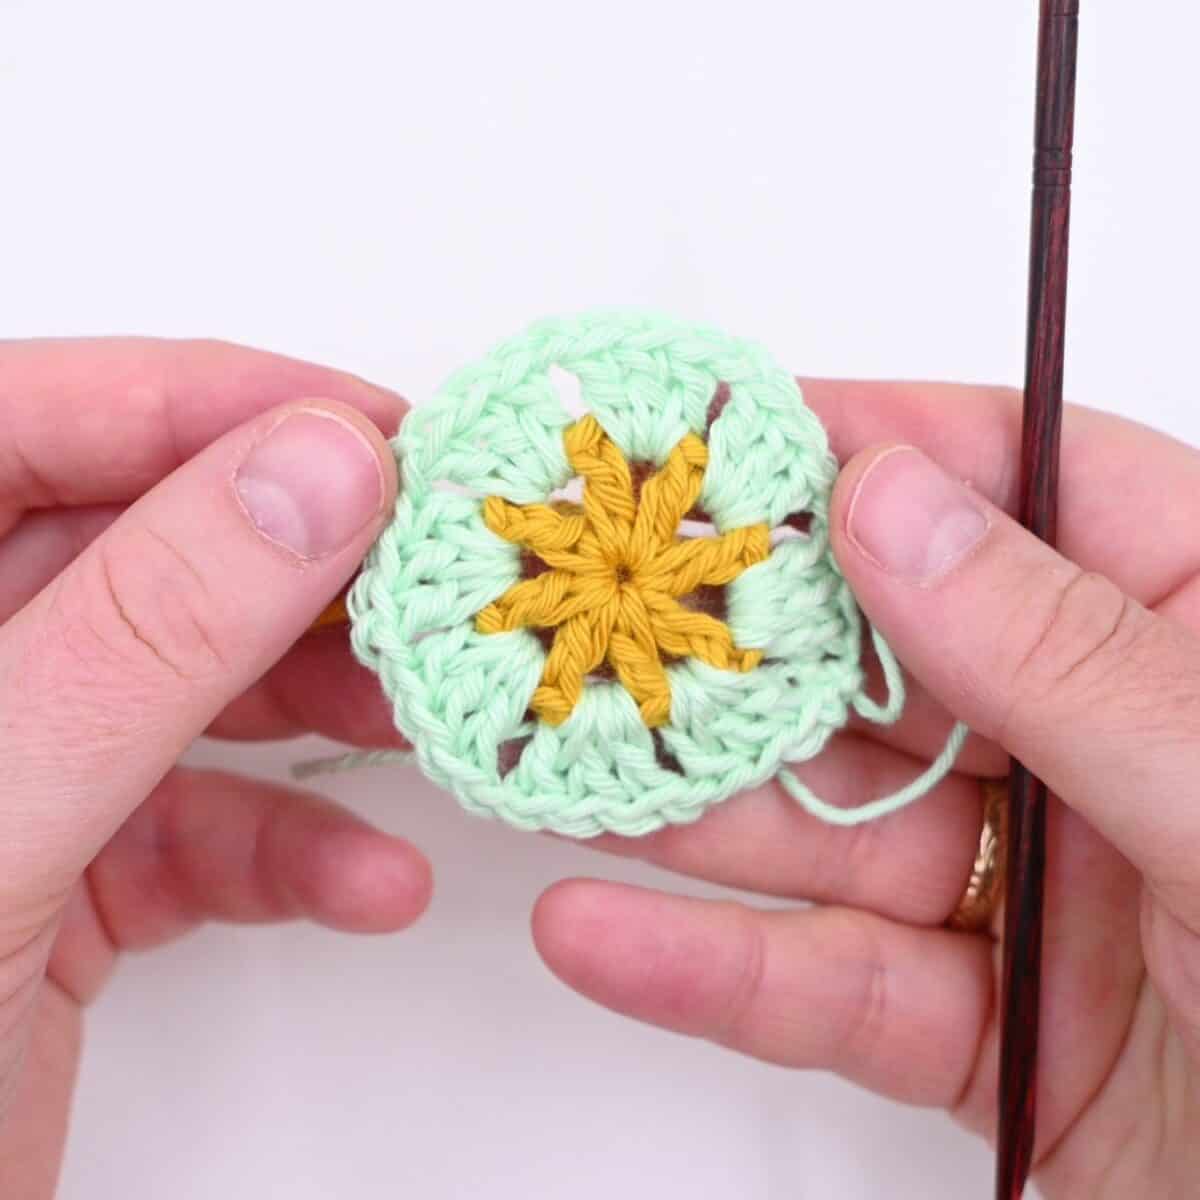
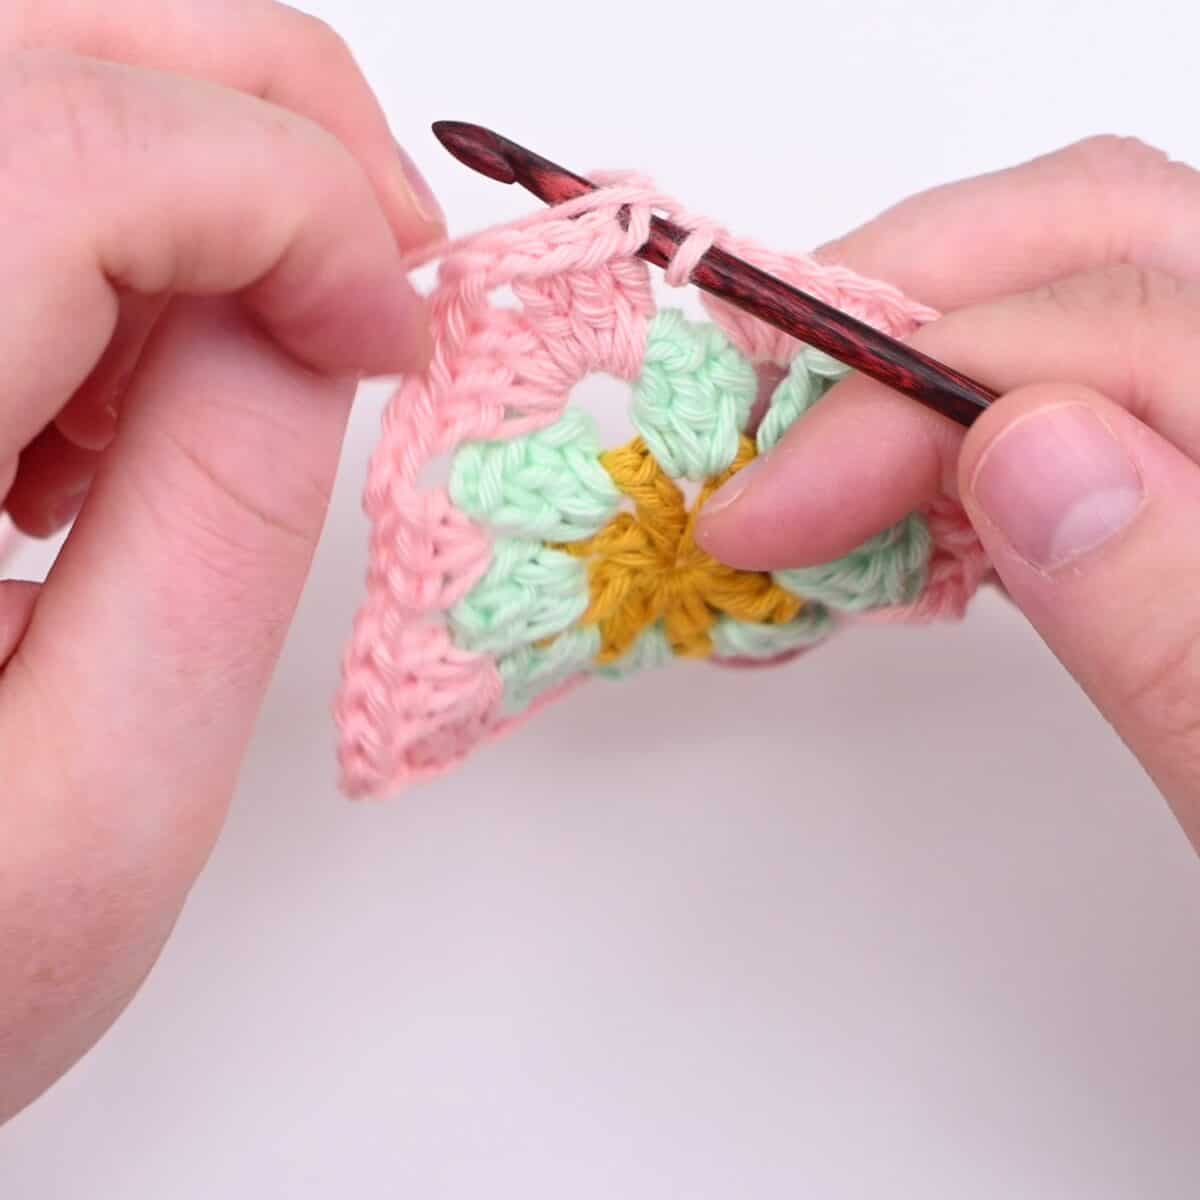
Round 3 with CC
New color: Double crochet in any chain space.
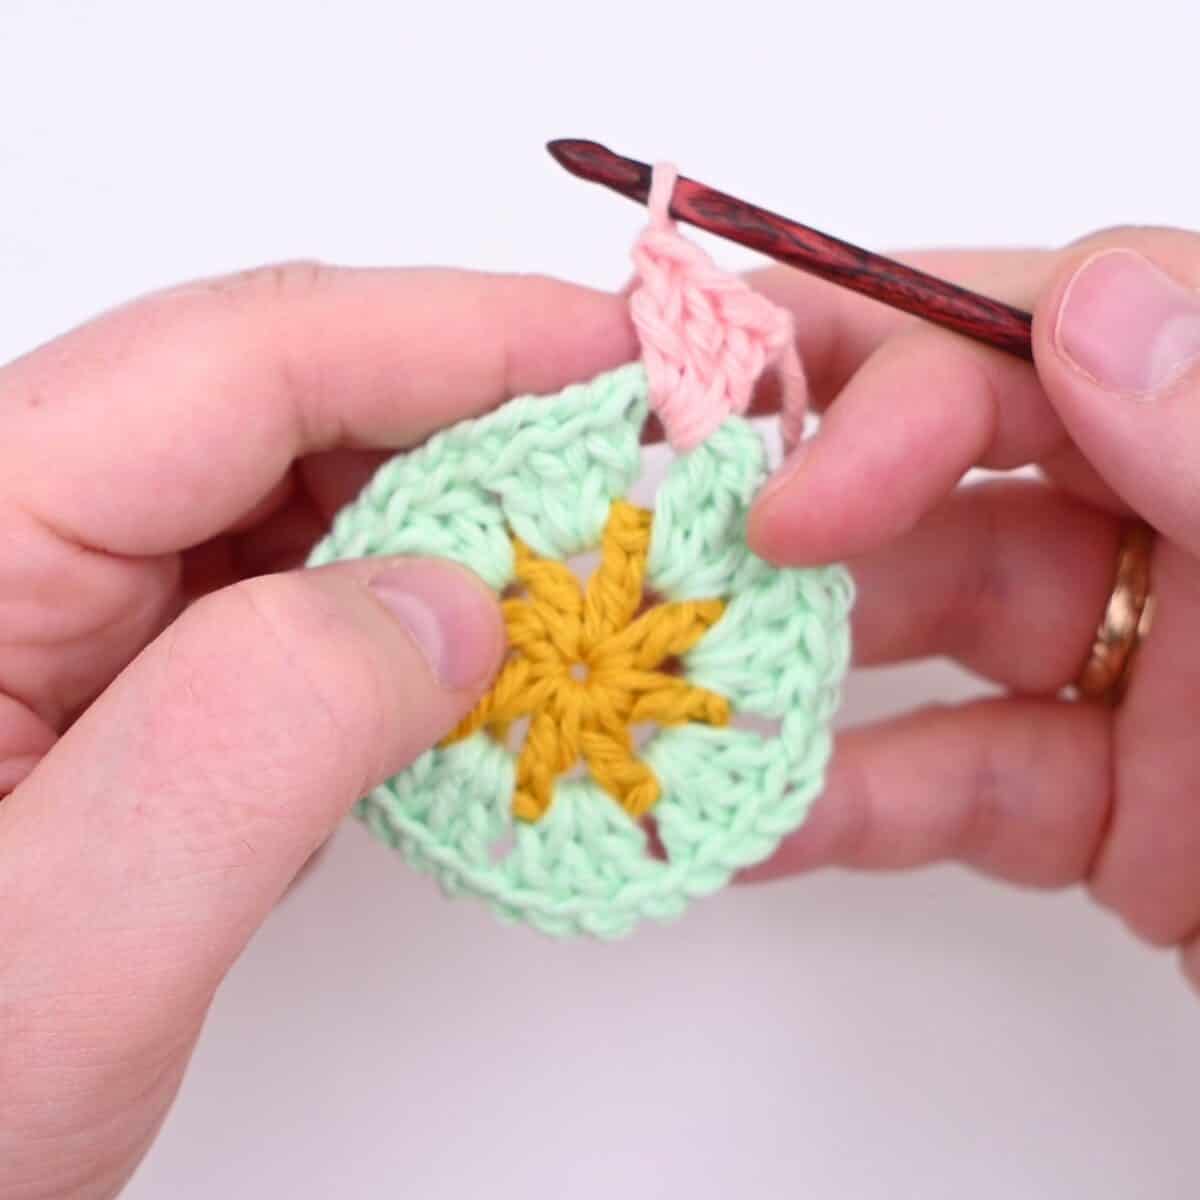
Corner: Chain 2.
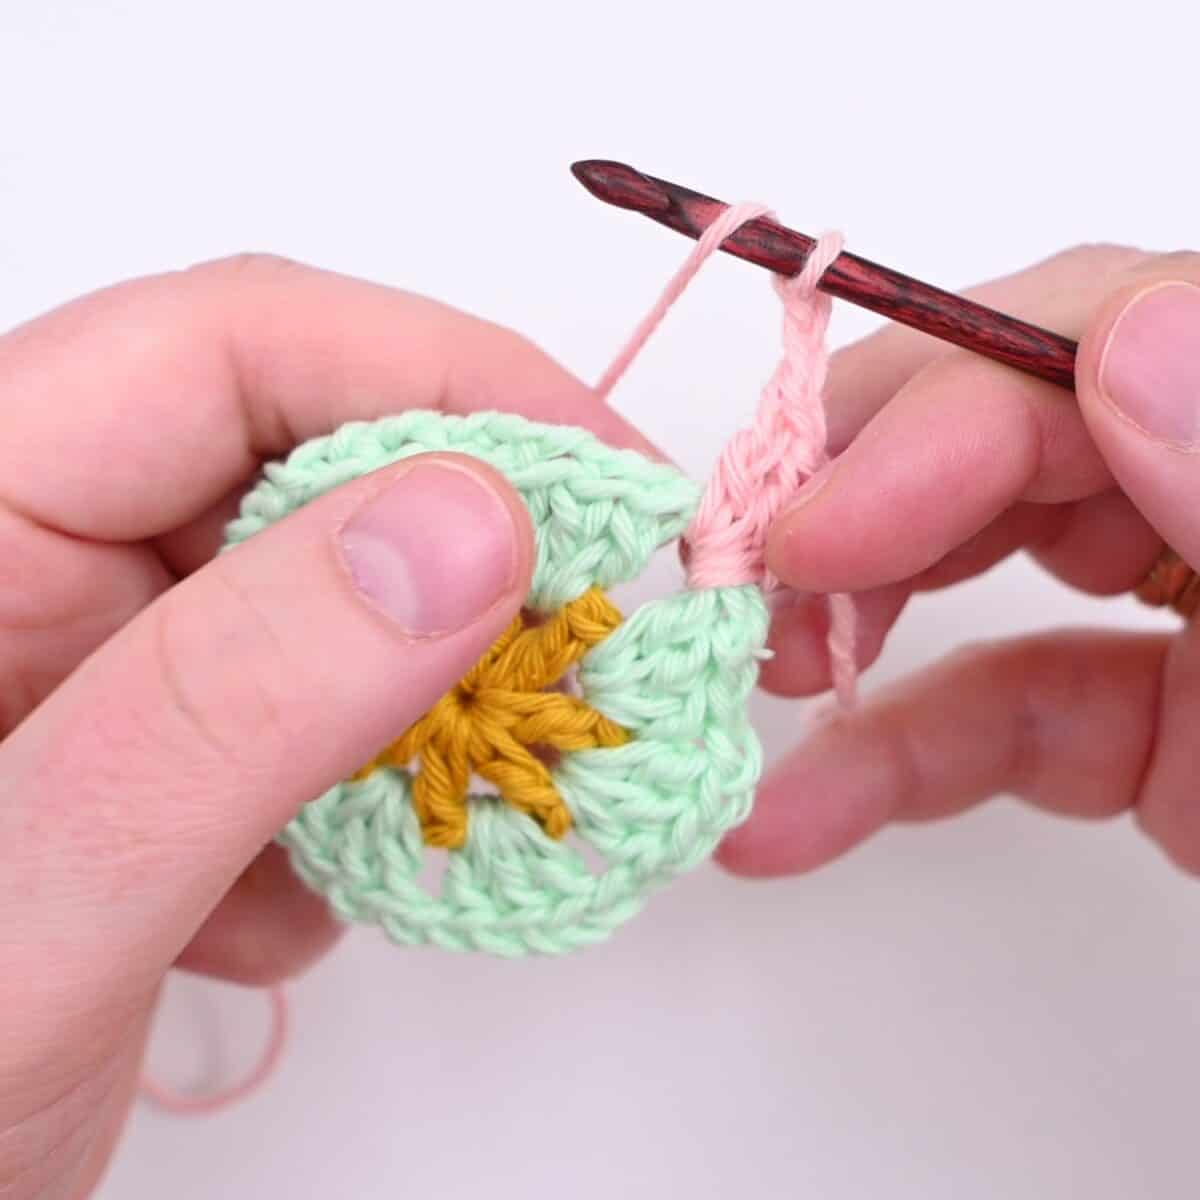
3 more double crochets: The corner is done.
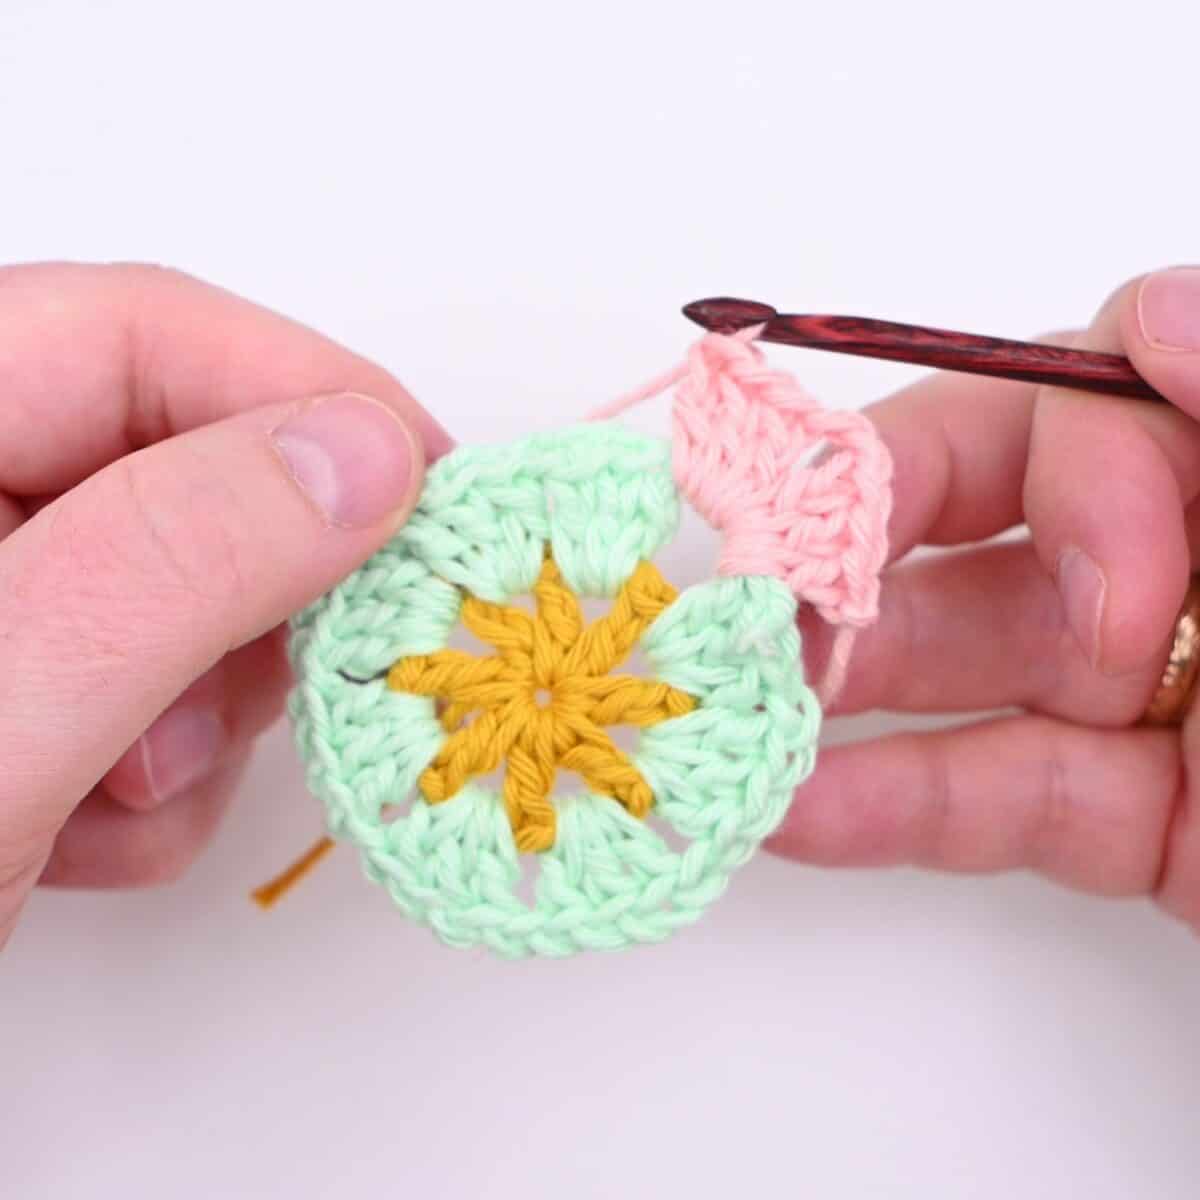
Chain 1.
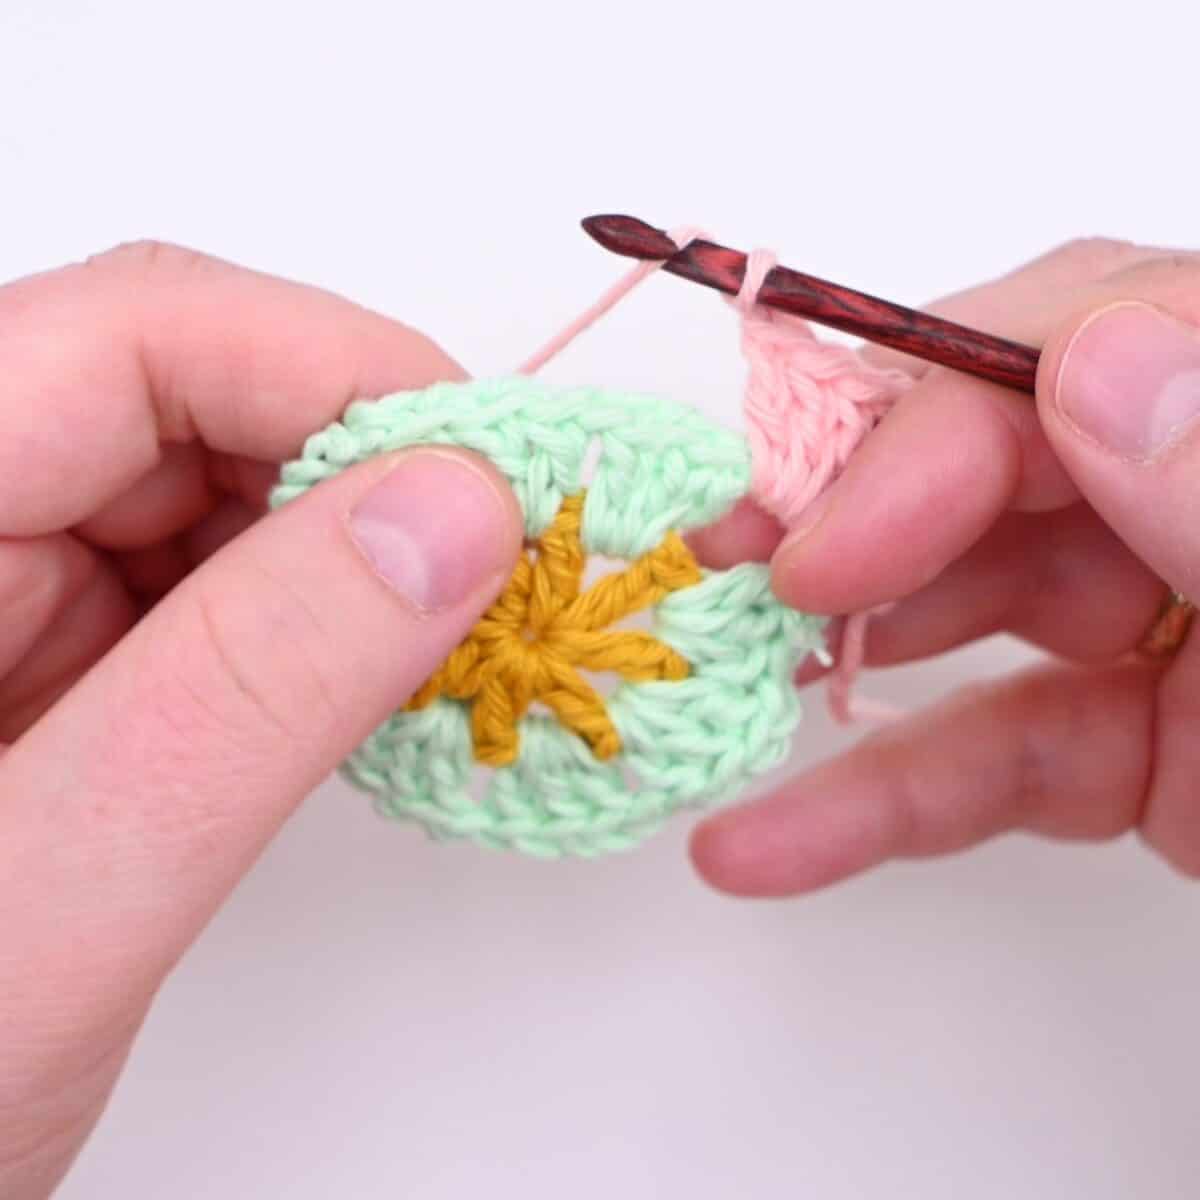
3 half double crochets, then the next corner.
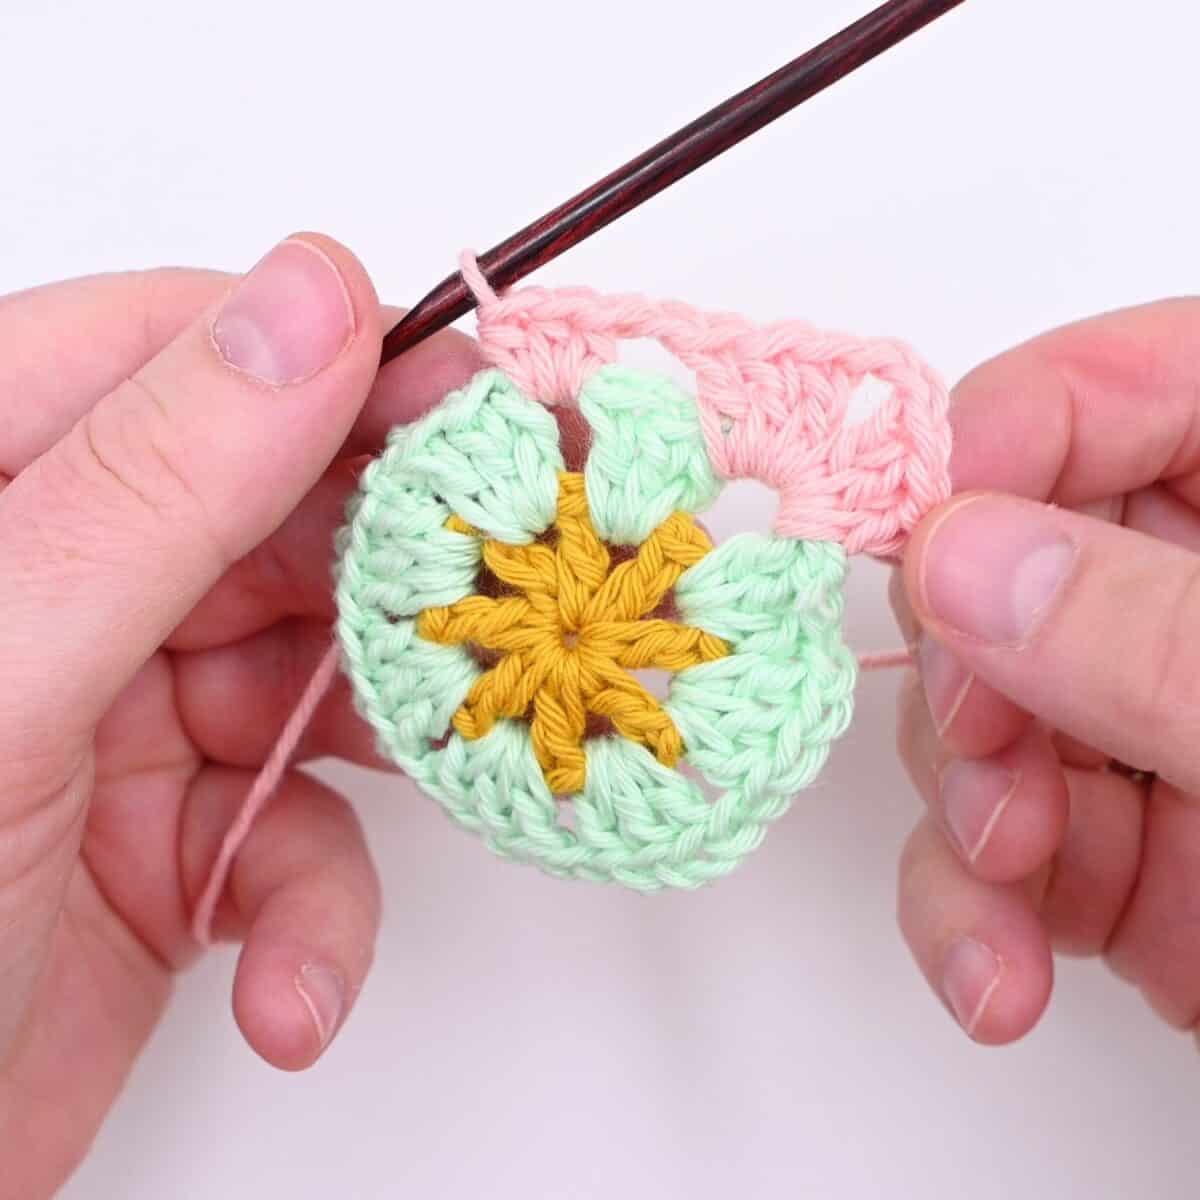
Join with a slip stitch.
The finished square.

Video Tutorial
This granny square also has a video tutorial. Watch it on YouTube: https://youtu.be/69rUDE2ErcA
Crochet Patterns Using Granny Squares
- Bloom Granny Square Bag Crochet Pattern
- Crochet Granny Square Tank Top
- Granny Square Dishcloth – Free Crochet Pattern
- Granny Square Sweater Crochet Pattern
- Crochet Sunburst Granny Square Blanket
- Granny Square Cardigan Crochet Pattern
- Ferris Wheel Granny Square Shawl – FREE Crochet Pattern
- Poinsettia Granny Square Christmas Stocking
- Crochet Continuous Granny Square Blanket
- Granny Square Bucket Hat Pattern
- Daisy Granny Square Bag Pattern
- Crochet Bum Bag Pattern
- Daisy Crochet Stanley Tumbler Cozy Pattern
- Granny Square Bag – Free Crochet Pattern
- Triangle Granny Square Garland
- Granny Square Basket – Free Crochet Pattern
- Granny Square Crochet Ottoman Pattern
- Granny Square Dish Towel – Free Crochet Pattern
- Your Sunday Shawl – FREE Crochet Pattern
- Clover Leaf Granny Square Pillow – FREE Crochet Pattern
Join Granny Squares Together
After learning to crochet this granny square, you of course need a way to join them together. There are several great ways to join granny squares together. But I’ll share 3 of the most common with you!
Whip Stitch
- The whip stitch uses yarn and needle.
- To whip stitch granny squares together, align the stitches of two granny squares with the right side facing against each other.
- With a needle, work through each of the aligned stitches with the yarn and needle
Whip Stitch Photo & Video Tutorial
Flat Slip Stitch Join
The flat slip stitch join creates a beautiful slip stitch seam between each of the granny squares.
- Make a slip knot and place it on the crochet hook.
- Line up two granny squares with the right side facing.
- Insert hook through the back loops of corner stitches on each square and slip stitch.
- Continue repeating for each stitch along the edge of the granny squares.
Flat Slip Stitch Join Tutorial
Join Granny Squares As You Go (JAYGO)
When you join granny squares as you go you will use yarn and a crochet hook, now sewing necessary.
There are 3 great ways to JAYGO:
More Different Granny Squares
- Leaf Clover Crochet Granny Square – How To
- How to Crochet a Granny Square – Easy Tutorial
- How To Crochet a Skull Granny Square
- How to Crochet A Poinsettia Granny Square
- How to Crochet A Flower Granny Square
- How to crochet a Groovy Bloom Granny Square
- How to Crochet A Miltered Granny Square
- How to Crochet A Puff Star Granny Square
- How to Crochet A Circle Flower Granny Square
- How to Crochet a Flower Center Granny Square
- How to Crochet a Granny Square with Puff Stitches
- How to Make the Crochet African Flower Hexagon
- How To Crochet a Solid Granny Square
- How To Crochet a Checkered Granny Square
- How To Crochet a Daisy Granny Square
- How To Crochet a Star Granny Square
- How to Crochet a Lace Granny Square
- Ferris Wheel Granny Square – Photo Tutorial
- How To Crochet a Heart Granny Square
- How To Crochet a Sunburst Granny Square