

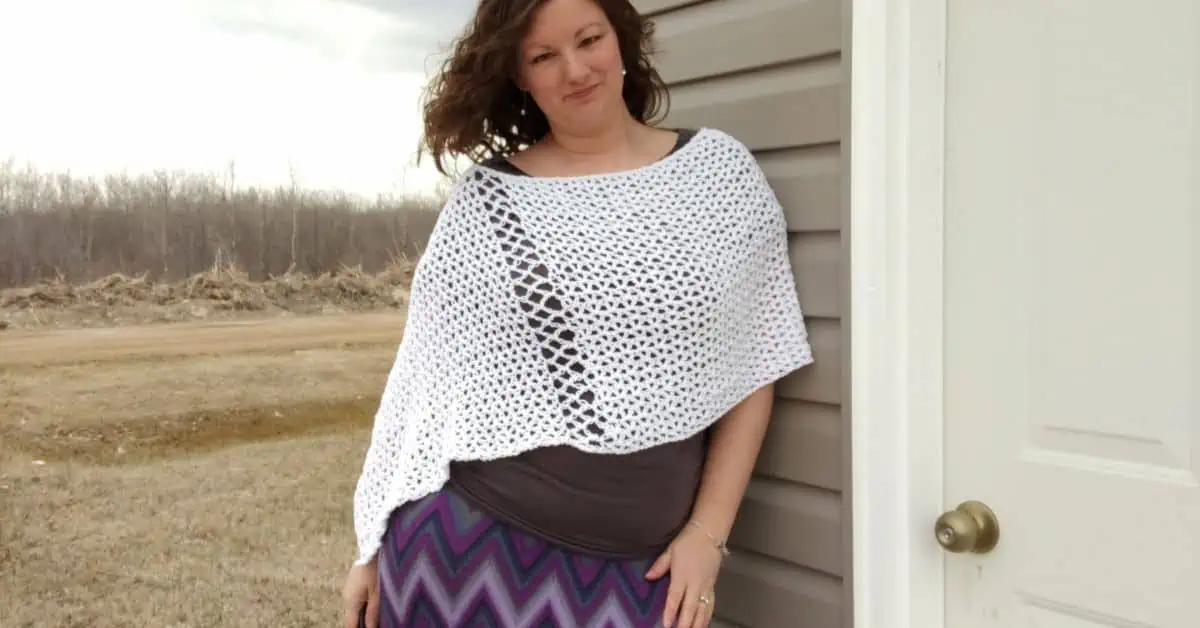
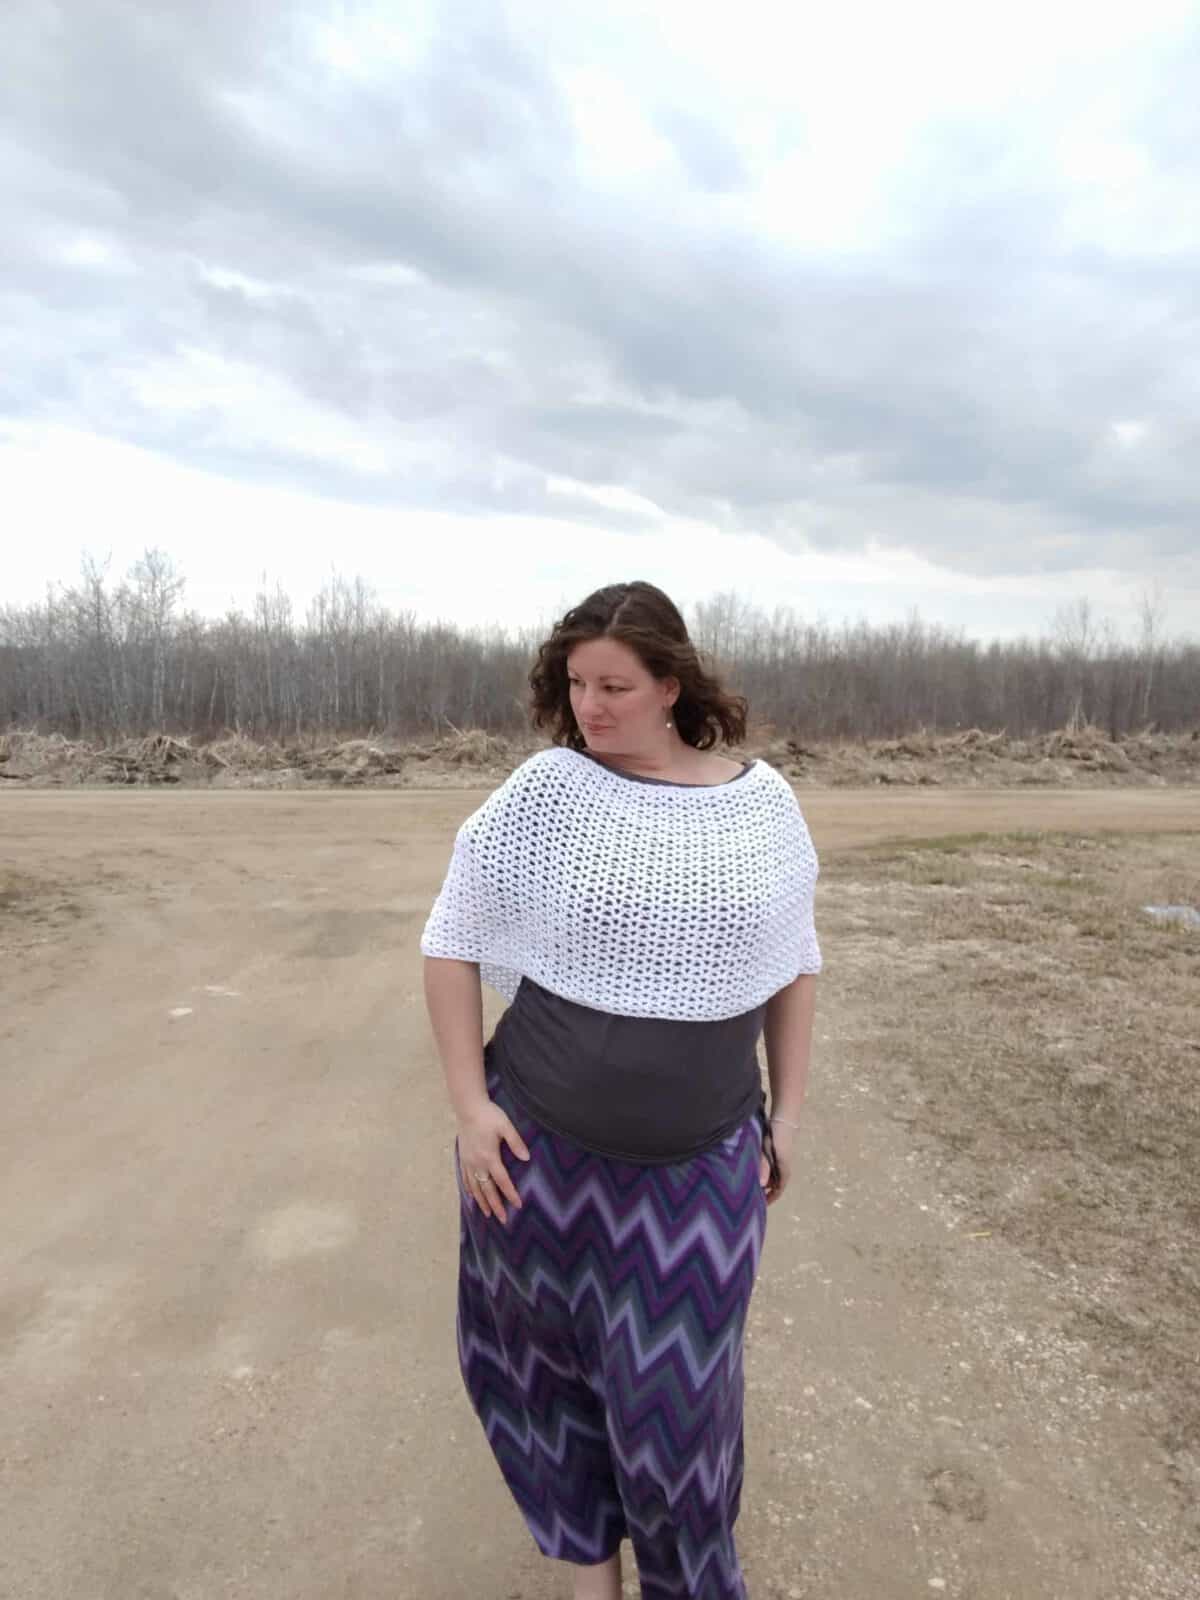
I am so happy present you with the Summer Sun Ponchette!
Would you like to save this?
The Yarn
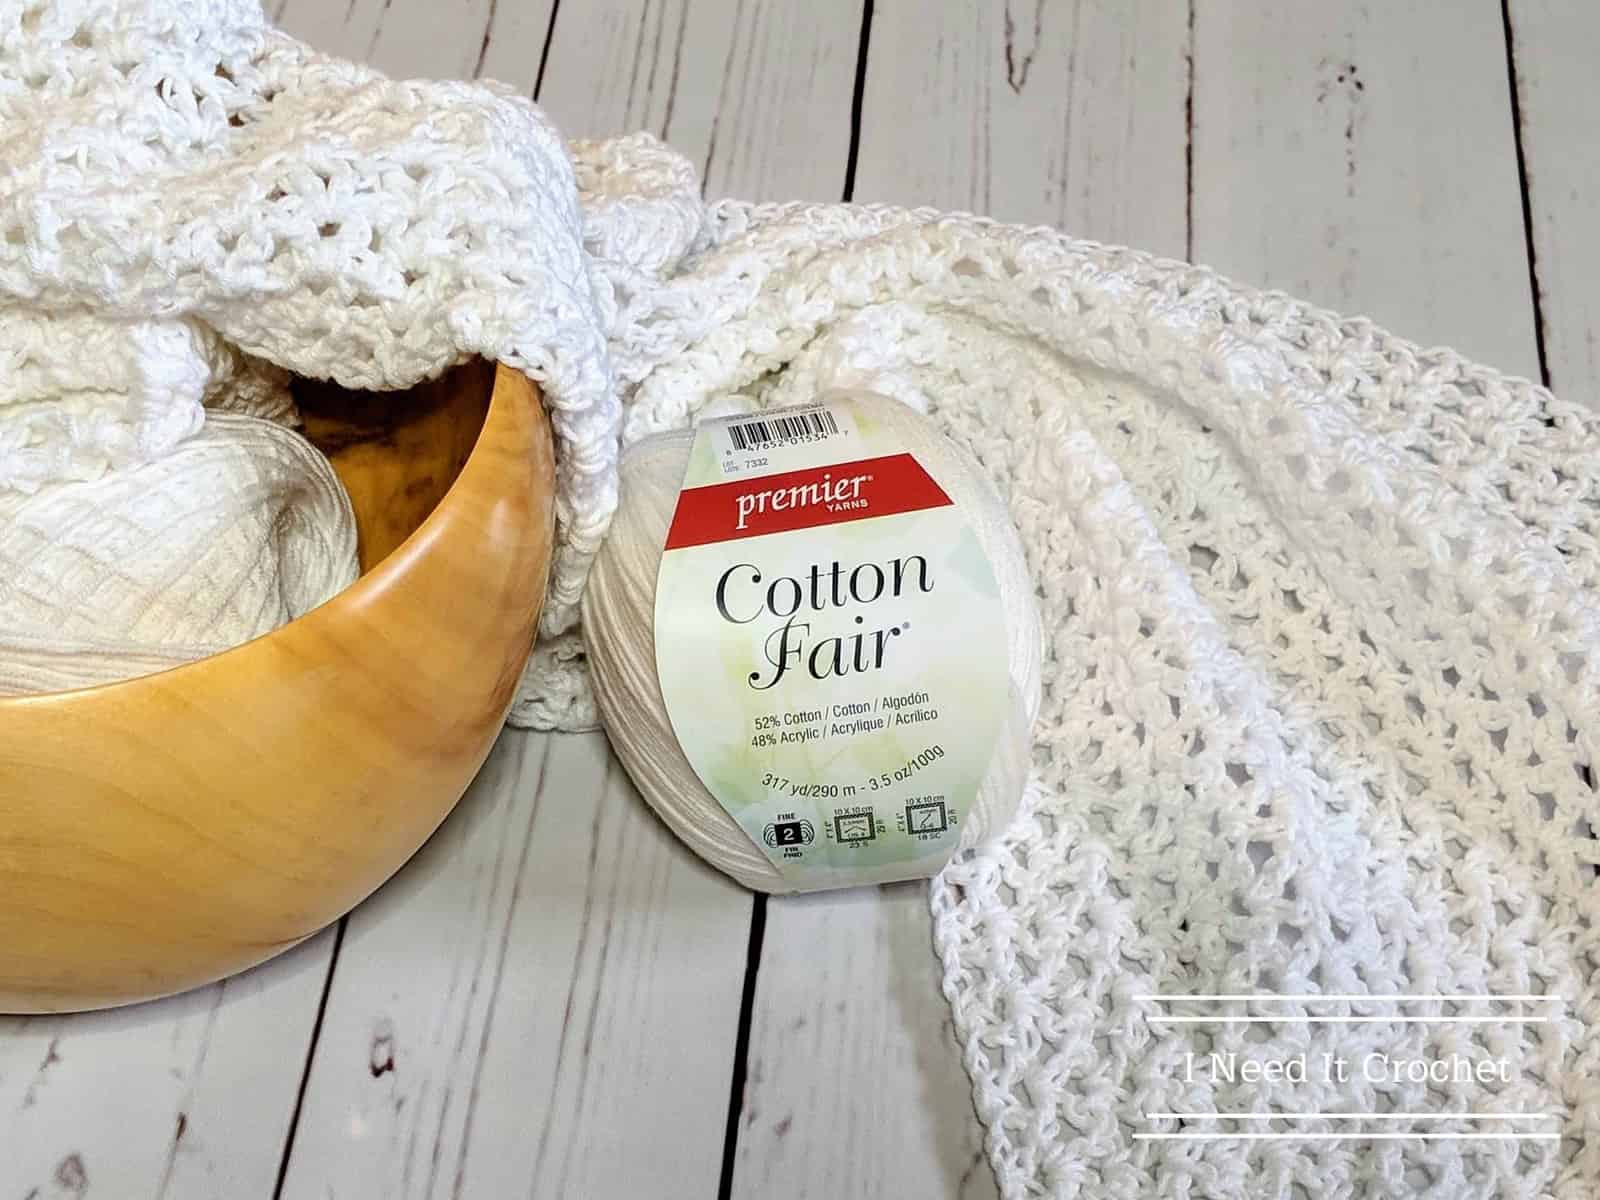
I knew this ponchette would need a light cotton blended yarn. Everything in my stash was either worsted or Dk, so I grabbed my purse and my coupons and set off to Michael’s.
That’s where I found Cotton Fair by Premier Yarns. This yarn is an absolute dream! The 52% Cotton, 48% Acrylic blend creates a wonderfully soft and luxurious feel. And the five well-spun plies give the finished project great stitch definition and bounce compared to other cotton yarns.
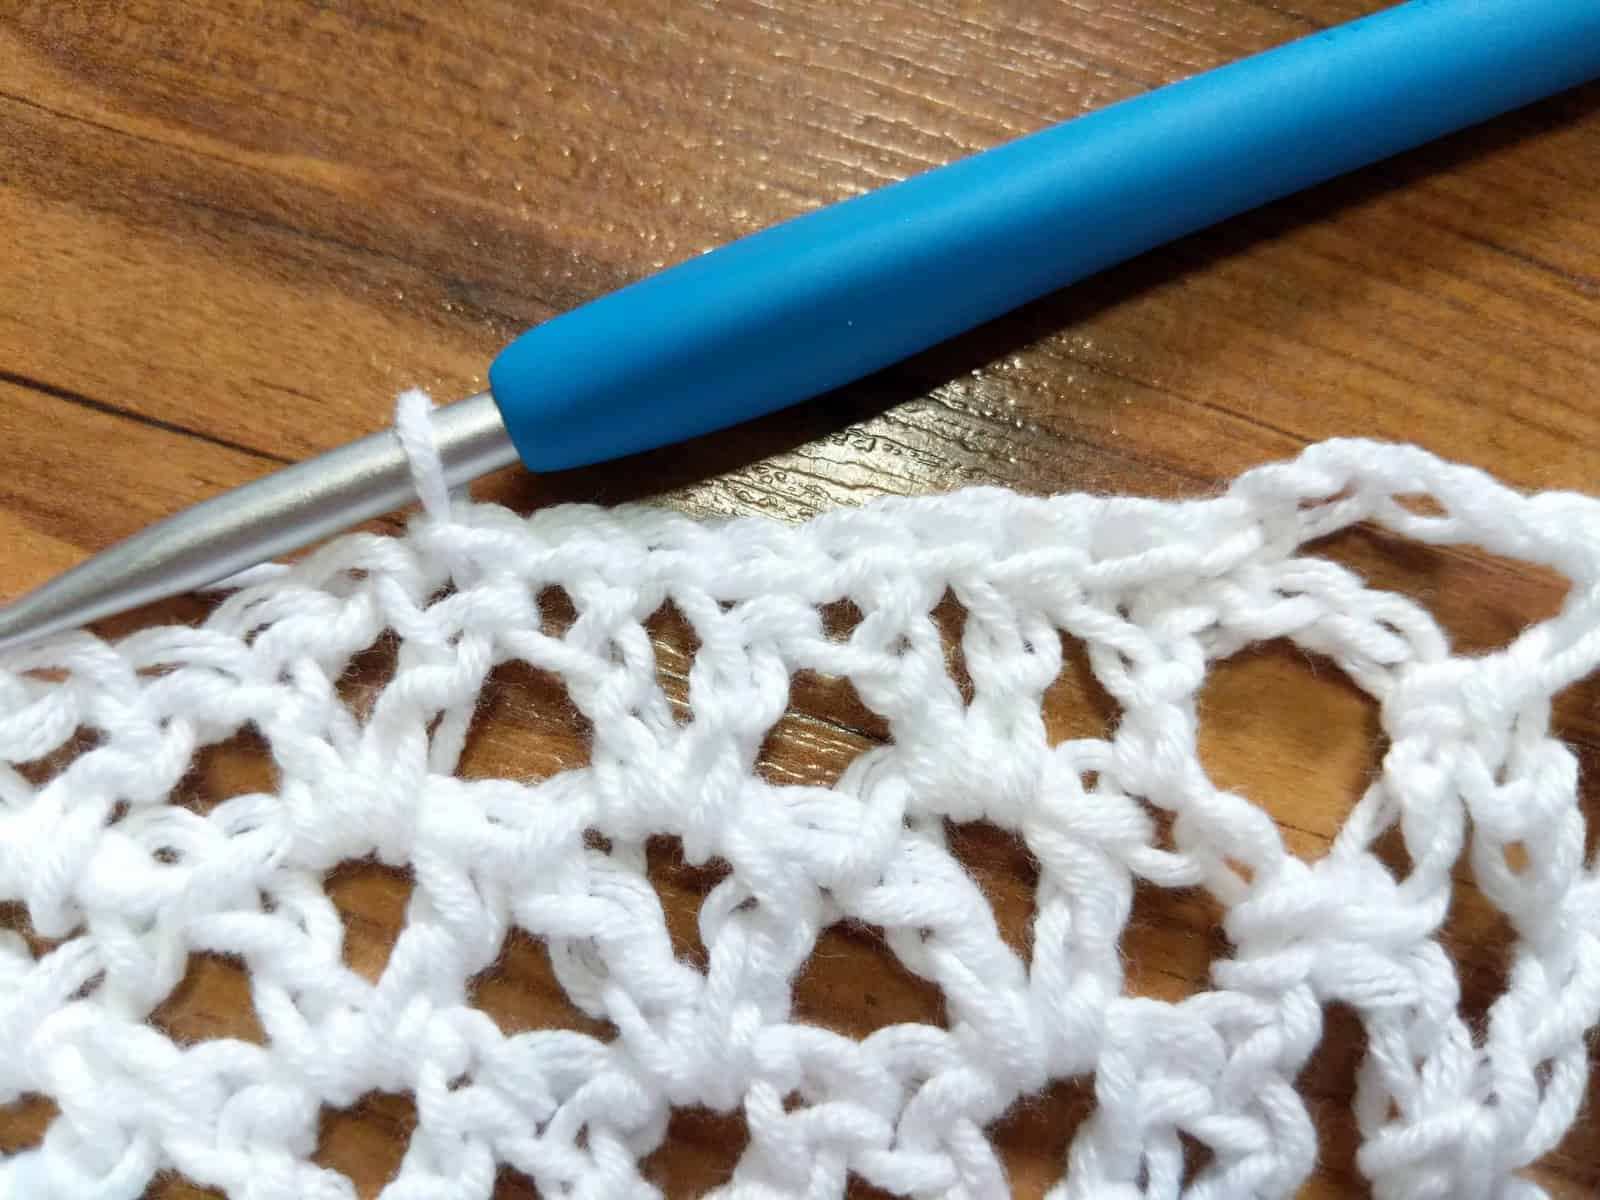
And the colours! My Michael’s carried 14 gorgeous shades, from bright primaries to soft pastels, and of course neutrals. I’ve made the Summer Sun Ponchette in many different colours for customers, but decided to go with white for mine. What can I say? I’m a simple girl. 😉
A GREAT SUMMER PROJECT
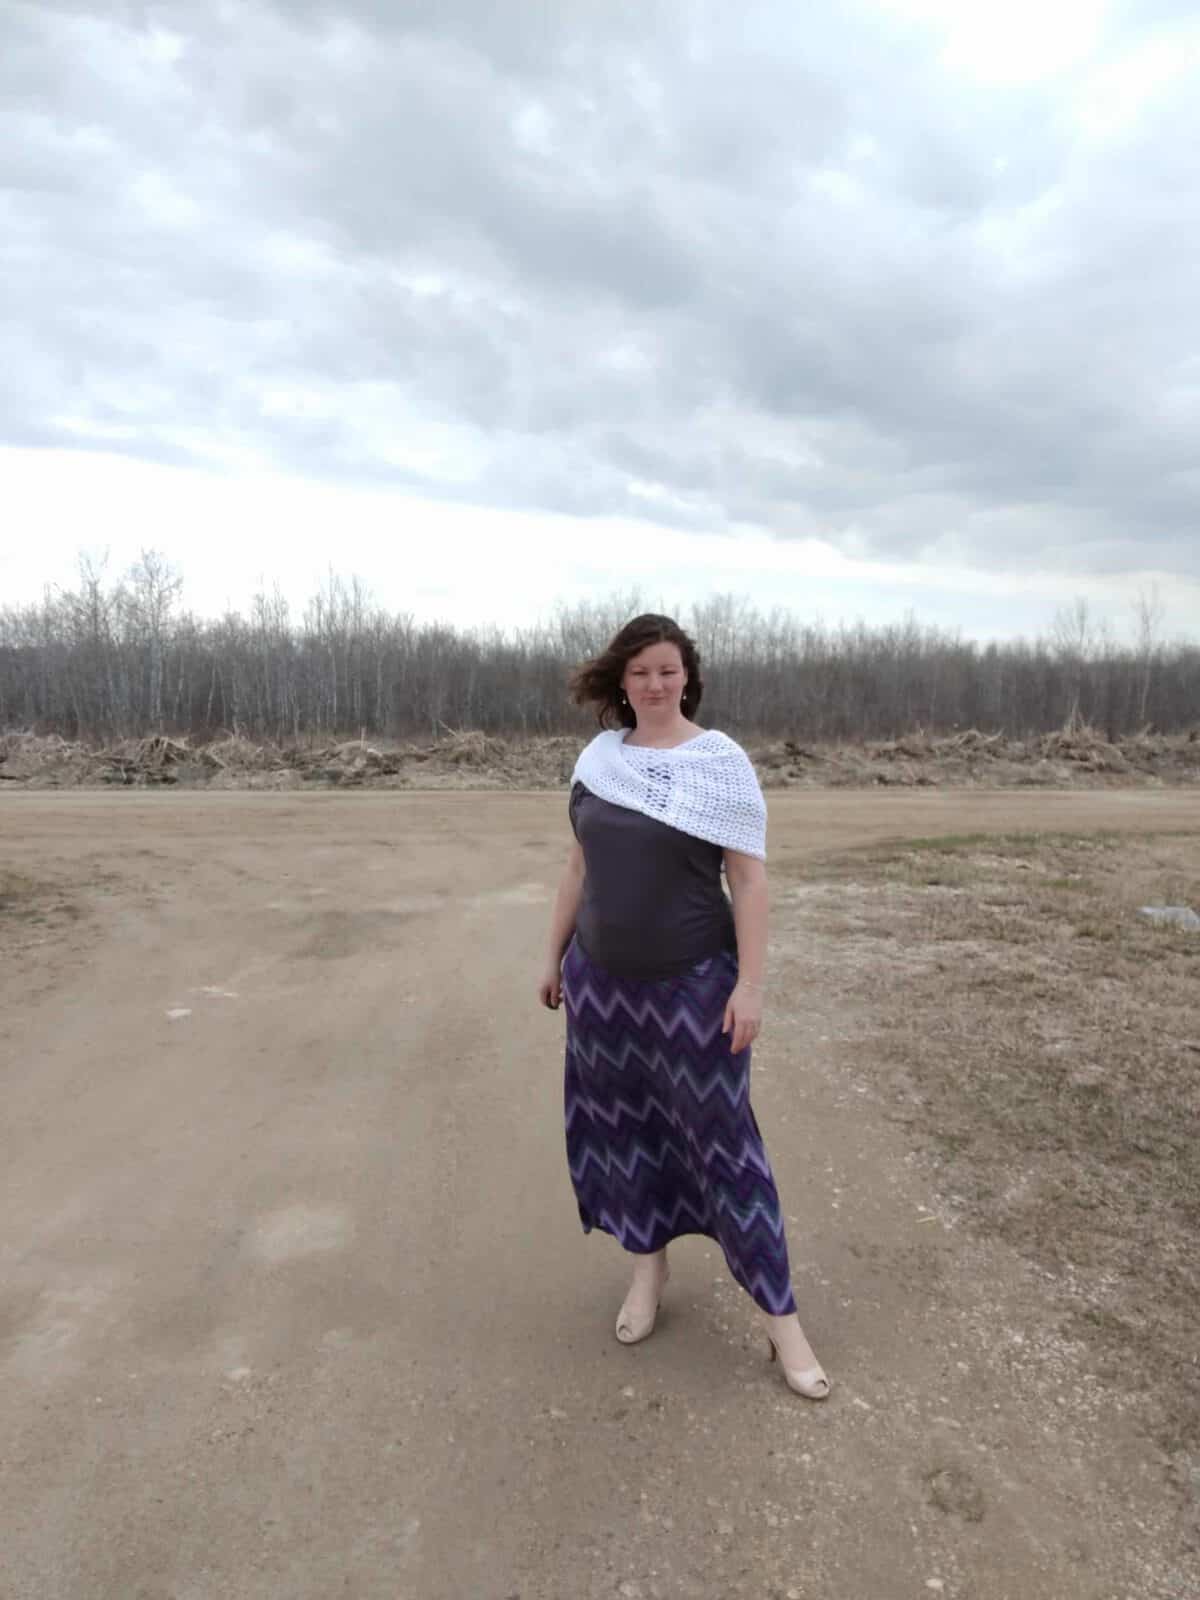
The Summer Sun Ponchette is the perfect accent piece. The piece itself doesn’t keep much heat in, so it is best suited to the warm summer months. Plus you can achieve many different looks, depending on how you wear it. I love to wear mine with the peak off to one side, giving it an asymmetrical look. And I love that, depending on how you turn it and drape it, it actually looks much like a shawl. Which is why it works with a wide range of styles.
You can wear it over a fancy dress for a wedding or garden party, or dress it down with a top and jeans. This piece just adds that little something to any outfit!
My favourite part about this project is it takes very little time to complete. I finished my size M/L in only 4 hours. So if I had a customer message me with a super last minute emergency order I could usually pull it off.
Since you like the Summer Sun Ponchette, these might interest you too?
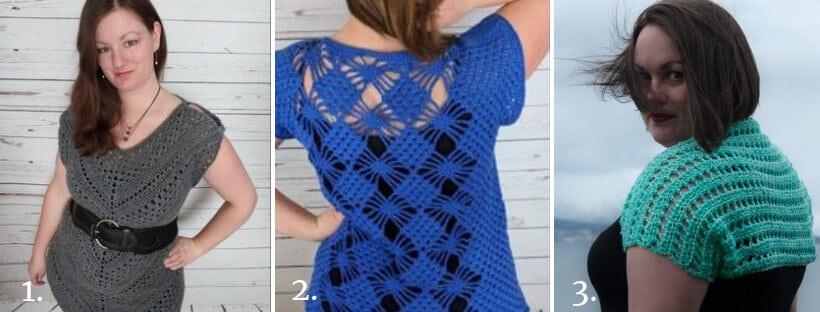
1. ANGLES TUNIC
2. CHASING DIAMONDS TUNIC
3. CROCHET CALLAINA TUNISIAN LACE BOLERO

How Long Does It Take To Crochet That?
How long it takes to crochet something varies depending on your skill & how fast you crochet. But that isn’t a helpful answer is it?
Well, I’ve developed a yarn calculator to help you get the answer to this question.
It will help you calculate exactly how much time you’ll spend crocheting a project.
All you need to know is how much yarn you will use on the project in either meters, yards or skeins. Then crochet your test square & time it.
Calculate how long it takes to crochet that.
THE SUMMER SUN PONCHETTE – THE FREE CROCHET PATTERN
Pattern Options
GRAB THE PDF ON RAVELRY!
About The Pattern
The Summer Sun Ponchette is worked by making a long rectangle, then joining the ends to make a circle with a peak on one side, and adding a lattice-like detail. The pattern is super simple, so it works up very quickly. It is a great project to work on while watching TV, because for the most part, it requires little to no concentration. I’ve written the pattern for size XS up to 5XL.
Skill Level
EASY
WHAT’S YOUR CROCHET SKILL LEVEL?
Take the Quiz
Get helpful tips for your next crochet project & increase your skills!
Materials Needed
Crochet Hook
Size 6 mm / US: J – 10 / UK: 4
Yarn
Yarn used:
Premier Yarns Cotton Fair in White
Yarn amount used:
2 (2, 2, 3, 3) balls @ 3.5 oz /100g / 290 m / 317 yds each
Yarn characteristics:
- 2 Fine yarn, Sport/Baby yarn.
- 52 % cotton, 48 % acrylic
Other Materials Needed
- Needle, find one here (if you don’t already have one)!
- Stitch Markers
- Scissors
- Measuring Tape
Gauge
Measured with V Stitches (Dc, ch1, Dc in one stitch) crocheted in rows:
5 stitches & 7 rows per 10 cm / 4”.
Notes
- This crochet pattern is written in US terms.
- All measurements given are unblocked.
- Note that measurements are given as exact as possible. But crochet tension & technique might give variations in the result, that changes from person to person.
- Read pattern instructions carefully before beginning to make sure you understand everything. It might save you hours frogging your work & crocheting it again!
- Make a swatch that measure at least 10 x 10 cm / 4 x 4 inches using the stitch the gauge is given for. If your swatch matches the gauge, you’re good to go. If the gauge is wrong, you might need to change your hook. Go up in crochet hook size if your stitches are smaller & go down in crochet hook size if your stitches are bigger. Learn more about testing gauge.
- Check yarn info if you want to find an alternative or test your yarn against the gauge. Learn more about substituting yarn.
- Sizing info can be found in Size & Measurements section.
- At the end of each row, the stitch count is given in parenthesis.
- Ch1 at the beginning of a row is never considered a stitch.
- Ch3 at the beginning of a row is always considered a Dc.
- Choose your size according to the measurements noted above and your preferences.
- A V Stitch is made by working a (Dc, Ch1, Dc) all into the same stitch.
- When asked to work into a Vst, you are working into the ch space between the Dcs of the Vst.
SIZE & MEASUREMENTS:
Instructions given to fit size X-small/small; changes for medium/ large, X-large/2X-large, 3X-large/4X-large and 5X-large/6X-large are in ()
XS/S ( M/L, XL/2XL, 3XL/4XL, 5XL/6XL)
To fit Bust: 33-37” (37”-42”, 42”-50”, 50”-58”, 58”-66”)
This pattern is designed so that the bottom edge sits at or just past the elbows and the peak hits at around the hip.
Size Adjustments
When made with #2 fine weight yarn, this pattern has a lot of stretch and a wide neckline. If you use a heavier weight yarn you will have less stretch and may need to go up a size.
The model above has a 40” bust and is wearing a size Medium/Large.
Abbreviations
- Sk = Skip
- Sp = Space
- St = Stitch
- Ss = Slip Stitch
- Ch = Chain
- sc = Single Crochet
- dc = Double Crochet
- Vst = V Stitch
We try our best to include all crochet abbreviations in the list above for the crochet pattern, but sometimes we may forget one or two.
Learn more about crochet abbreviations & find a complete list on our Crochet Abbreviations & Terms post.
Stitches You Will Need
In this pattern you will use the Slip Stitch, Chain Stitch, Single Crochet, Double Crochet, and V Stitch.
To make a V Stitch, work a (Dc, Ch1, Dc) all into the specified stitch.
Summer Sun Ponchette Pattern Instructions
Body
Ch 169 (175, 181, 196, 208)
- Vst in 5th ch from hook. *Sk 2 sts, Vst in next st.** Repeat from * to ** until there are only 2 sts left unworked. Sk 1 st, dc in last st. Turn.
55 (57, 59, 64, 68) Vst + 2 Dc - Ch 3. Vst in next Vst and each Vst across. Dc in top of starting ch 4. Turn.
55 (57, 59, 64, 68) Vst + 2 Dc - Ch 3. Vst in next Vst and each Vst across. dc in top of starting ch 3. Turn.
55 (57, 59, 64, 68) Vst + 2 Dc
Note: It would be a good idea to measure the length of your piece after finishing 3-4 rows.
Some people tend to fall off gauge even after making a gauge swatch. If you measure your piece and you are more than 2-3 inches off on the length, you may want to try again with a different sized hook.
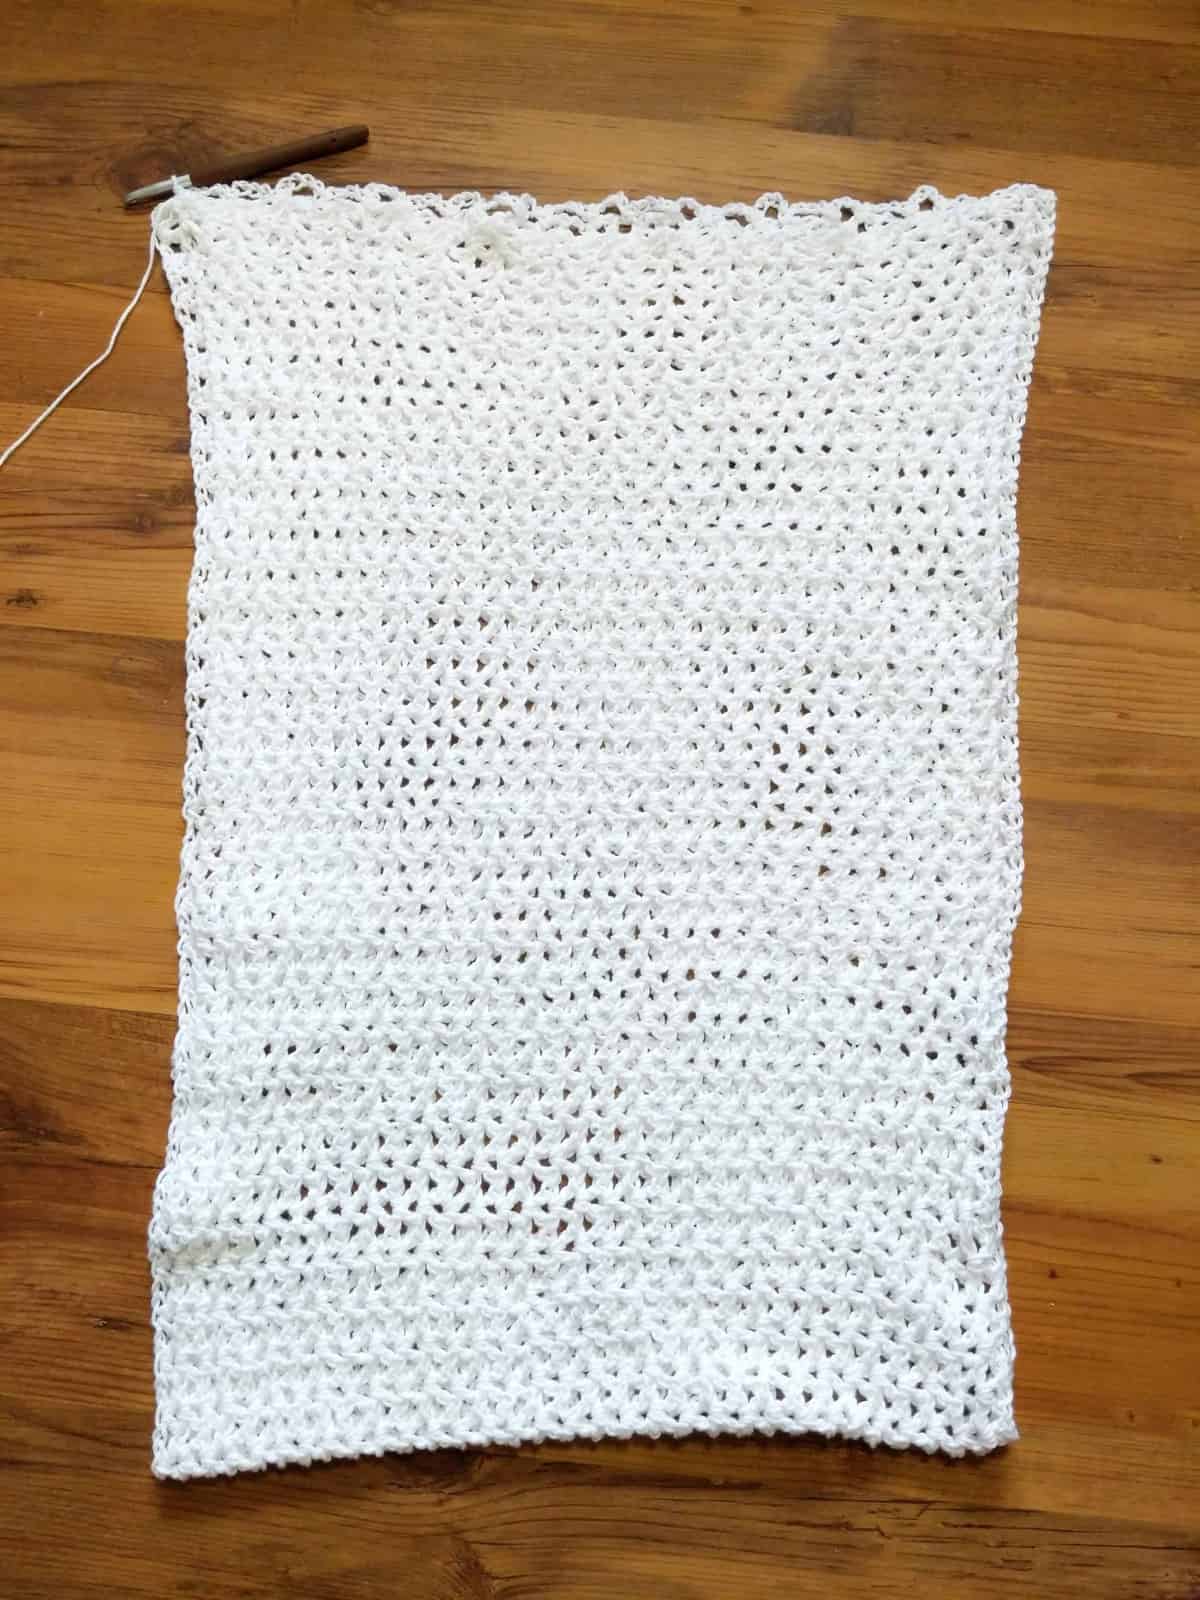
Repeat Row 3 until you have a total of 29 (29, 32, 38, 44) rows.
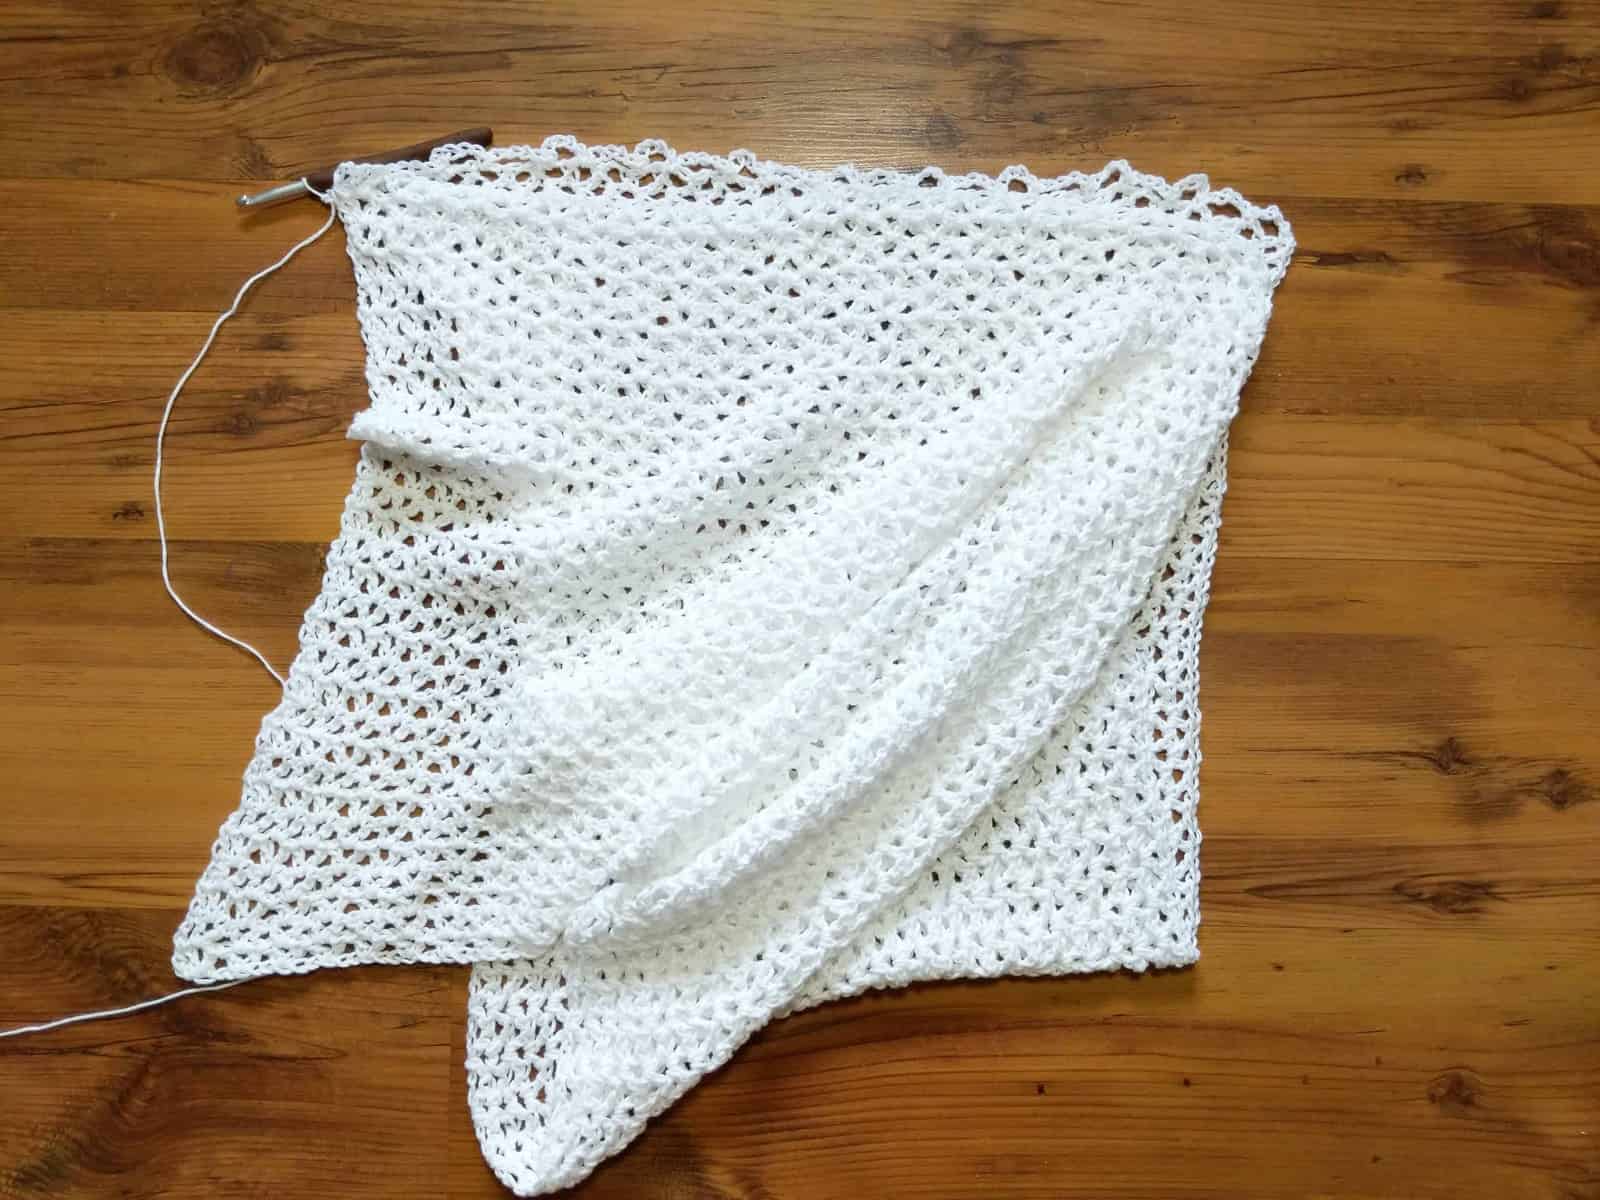
You should now have a large rectangle that measures 43 (44, 47, 50, 54) inches long X 15 (15, 17, 21, 24) inches wide.
Note: If you prefer a slightly longer poncho, you may add rows at this point. Be sure you add rows in a multiple of 3 (3, 6, 9, etc). Remember that if you add rows at this point, your counts in the next step will be off. Also note that adding rows at this point will make the neckline smaller when the poncho is finished.
Joining Rows
Turn your work 90 degrees clockwise. You will now be working into the sides of the rows.
Ch 1
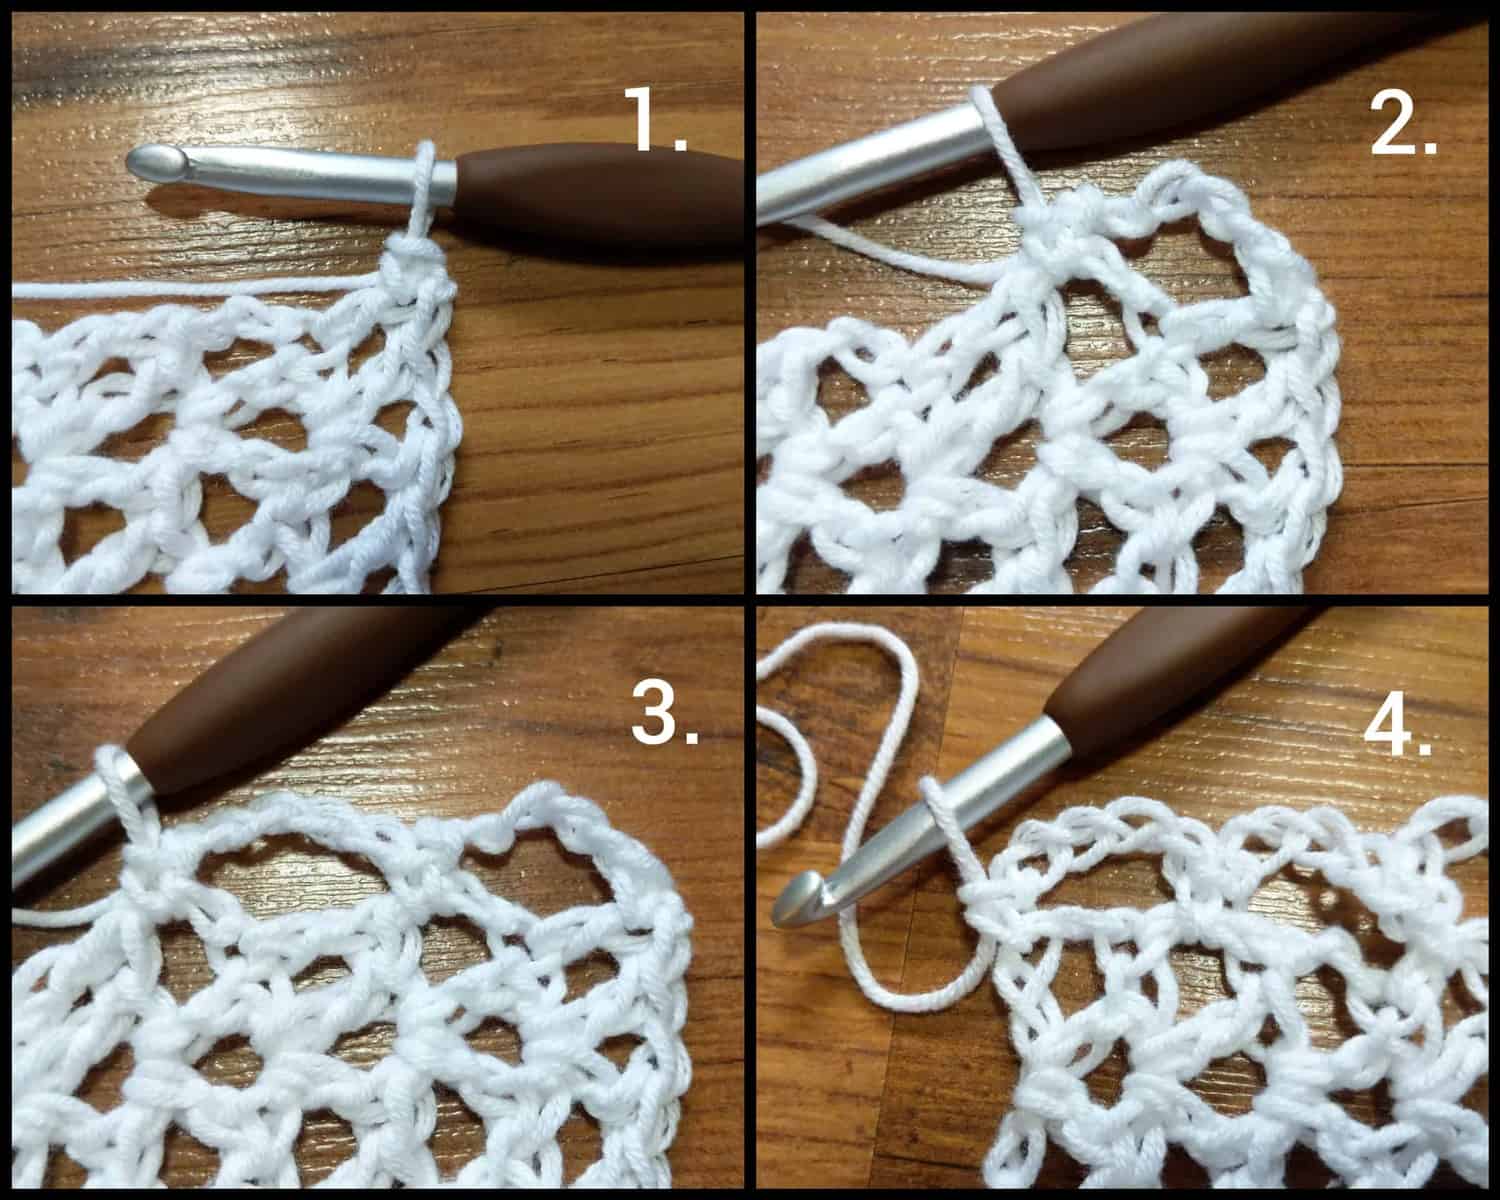
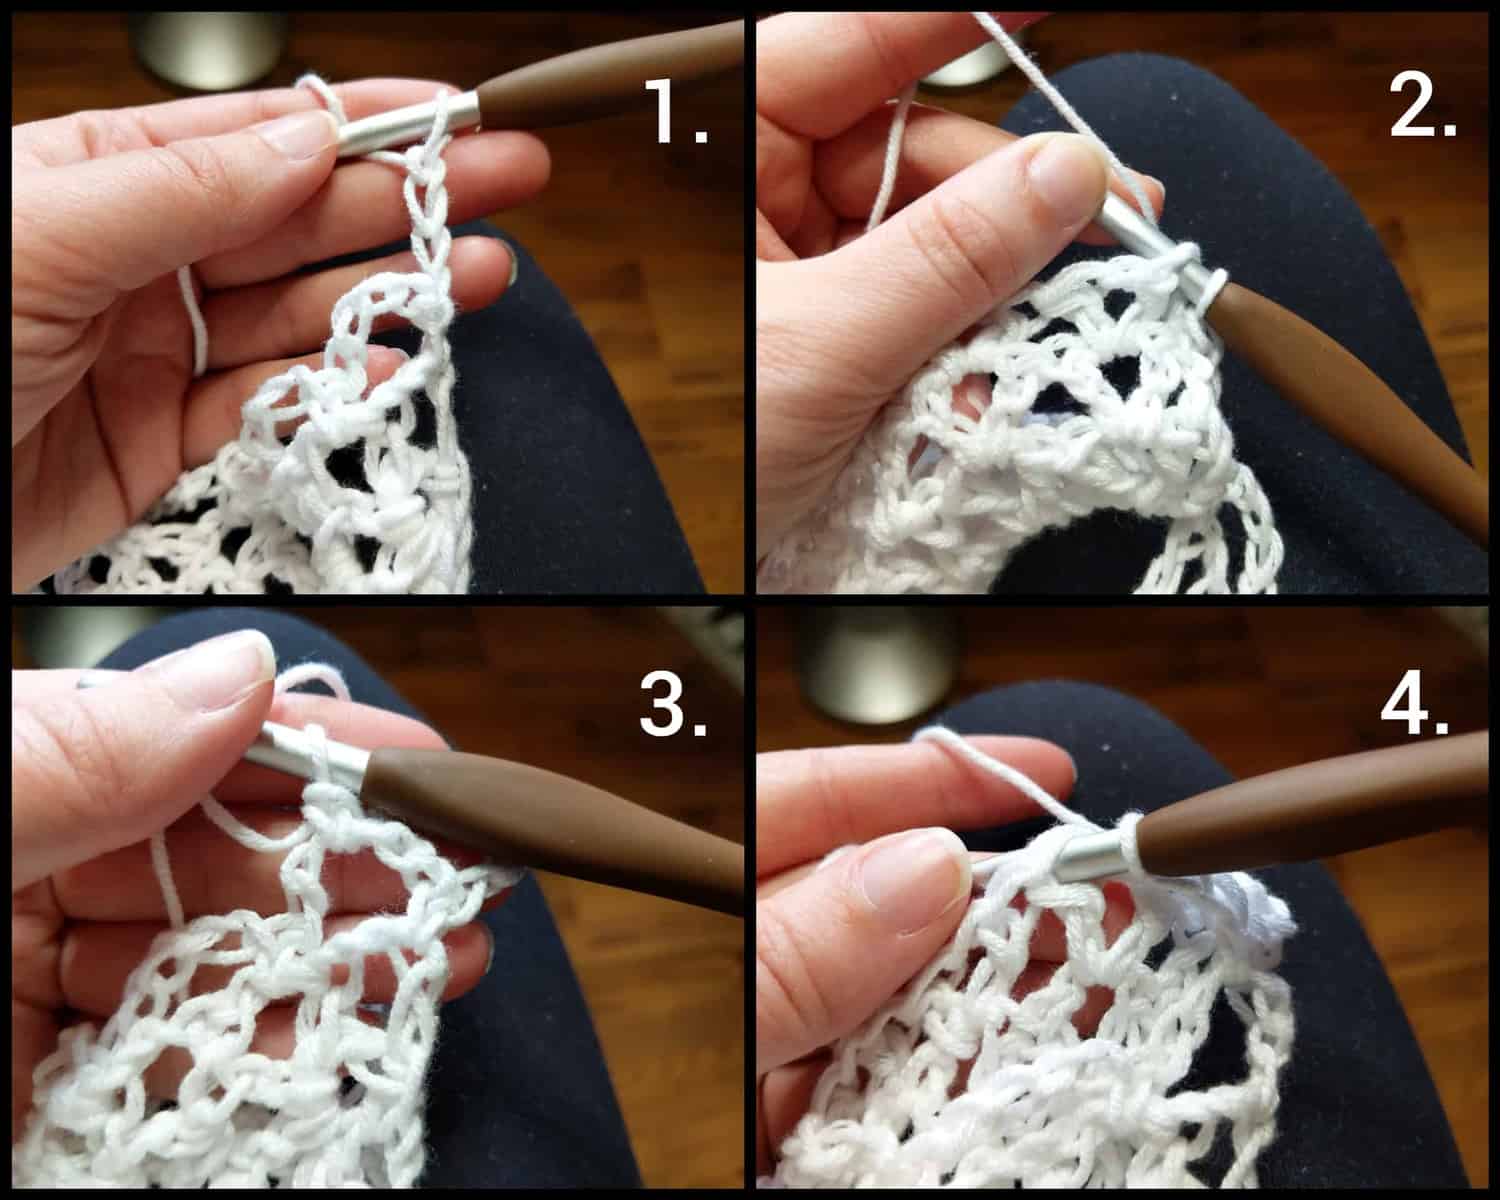
- Sc in side of row just completed. (Figure 1) *Ch 5, sc in side of next row. (Figure 2) Ch 5, sk 1 row, sc in side of next row. (Figure 3) ** Repeat from * to ** until you only have 1 row left unworked. Ch 5, sc in last row. Its best to place this sc in the bottom of the dc or ch3. (Figure 4)
19 (19, 21, 25, 29) ch5 + 20 (20, 22, 26, 30) sc
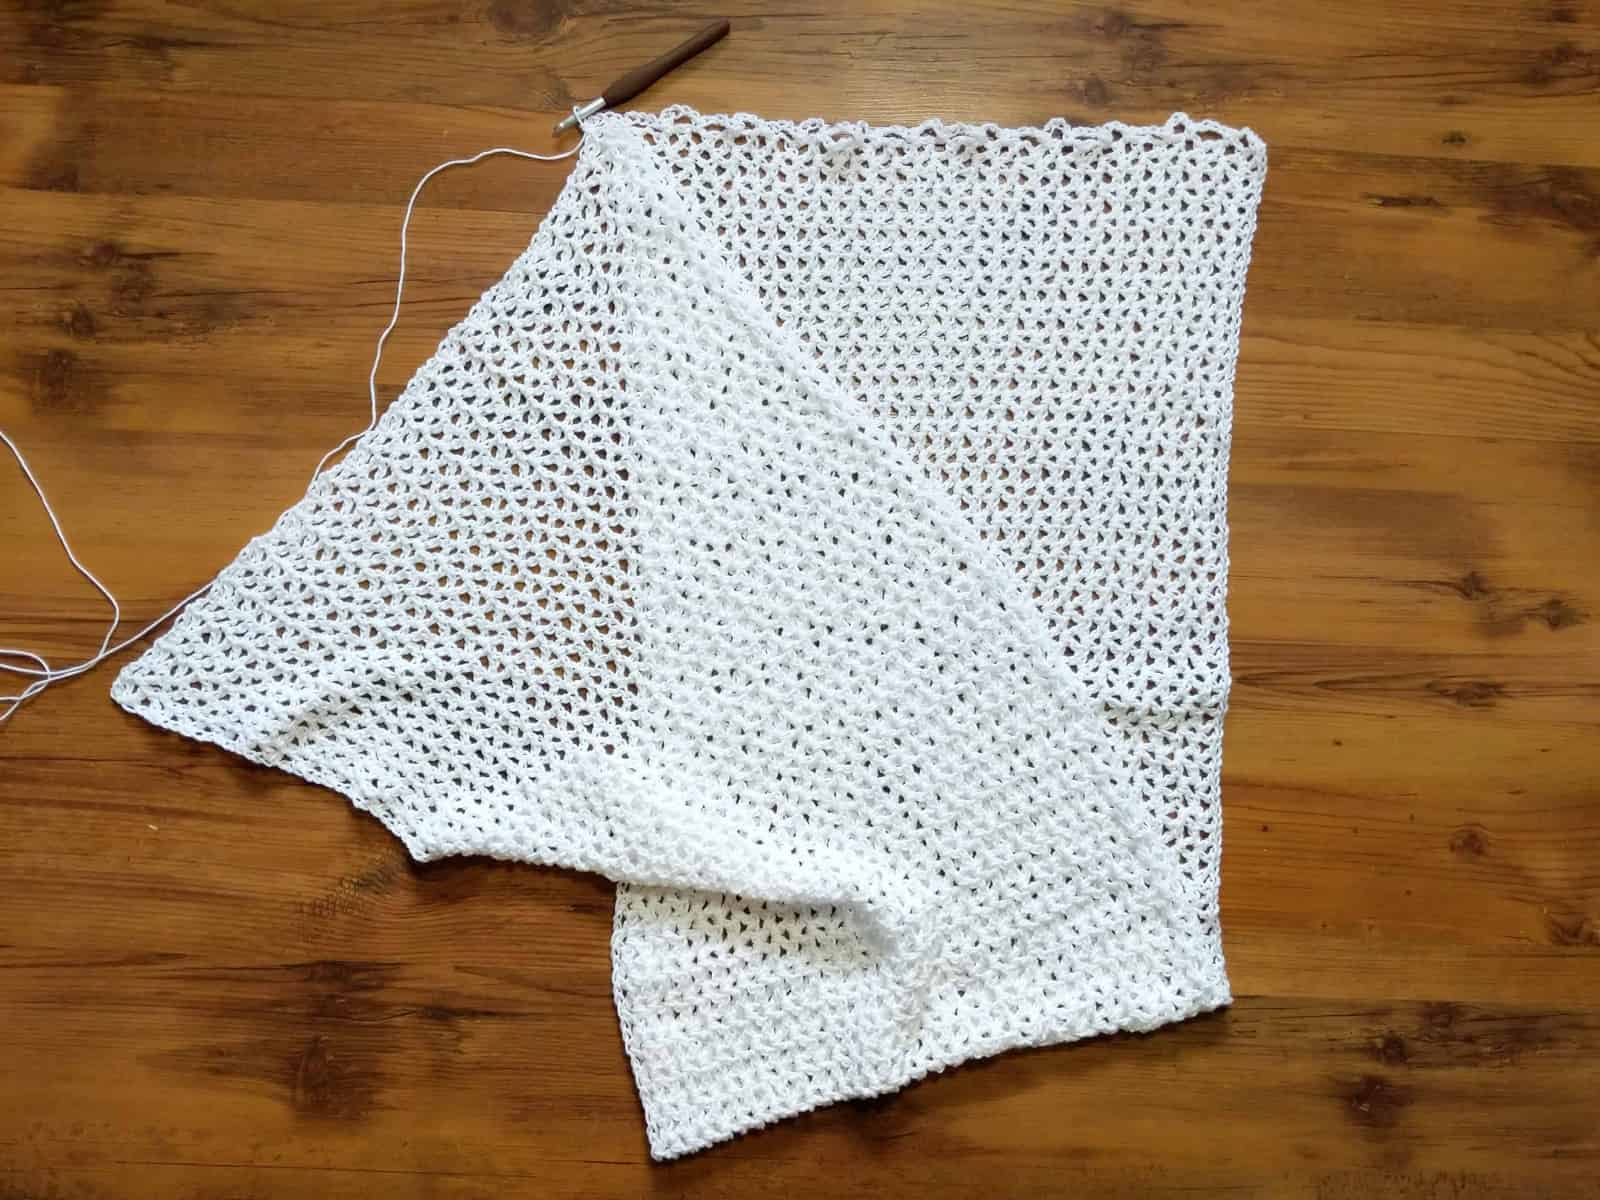
In the next row you will be joining the end of your rectangle to the top. This is what makes it into a poncho rather than a long shawl. I have laid out a few steps and taken some pictures to give you an idea of how it works.
First, lay your rectangle out so your working row is at the top. Then fold the bottom up to meet the top.
Then grab the corners of the top layer and shift them over so that the right corner of the top layer matches up with the left corner of the bottom layer.
Now, keeping those two corners together, grab the edge of the top layer and pull it up to meet the edge of the bottom layer.
This is where the piece will be joined. You can add a couple of locking stitch markers to this edge to hold it together. Then you won’t get lost if you have to put your project down in the middle of this next row.
After you’ve placed your stitch markers, pick up your project and turn it so that the working row is facing you. In this next row I will refer to the layer facing you as the front layer and the layer behind it as the back layer.
2. Ch 4. sc in top of ch3 of back layer. (See figures 1 & 2)
Ch 2, sc in 1st ch5 space of front layer. (See figure 3)
Ch 2, sc in the 2nd dc of the 1st Vst of the back layer. (See Figure 4) (Figure 5 shows what it should look like laid flat)
*Ch 2, sc in the next ch5 space of the front layer.
Ch 2, sc in the 2nd dc of the next Vst of the back layer. **
Repeat from * to ** across until all of the ch5 spaces have been worked (ending on a ch5 space).
Ch 2, sc in the 2nd dc of the next Vst of the back layer.
Ch 4, ss to the 1st st of row 1.
30 (34, 42, 54, 62) sc, ch2 + 2 ch4
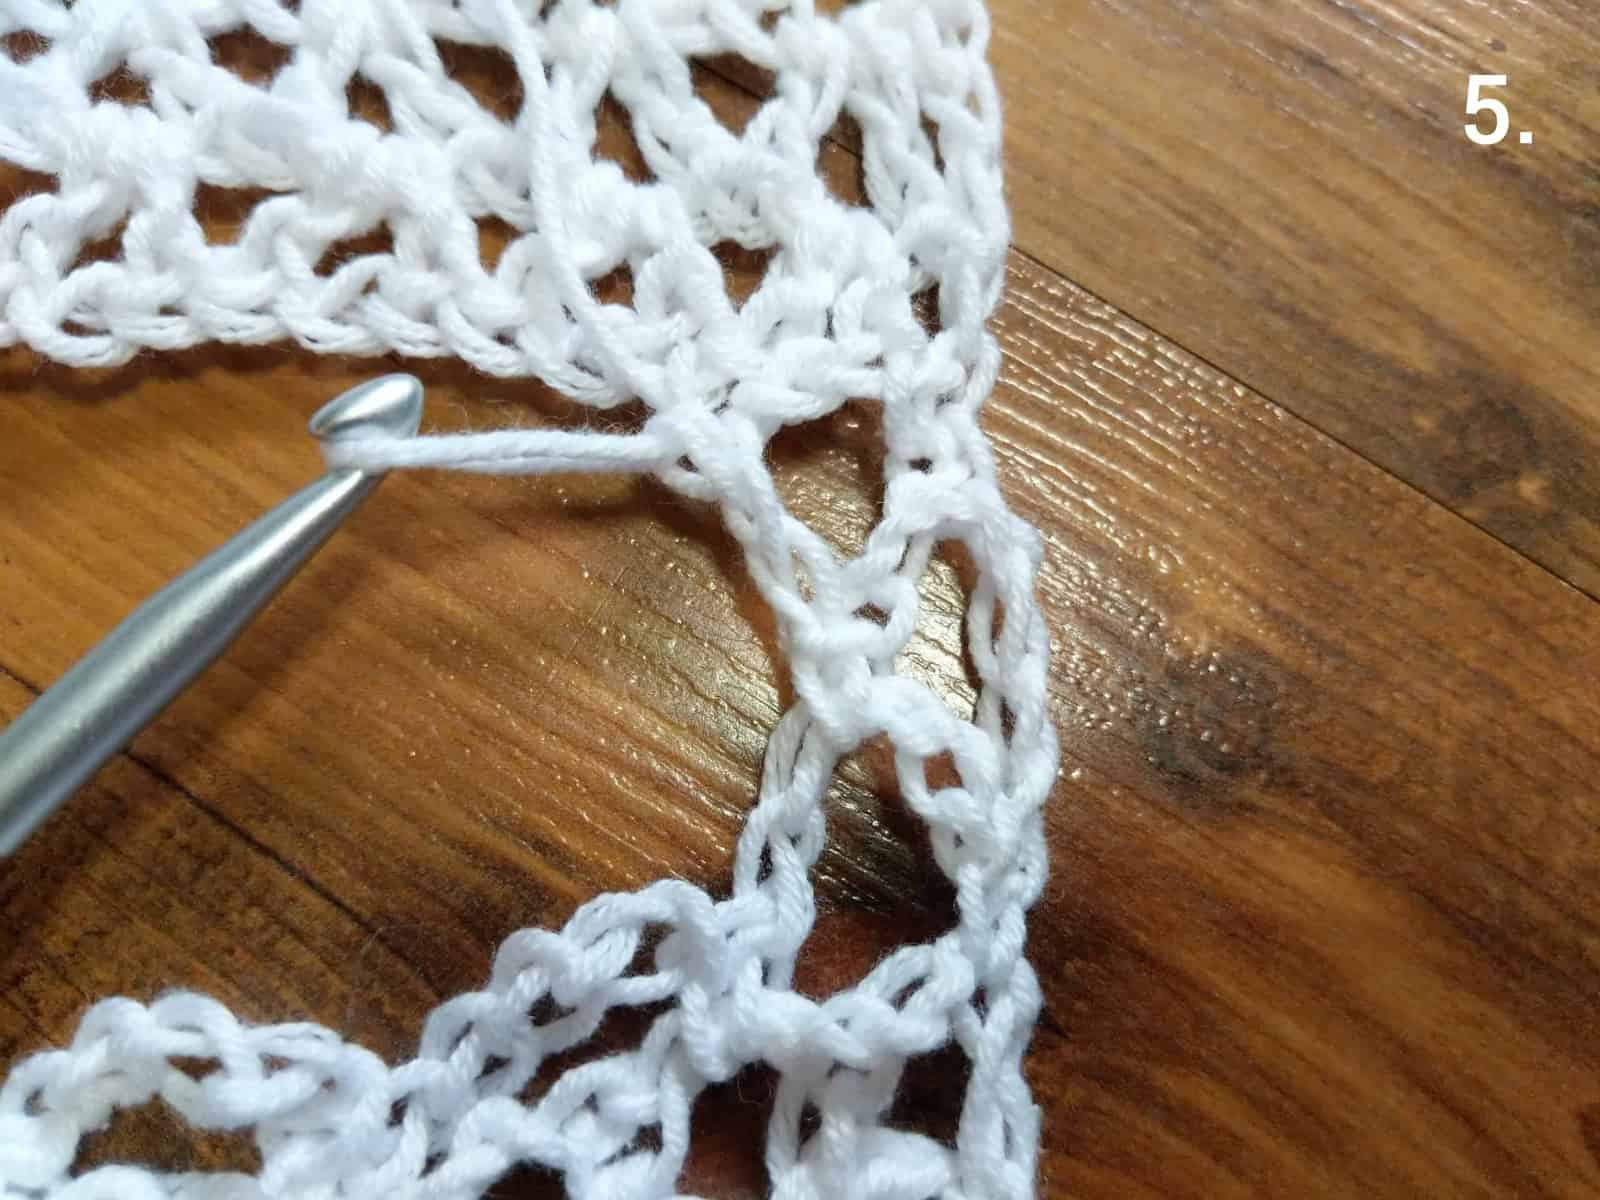
You should now have a pretty detail running up the side of your poncho, like this.
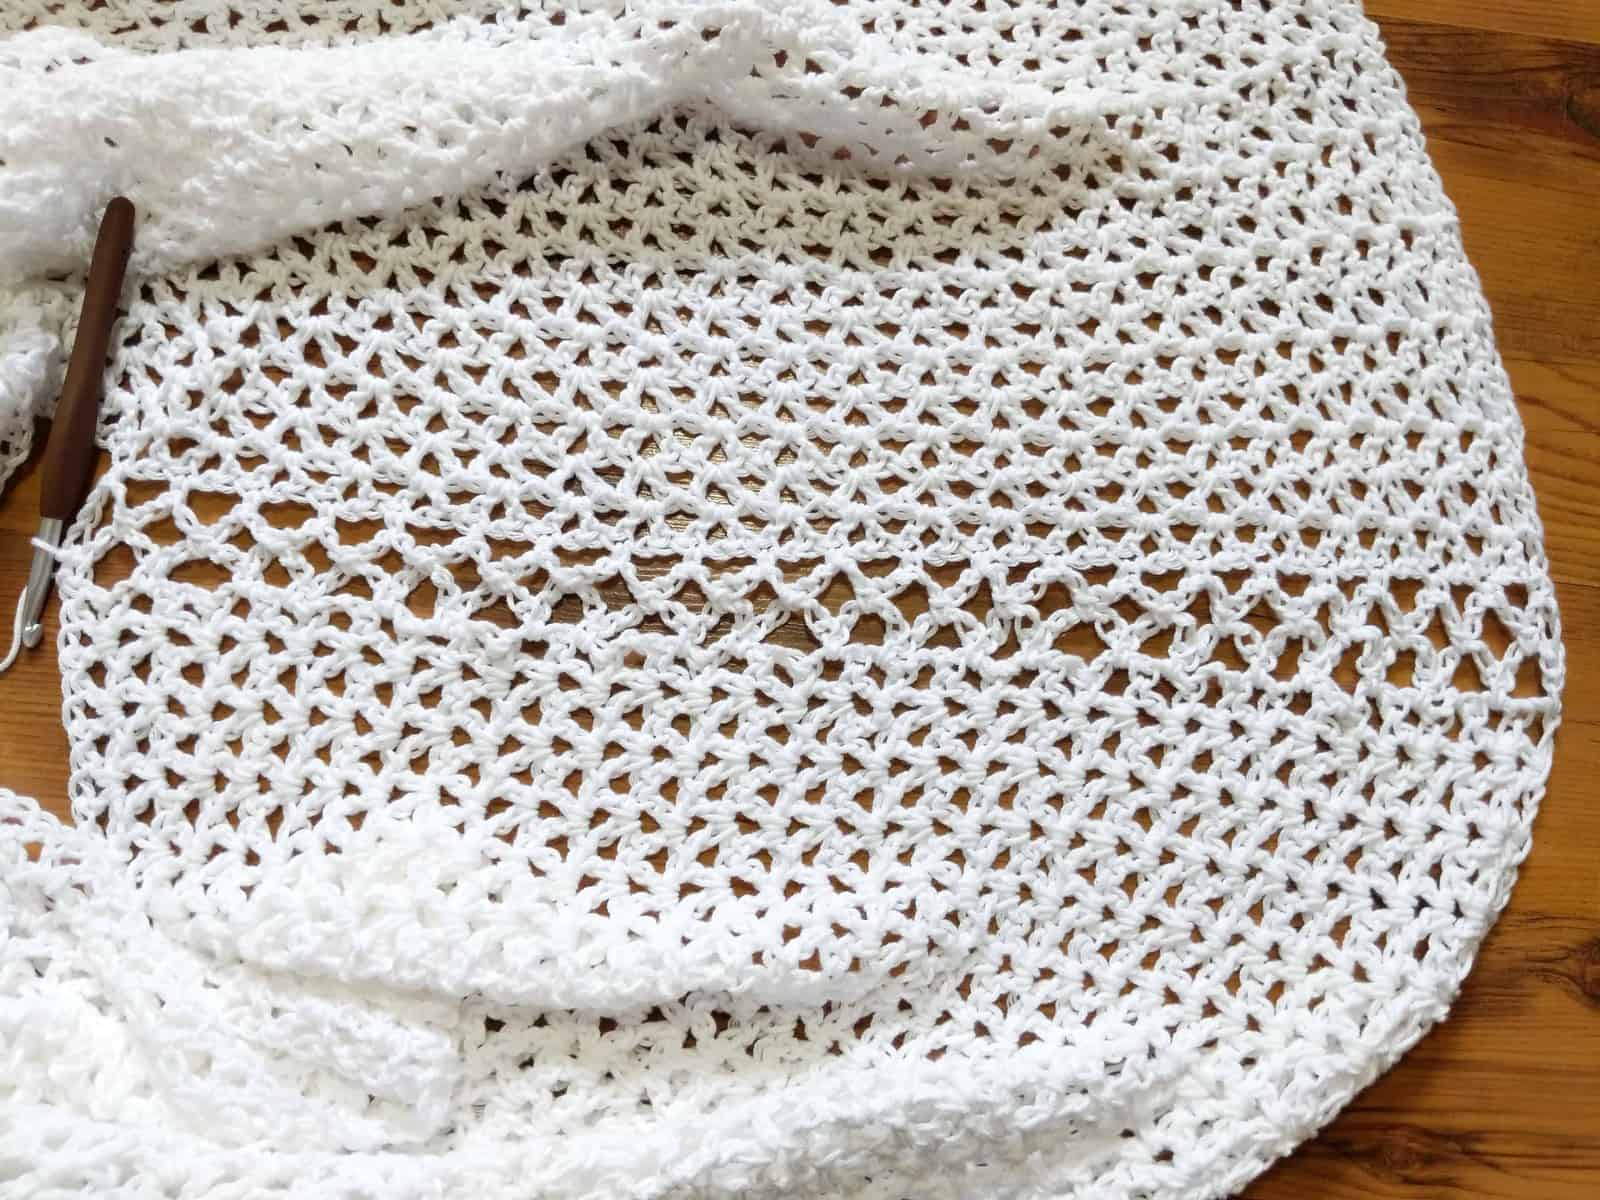
Now we will switch to a 5 mm hook and slip stitch around the neckline of the poncho. The body of this piece has a loose, flowy stitch. Sometimes, depending on what type of yarn you use, this can cause the neckline to stretch and lose shape. To prevent this, we decrease our hook size and run a slip stitch around the neckline to stabilize it.
- Ss in next st and every st around, including chain stitches.
115 (121, 121, 124, 124) ss
Finishing
Now you just have to weave in all your ends and you are done! I hope you enjoyed making your Summer Sun Ponchette! Now that you know how easy it is, you can go ahead and make one in every colour!
You can also try experimenting with other yarn weights. Or use the knowledge you gained making this piece to design your own poncho.
Share & Worth Noting
I really hope you liked the Summer Sun Ponchette!
However, if you really like it, make sure to share the FREE pattern & share pictures of your Summer Sun Ponchette that you’ve made with me.
Tag me on Instagram: Take a picture of your project, use #ineeditcrochet & tag me!
I can’t wait to see your pictures!
Not ready to crochet it yet?
- Share this FREE pattern on Facebook.
- Share this FREE pattern on Pinterest & save it to make later.
Thank you for sharing my FREE patterns & tutorials. When you do, you support me & the blog, which makes it possible to continue sharing free content with you. Which, I really love doing, so thank you!
Not all content on this blog website is free, but the more you share, the more free content I will be able to share. Note that all premium content are ad free.

