If you’re a beginner crocheter, then learning how to crochet the slip stitch is an essential skill to master. This crochet guide comes with pictures and video to help you learn how to crochet this basic stitch.
The slip stitch is for the most part used to end crochet rounds, but you can also crochet full rows and rounds using only thi stitch.
Slip stitches are fairly easy to learn and once you get the hang of it, you’ll be able to use it in all kinds of crochet patterns.
Would you like to save this?
What is a Slip Stitch in Crochet?
The slip stitch is often one of the first stitches beginner crocheters learn after the slip knot and chain stitch.
It is known for being one of the most basic crochet stitches, with just a couple of simple steps.
The steps of the slip stitch in crochet is to insert hook into the stitch or space indicated on the pattern instructions, with the yarn over the hook pull the yarn through the stitch, and then the loop on the crochet hook.
Continue these steps to make more stitches.
Crochet Supplies You Need to Make a Slip Stitch
Any crochet hook size and yarn.
For crocheting slip stitches you can use any type of yarn from acrylic yarn, wool yarn to cotton yarn.
If you are going to follow your first crochet pattern, I suggest using the same yarn and crochet hook size as suggested in the pattern and make a swatch.
If you are learning the stitch only try:
- 3 light yarn with a 4.5 mm, 5 mm or 5.5 mm crochet hook
- 4 medium yarn with a 5.5 mm, 6 mm or 6.5 mm crochet hook
- 5 bulky yarn with a 6.5 mm, 7 mm, 8 mm or 9 mm crochet hook
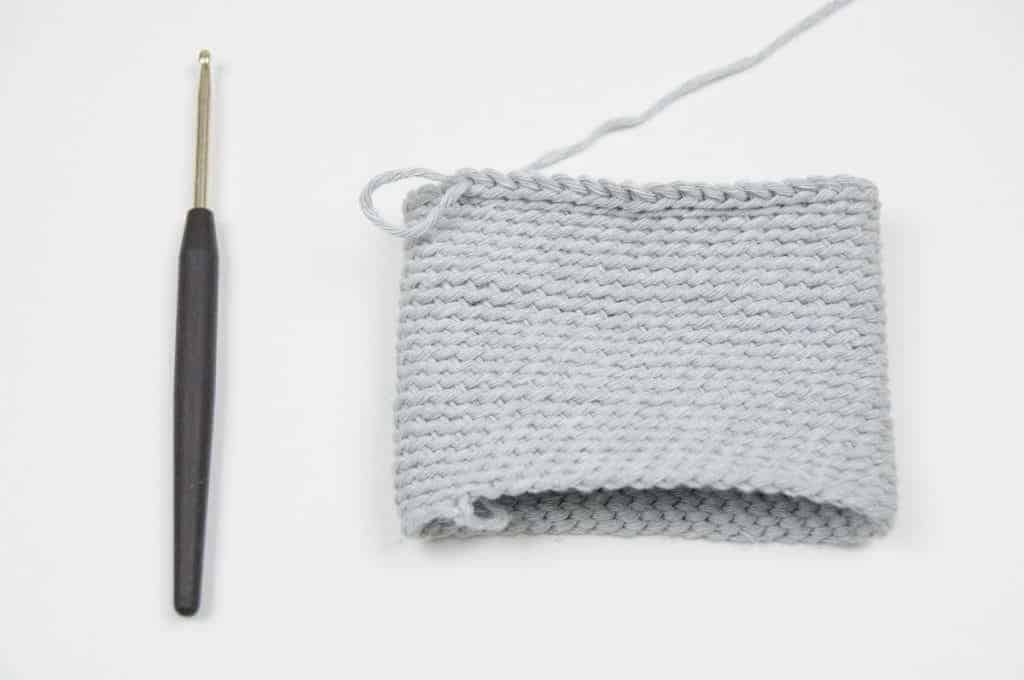
In the photos the yarn used was 4 medium worsted weight yarn.
The exact sizes hook and yarn doesn’t matter, but the experience for a beginner improves if they match fairly well.
If you do start with a yarn that’s a lot thinner, it may become more challenging, the same goes with a crochet hook and yarn that’s a lot thicker.
Don’t worry to much if you have just one hook and yarn, use what you have!
How to do a Slip Stitch
A quick written description:
- Insert hook into next stitch (or space specified in pattern)
- Pull yarn through the stitch
- And continue to pull yarn through the loop on the hook
- Repeat steps 1 to 3 to make more slip stitches
Slip Stitch Abbreviation
The most common crochet abbreviation is sl st in US crochet terms.
Note: In UK crochet terms the single crochet is referred to as a double crochet and abbreviated ss.
The abbreviation sl st is used for both one and multiple stitches.
The abbreviation list will write it like this: sl = slip stitch.
If you are supposed to crochet multiple slip stitches you may find it written as “sl st 2“, “sl st 3” ect or “2sl stc“, “3 sl st” ect. in a crochet pattern.
Save to Pinterest!

Slip Stitch Chart Symbol
The slip stitch crochet chart symbol is simple and looks like a “.” sign.

HOW TO Crochet the Slip Stitch
Skill Level
Tools

Materials
Abbreviations
Instructions
- Setup: I’m starting this guide off without any extra explanation on how to chain or start a row. Consequently you should know how to make a slip knot and crochet a chain. To keep it simple, I’ve chained 10 stitches, turned and crocheted single crochet stitches across the chain row.

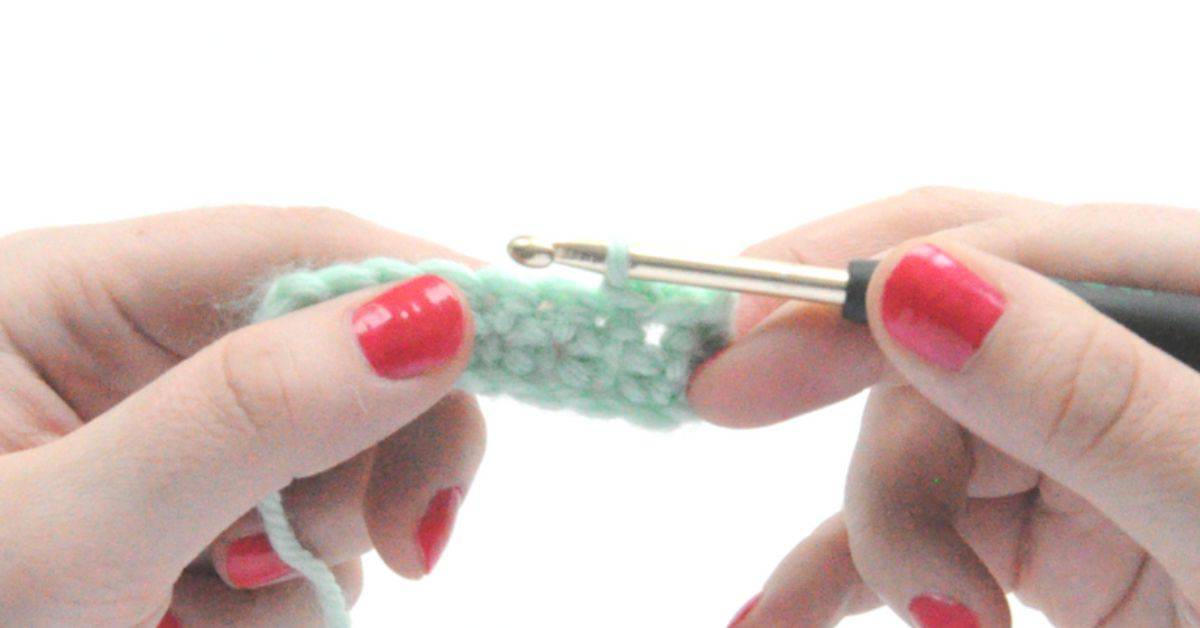
- Insert hook in next stitch or in given stitch.
- Draw yarn through the stitch: Draw up a loop by drawing the yarn through the stitch you inserted the crochet hook. You have 1 loop on the crochet hook.
- Pull the yarn through the loop on the crochet hook to finish the slip stitch.
- You have now finished the slip stitch. In this tutorial steps 3-5 are shown in 3 different steps. However, if you are an experienced crocheter you will probably do this in one motion. If you’re a beginner, don’t worry, you will probably do it in one motion soon.


Step By Step Slip Stitch Video
When is slip stitches most commonly used?
The slip stitch is most commonly used end crochet rounds. You will then work the slip stitch into the chains that started the round or the first stitch crocheted on the round, depending what the crochet instructions tells you.
Slip Stitch Crochet
If you are crocheting multiple rows or rounds with slip stitches it’s actually called slip stitch crochet or even “pjoning”.
This technique creates quite a tight crochet result & is great for crocheted hats, headbands and mittens.