

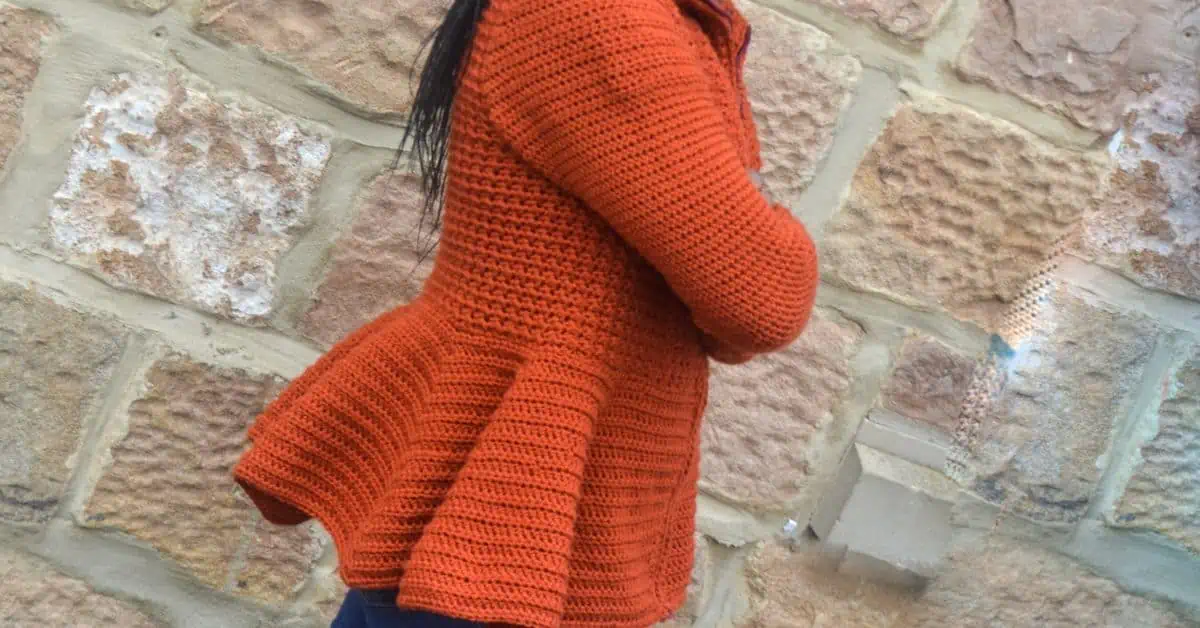
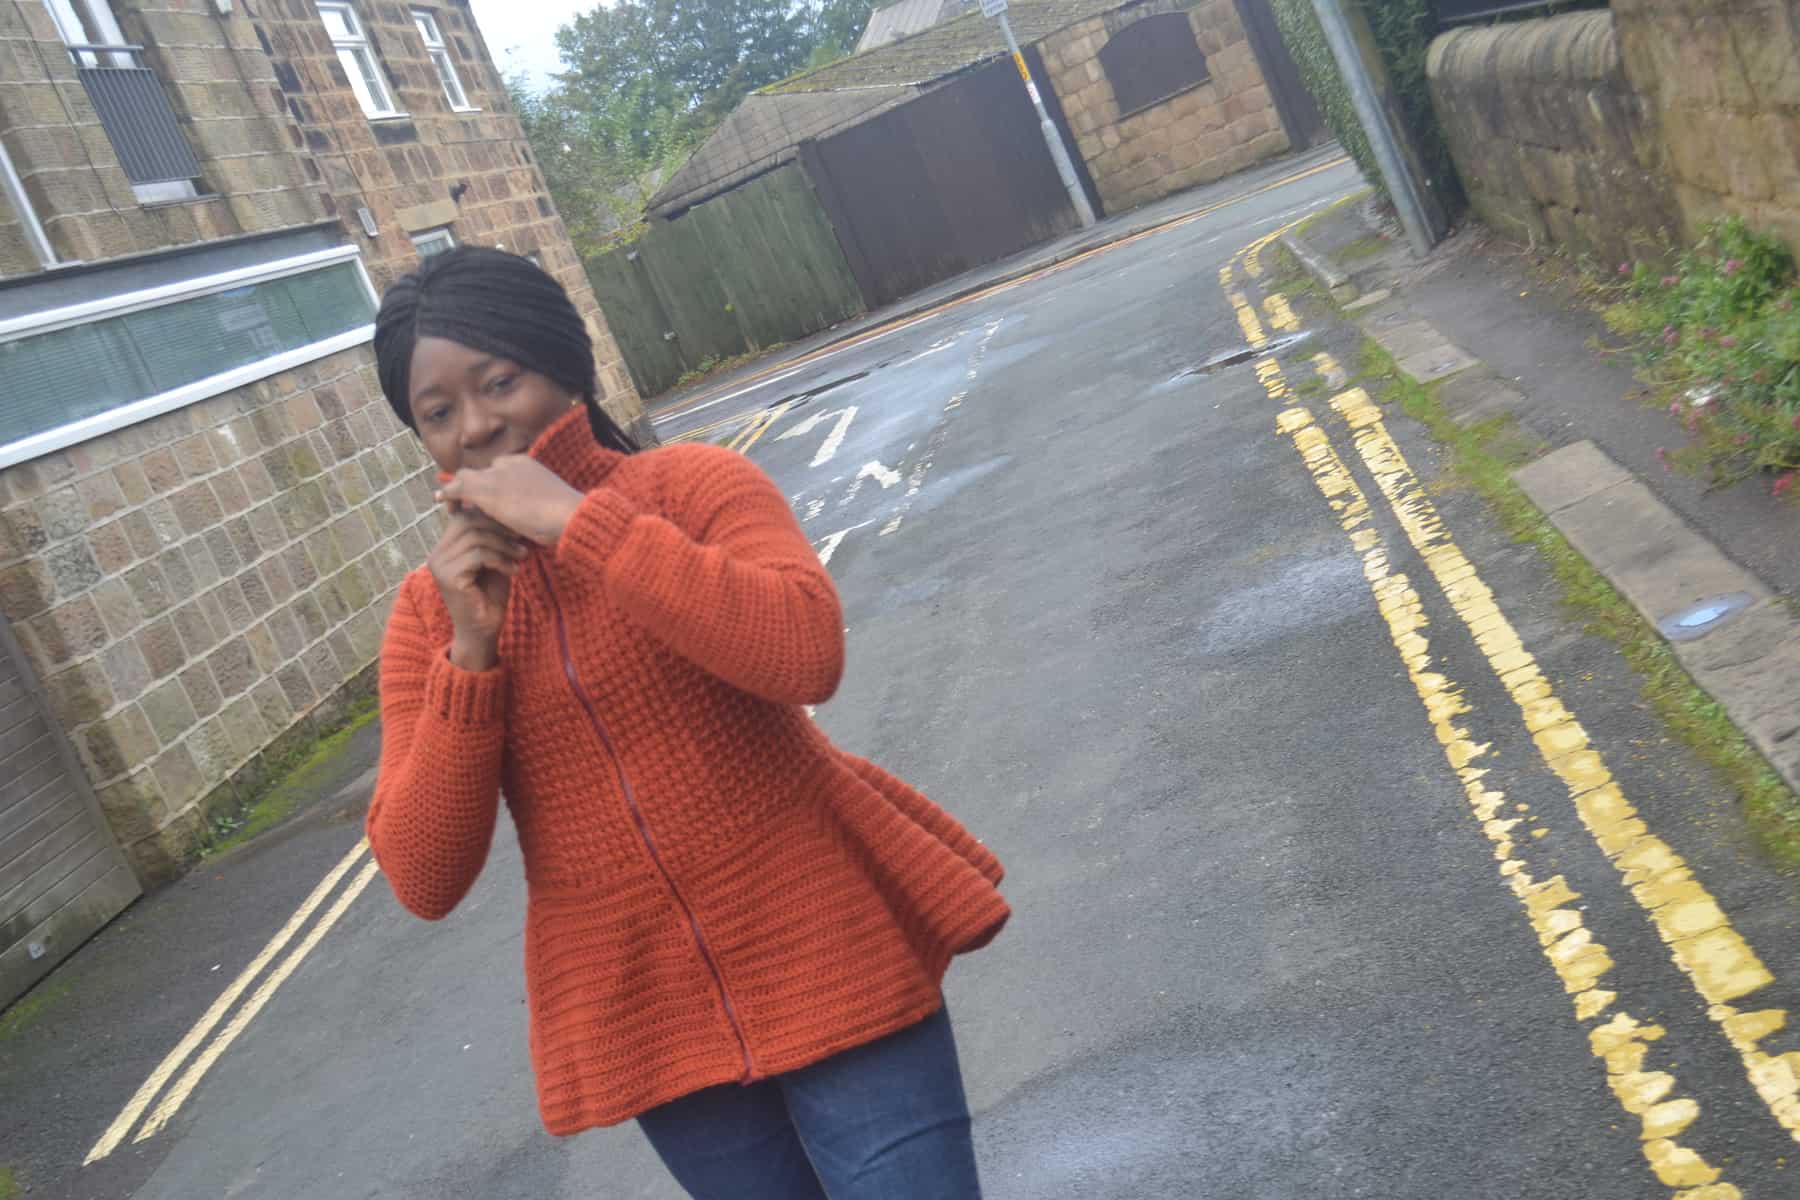
Introducing the Lillian Flared Cardigan!
It is my absolute pleasure to be featured by one of the designers I look up to, yes, I adore Janne’s designs ,when the privilege came, it was a dream come true. There was a moment of me wanting to put out my best in the design I’d submit and I am glad with the outcome of this Cardigan! I wanted a versatile design, by that I meant a pattern you can style in different ways, which this design has. This pattern has its uniqueness from the texture and it is worked in one piece with minimal sewing (sleeves and shoulder seem)
Find more: 44+ crochet cardigan pattern collection.
Would you like to save this?
The Yarn
Yarn characteristics
Stylecraft special Aran (100% acrylic 196 yards/214 m per 3.5 oz/100 g skein)

About Lillian Flared Cardigan
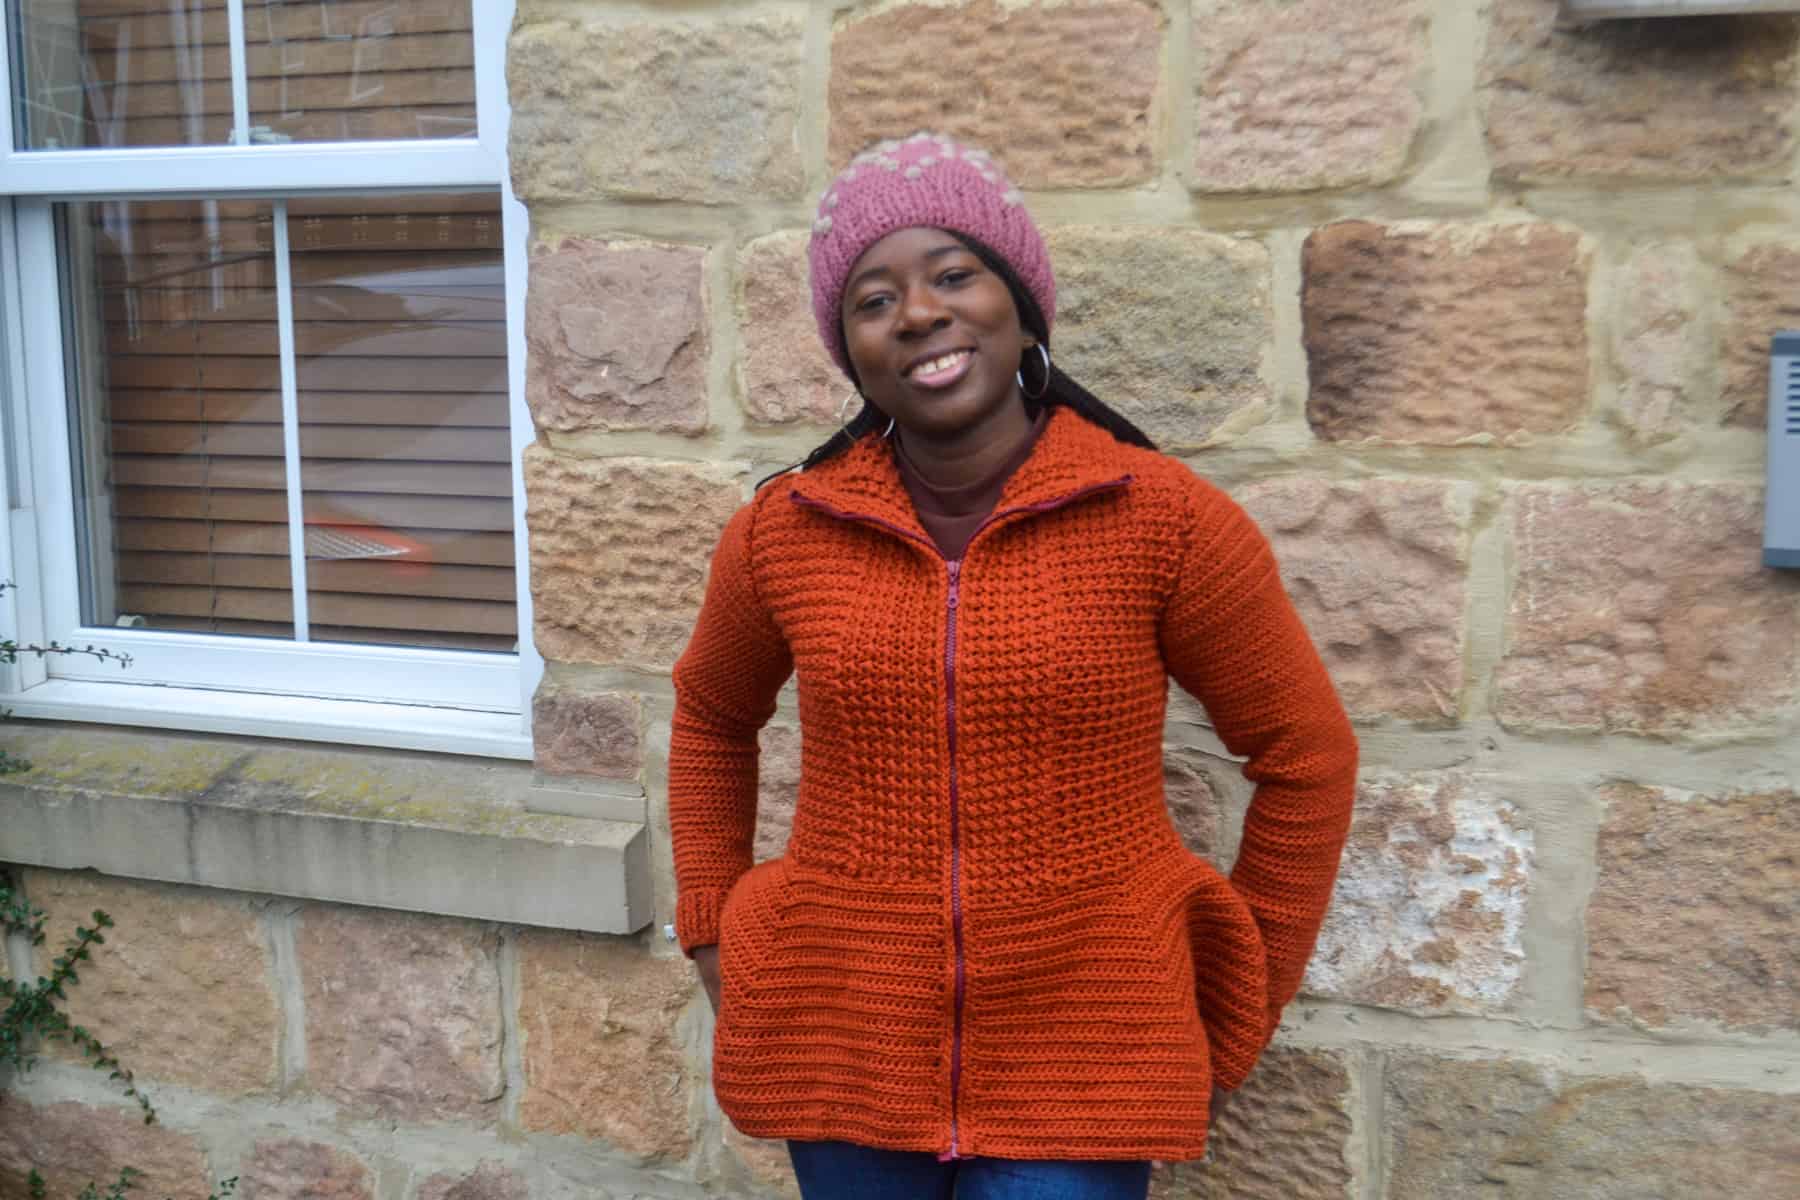
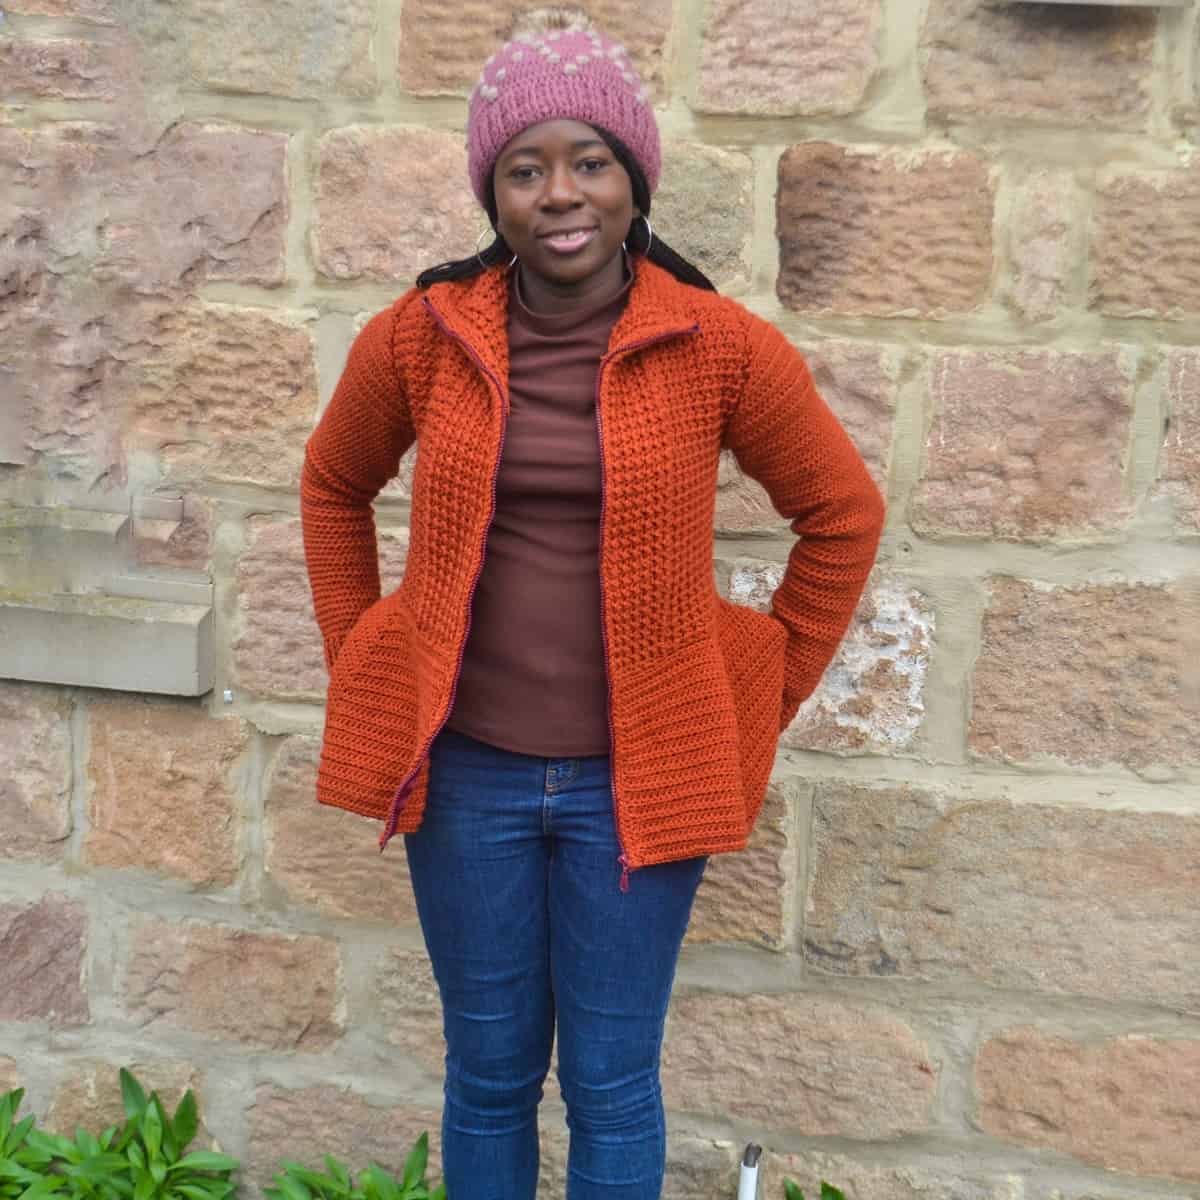
This Cardigan was inspired by a cardigan I made last fall which was a full flared cardigan. I have always wanted a cardigan with a zipper, plus the ease of putting on and off provided by the zipper made me more inclined to designing this pattern, though the option of adding buttons is provided. This cardigan is perfect for all seasons, as you can pair it with a Jean and even a boot.
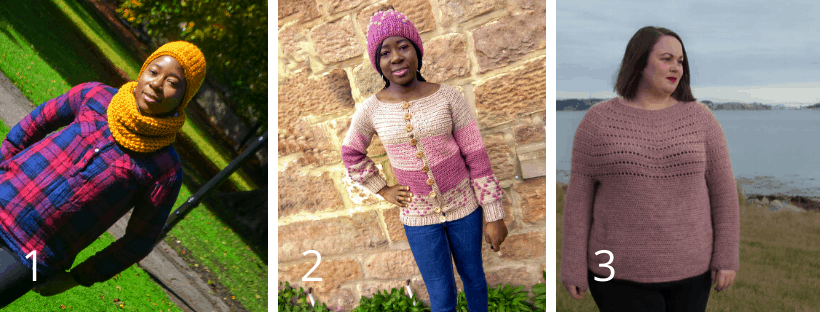
This pattern is easy to follow as it is a repeat of basic stitches but won’t bore you as its got a beautiful texture, which made me love it so much and couldn’t resist making a matching Beanie and Cowl, you can find the two crochet pattern here.
Since you like the Lillian Cardigan, these might interest you too?
How Long Does It Take To Crochet That?
How long it takes to crochet something varies depending on your skill & how fast you crochet. But that isn’t a helpful answer is it?
Well, I’ve developed a yarn calculator to help you get the answer to this question.
It will help you calculate exactly how much time you’ll spend crocheting a project.
All you need to know is how much yarn you will use on the project in either meters, yards or skeins. Then crochet your test square & time it.
Calculate how long it takes to crochet that.
LILLIAN FLARED CARDIGAN – THE FREE CROCHET PATTERN
Pattern Options
This pattern can be made using either a chunky or a Worsted weight yarn.
GRAB THE PDF ON RAVELRY
GRAB THE PDF ON ETSY
About The Pattern
This pattern work up fast, written for 9 different sizes using Bust measurement as a landmark.
Project Level
WHAT’S YOUR CROCHET SKILL LEVEL?
Take the Quiz
Get helpful tips for your next crochet project & increase your skills!
Materials Needed
Crochet Hook
Size 6 mm / US: J – 10 / UK: 4
Yarn
Yarn used:
Stylecraft special Aran in Copper
Yarn amount used:
Worsted/Aran – 1,370 yards (1560 yards, 1,760 yards, 1960 yards, 2000 yards, 2150 yards, 2300 yards, 2400 yards, 2500 yards)
Yarn characteristics:
- 4 medium yarn, worsted weight yarn, 100% acrylic
Other Materials Needed
- Buttons (6 – 10) or Zipper length depends on how long your flare is)
- Measuring tape
- Yarn needle
- Scissors
- Stitch markers
Gauge
Measured with half double crochet stitches crocheted in rows:
Chunky yarn – 14 sts and 10 rows = 10 cm/4”
Aran weight/Worsted weight – 14 sts and 11 rows = 10 cm/4”
Adjust hook size if necessary to obtain gauge.
Notes
- This crochet pattern is written in US terms.
- All measurements given are unblocked.
- Note that measurements are given as exact as possible. But crochet tension & technique might give variations in the result, that changes from person to person.
- Read pattern instructions carefully before beginning to make sure you understand everything. It might save you hours frogging your work & crocheting it again!
- Make a swatch that measure at least 10 x 10 cm / 4 x 4 inches using the stitch the gauge is given for. If your swatch matches the gauge, you’re good to go. If the gauge is wrong, you might need to change your hook. Go up in crochet hook size if your stitches are smaller & go down in crochet hook size if your stitches are bigger. Learn more about testing gauge.
- Check yarn info if you want to find an alternative or test your yarn against the gauge. Learn more about substituting yarn.
- At the end of each row, the stitch count is given in parenthesis.
- The pattern is worked in rows with the sleeves in rounds
- chains at the beginning of each row/round does not count as a stitch
Size & Measurements

Adjustment:
The length of the flare can be made to your preference, prototype is 10″ long
Abbreviations
- ch = chain
- sl st = slip stitch
- sc = single Crochet
- sc2tog = single crochet 2 together
- hdc = half double crochet
- hdc2tog = half double crochet 2 together
- dc = double crochet
- fpdc = front post double crochet
- bpdc = back post double crochet
We try our best to include all crochet abbreviations in the list above for the crochet pattern, but sometimes we may forget one or two.
Learn more about crochet abbreviations & find a complete list on our Crochet Abbreviations & Terms post.
Lillian Flared Cardigan Pattern Instructions
Section 1: Waist upwards
Row 1: Chain 114 (130, 146, 160, 174, 190, 204, 220, 234), sc in 2nd ch from hook, *hdc in next, sl st in next, repeat from * to last st, sc, turn. 56 (64, 72, 79, 86, 95, 101, 109, 116) hdc 55 (63, 71, 78, 85, 94, 100, 108, 115) sl st, 2 sc
Row 2: Ch 1, sc in first st, *sl st in next, hdc in next, repeat from * to last st, sc in last, turn – 56 (64, 72, 79, 86, 95, 101, 109, 116) sl st 55 (63, 71, 78, 85, 94, 100, 108, 115) hdc, 2 sc
Row 3: Ch 1, sc in first st, *hdc in next, sl st in next, repeat from * to last st, sc, turn – 56 (64, 72, 79, 86, 95, 101, 109, 116) hdc 55 (63, 71, 78, 85, 94, 100, 108, 115) sl st, 2 sc
Rows 4 – 33 (33, 33, 33, 33, 37, 37, 37, 37): Repeat Row 2 and 3
Row 34 (34, 34, 34, 34, 38, 38, 38, 38): Rep. Row 2.
Do not Fasten off.
Split for sleeve opening
Place stitch markers on the 28th and 85th (32nd and 97th, 36th and 109th, 40th and 119th, 44th and 129th, 46th and 143rd, 50th and 153rd, 54th and 165th, 58th and 175th) stitches respectively.
Front panels
Right side: Arm-pit shaping.
Row 1: Working toward the 1st stitch marker, ch 1, sc in first st, *hdc in next, sl st in next, repeat from * to last 2 sts before stitch marker, hdc in next st, sc2tog, turn – 27 (31, 35, 39, 43, 45, 49, 53, 57) sts
Row 2: Ch 1, sc2tog, *hdc in next, sl st in next, repeat from * to last st, sc, turn – 26 (30, 34, 38, 42, 44, 48, 52, 56) sts
Row 3: Ch 1, sc in first st, *hdc in next, sl st in next, repeat from * to last 3 sts, hdc in next st, sc2tog, turn – 25 (29, 33, 37, 41, 43, 47, 51, 55) sts
Row 4: Ch 1, sc2tog, *hdc in next, sl st in next, repeat from * to last st, sc, turn – 24 (28, 32, 36, 40, 42, 46, 50, 54) sts
Row 5: Ch 1, sc in first st, *hdc in next, sl st in next, repeat from * to last 3 sts, hdc in next st, sc2tog, turn – 23 (27, 31, 35, 39, 41, 45, 49, 53) sts
Stop reducing.
Row 6: Ch 1, sc in first st, *sl st in next, Hdc in next, repeat from * to last st, sc in last, turn – 23 (27, 31, 35, 39, 41, 45, 49, 53) sts
Row 7: Ch 1, sc in first st, *hdc in next, sl st in next, repeat from * to last st, sc, turn – 23 (27, 31, 35, 39, 41, 45, 49, 53) sts
Row 8 – 27 (29, 31, 31, 33, 33, 35, 37, 37): Repeat Rows 6 – 7
Do not fasten off.
Shape neckline
Row 1: Ch 1, sc in first st, *sl st in next, hdc in next, repeat from * to last st, sc in last, turn – 23 (27, 31, 35, 39, 41, 45, 49, 53) sts
Row 2: Ch 1, sc in first 5 sts, (place stitch marker on the 4th st) *hdc in next, sl st in next, repeat from * to last st, sc, turn – 23 (27, 31, 35, 39, 41, 45, 49, 53) sts
Row 3: Ch 1, sc in first st, *sl st in next, hdc in next, repeat from * to last 5 sts, sc in next st, leave last 4 sts unworked, turn. 19 (23, 27, 31, 35, 37, 41, 45, 49) sts
Row 4: Ch 1, sc2tog, *sl st in next, hdc in next, repeat from * to last st, sc in last st, turn. 18 (22, 26, 30, 34, 36, 40, 44, 48) sts
Row 5: Ch 1, sc in first st, *hdc in next st, sl st in next, hdc in next, repeat from * to last 2 sts, sc2tog, turn. 17 (21, 25, 29, 33, 35, 39, 43, 47) sts
Row 6: Repeat Row 4. 16 (20, 24, 28, 32, 34, 38, 42, 46) sts
Fasten off
Left Panel – Arm-pit shaping.
Working from the 2nd stitch marker towards the edge.
Join yarn with a slip stitch.
Row 1: Ch 1, sc2tog, * hdc in next, sl st in next, repeat from * to last st, sc, turn – 27 (31, 35, 39, 43, 45, 49, 53, 57) sts
Row 2: Ch 1, sc in first stitch, * sl st in next, hdc in next, repeat from * to last 2 sts, sc2tog, turn – 26 (30, 34, 38, 42, 44, 48, 52, 56) sts
Row 3: Ch 1, sc2tog, * hdc in next, sl st in next, repeat from * to last st, sc, turn – 25 (29, 33, 37, 41, 43, 47, 51, 55) sts
Row 4: Ch 1, sc in first st, * sl st in next, hdc in next, repeat from * to last 2 sts, sc2tog, turn – 24 (28, 32, 36, 40, 42, 46, 50, 54) sts
Row 5: Ch 1, sc2tog, * hdc in next, sl st in next, repeat from * to last st, sc, turn – 23 (27, 31, 35, 39, 41, 45, 49, 53) sts
Stop reducing.
Row 6: Ch 1, sc in first st, *sl st in next, hdc in next, repeat from * to last st, sc in last, turn –23 (27, 31, 35, 39, 41, 45, 49, 53) sts
Row 7: Ch 1, sc in first st, * hdc in next, sl st in next, repeat from * to last st, sc, turn – 23 (27, 31, 35, 39, 41, 45, 49, 53) sts
Row 8 – 27 (29, 31, 31, 33, 33, 35, 37, 37): Repeat Rows 6 – 7
Shape neckline
Row 1: Ch 1, sc in first st, *sl st in next, hdc in next, repeat from * to last st, sc in last, turn – 23 (27, 31, 35, 39, 41, 45, 49, 53) sts
Row 2: Ch 1, sc in first st, *hdc in next, sl st in next, repeat from * to last 5 sts, sc in next st, leave last 4 sts unworked, turn – 19 (23, 27, 31, 35, 37, 41, 45, 49) sts
Row 3: Ch 1, sc2tog, *hdc in next, sl st in next, repeat from * to last st, sc in last st, turn. 18 (22, 26, 30, 34, 36, 40, 44, 48) sts
Row 4: Sc in first st, * hdc in next, sl st in next, repeat from * to 2 sts, sc2tog, turn – 17 (21, 25, 29, 33, 35, 39, 43, 47) sts
Row 5: Ch 1, sc2tog, *hdc in next st, sl st in next, hdc in next, repeat from * to last st, sc in last st, turn – 16 (20, 24, 28, 32, 34, 38, 42, 46) sts
Row 6: Repeat Row 4. 15 (19, 23, 27, 31, 33, 37, 41, 45) sts
Fasten off
Back Panel
Working between 1st and 2nd stitch markers, join yarn with a slip stitch to stitch with 1st stitch marker, and work the following stitches –
Row 1: Ch 1, sc2tog, *hdc in next, sl st in next, repeat from * to last 1st before 2nd stitch marker, sc2tog, turn. 55 (63, 71, 77, 83, 95, 101, 109, 115) sts
Row 2: Ch 1, sc2tog, *hdc in next, sl st in next, repeat from * to last 2 sts, sc2tog, turn. 53 (61, 69, 75, 81, 93, 99, 107, 113) sts
Row 3: Ch 1, sc2tog, *hdc in next, sl st in next, repeat from * to last 2 sts, sc2tog, turn. 51 (59, 67, 73, 79, 91, 97, 105, 111) sts
Row 4: Repeat Row 2. 49 (57, 65, 71, 77, 89, 95, 103, 109) sts
Row 5: Repeat Row 3 – 47 (55, 63, 69, 75, 87, 93, 101, 107) sts
Stop Reducing
Row 6: Ch 1, sc in first st, *sl st in next, hdc in next, repeat from * to last st, sc in last st, turn – 47 (55, 63, 69, 75, 87, 93, 101, 107) sts
Row 7: Ch 1, sc in first st, *hdc in next st, sl st in next, repeat from * to last st, sc in last, turn – 47 (55, 63, 69, 75, 87, 93, 101, 107) sts
Rows 8 – 33 (35, 37, 37, 39, 39, 41, 43, 43): Repeat Rows 6 and 7
Match the height with that of the front panels.
Shoulder seam
On both sides – sew/join from the shoulder tip towards the neck, stop joining 2” from the front panels and the neck opening (adjust appropriately, if neck is too wide, increase the length joined)
Collar
Working in Row, across 2” left un-joined from both panels and the back.
With right side – Join yarn with a slip stitch, to first st of skipped sts from the front panel in Row 3 of front panel.
Row 1: Ch 1, sc in each across, turn.
Row 2: Ch 1, sc in first st, *hdc in next, sl st in next, repeat from * to last st, sc, turn.
Row 3: Ch 1, sc in first st, * sl st in next, hdc in next, repeat from * to last st, sc, turn.
Rows 4 – 11: Repeat Row 2 – 3.
Section 2: Sleeves
Round 1: Ch 26 (30, 30, 30, 34, 34, 36, 36, 36), join to form a ring, ch 2, dc in each ch around. 26 (30, 30, 30, 33, 33, 36, 36, 36) dc
Round 2: Ch 2, *fpdc in next 2, bpdc in next, repeat from * to the end of round, join with a sl st to beginning chain. 18 (20, 20, 20, 22, 22, 24, 24, 24) FPdc, 8 (10, 10, 10, 11, 11, 12, 12, 12) BPdc
Rounds 3 – 7: Repeat Round 2
Round 8: Ch 2, hdc in each st across, join to beginning ch. 26 (30, 30, 30, 33, 33, 36, 36, 36) Hdc
Round 9: Ch 2, *hdc in next 2 sts, 2 hdc, repeat from * to end, join with a sl st to beginning ch – 36 (40, 40, 40, 44, 44, 48, 48, 48) hdc
Round 10: Ch 2, hdc in each st, join with beginning ch – 36 (40, 40, 40,44, 44, 48, 48, 48) hdc
Rounds 11 – 24 (26, 28, 30, 32, 32, 34, 34, 34): Repeat Row 10; 36 (40, 40, 40, 44, 44, 48, 48, 48) hdc
At this point, the sleeve should be at your elbow, if not, repeat round 10 till you have a length of your elbow.
Do not Fasten off.
Round 1: Ch 2, hdc in next, 2 hdc in next st, hdc in next st, 2 hdc in next st, hdc in each of the remaining sts till last 4 sts, 2 hdc in next, hdc in next st, 2 hdc in next, hdc in last st, join with ch – 40 (44, 44, 44, 48, 48, 52, 52, 52) hdc
Round 2: Ch 2, hdc in each st, join with slip stitch – 40 (44, 44, 44, 48, 48, 52, 52, 52) hdc
Rounds 3 – 7: Repeat Round 1 – 2.
52 (56, 56, 56, 60, 60, 64, 64, 64) hdc
Note
- If too tight, increase (repeat round 1 -2) till a convenient width i.e Repeat Round 2 till the start of your Armpit.
- Kindly remember that the stitch counts would be different as such you would need more rows when reducing.
Working in Rows
Row 1: Ch 2, hdc2tog, hdc in each st to last 2 sts, hdc2tog, turn – 50 (54, 54, 54, 58, 58, 62, 62, 66) hdc
Rows 2 – 18 (20, 20, 20, 22, 22, 24, 24, 26): Repeat Row 1. 16 (16, 16, 16, 16, 16, 16, 16, 16) hdc
Row 19 (21, 21, 21, 23, 23, 25, 25, 27): Ch 2, hdc2tog in each stitch across. 8 (8, 8, 8, 8, 8, 8, 8, 8) hdc
Note – If you increased the number of stitches earlier, you would need to increase the number of repeats also.
Fasten off.
To join the sleeves to the body of your cardigan –
Turn both sleeves and the body of the cardigan to the wrong side, with the tip of the sleeve placed on the shoulder tip, work sc around both shoulder and body of the cardigan.
Section 3: Flare
Note to self – check the numbers for the flare!!!
Turn the bodice to the waist (foundation Row 1).
Join yarn with a sl st to the edge of Row 1.
XS, S and M sizes alone –
Row 1: Ch 1, sc in first 5 sts, sc2tog, sc in each st across, turn. 112 (128, 144)
Large size alone –
Row 1: Ch 1, 2 sc in first st, sc in remaining sts across, turn. 160 sc.
XL, 2XL, 3XL, 4XL and 5XL alone –
Row 1: Ch 1, *sc in next 5 sts, sc2tog, rep from * (5, 5, 3, 3, 1) more time(s), sc in remaining sts across, turn. (168, 184, 200, 216, 232) sc
For all Sizes –
Row 2: Ch 2, hdc in next 14 (16, 18, 20, 21, 23, 25, 27, 29) sts, *3 hdc in next, hdc in next 13 (15, 17, 19, 20, 22, 24, 26, 28) sts, repeat from * 5 more times, 3 hdc in next st, hdc in remaining sts, turn. 126 (142, 158, 174, 182, 198, 214, 230, 246) hdc.
Row 3: Ch 2, hdc in next 14 (16, 18, 20, 21, 23, 25, 27, 29) sts, *3 hdc in next, hdc in next 15 (17, 19, 21, 22, 24, 26, 28, 30) sts, repeat from * 5 more times, 3 hdc in next st, hdc in remaining sts, turn. 140 (156, 172, 188, 196, 212, 228, 244, 260) hdc.
Row 4: Ch 2, hdc in next 16 (18, 20, 22, 23, 25, 27, 29, 31) sts, *2 hdc in next, hdc in next 17 (19, 21, 23, 24, 26, 28, 30, 32) sts, repeat from * 5 more times, 2 hdc in next st, hdc in remaining sts, turn. 147 (163, 179, 195, 203, 219, 235, 251, 274) hdc.
Row 5: Ch 2, hdc 16 (18, 20, 22, 23, 25, 27, 29, 31) sts, *2 hdc in next, hdc in next 18 (20, 22, 24, 25, 27, 29, 31, 33) sts, repeat from * 5 more times, 2 hdc in next st, hdc in remaining sts, turn. 154 (170, 186, 202, 210, 226, 242, 258, 281) hdc.
Row 6: Ch 2, hdc in next 17 (19, 21, 23, 24, 26, 28, 30, 32) sts, *2 hdc in next, hdc in next 19 (21, 23, 25, 26, 28, 30, 32, 34) sts, repeat from * 5 more times, 2 hdc in next st, hdc in remaining sts, turn. 161 (177, 193, 209, 217, 233, 249, 265, 288) hdc.
Row 7: Ch 2, hdc in next 17 (19, 21, 23, 24, 26, 28, 30, 32) sts, *2 hdc in next, hdc in next 20 (22, 24, 26, 27, 29, 31, 33, 35) sts, repeat from * 5 more times, Hdc in last 19(20, 21, 22, 23, 24, 25, 26, 27) sts, turn. 168 (184, 200, 216, 224, 240, 256, 272, 295) hdc.
Row 8: Ch 2, hdc in next 18 (21, 23, 25, 26, 28, 30, 32, 34) sts, *2 hdc in next, hdc in next 21 (23, 25, 27, 28, 30, 32, 34, 36) sts, repeat from * 5 more times, 2 hdc in next st, hdc in remaining sts, turn. 175 (191, 207, 223, 231, 247, 263, 279, 302) hdc.
Continue in this sequence till you have a desired length, Prototype made to Row 28 measuring 10”!
Finishing
- Please note that you can either use Buttons or Zippers.
- Kindly Follow the instructions for either.
Option 1: Zippers
Note:
- Tip: Make sure you don’t sew too close to the zipper tooth.
- The slip stitch gives a clean edge
- On the right side of the body –
Working on the sides/edges from last row of the collar towards the flare, join yarn with a slip stitch to the edge of the collar, ch 1, sc in first st, *Hdc in next, sl st in next, repeat from * to last stitch, sc, end, turn
- Ch 1, sc in first stitch, *sl st, Hdc, repeat from * to last st, sc
- Ch 1, sc in each st across, turn
- Ch 1, slip stitch in each stitch across.
Fasten off, repeat on the left side.
To add zipper –
- Measure from the tip of your flare to the edge of collar to get the required length for a zip. Some Testers preferred to stop their Zippers at the neck as they did not want a turtle neck collar.
- Place your zipper on your cardigan, secure both ends with needles
- On each side, with a sewing needle, sew the zipper and cardigan together, starting from the collar towards the flare.
Repeat on the other side.
Option 2: Buttons
On the Left side –
- Working on the sides/edges from last row of the collar towards the flare, join yarn with a slip stitch to the edge of the collar, ch 1, sc in first st, *hdc in next, sl st in next, repeat from * to last stitch, sc, end, turn
- Ch 1, sc in first stitch, *sl st, Hdc, repeat from * to last st, sc
- Ch 1, sc in each st across, turn
- Ch 1, slip stitch in each stitch across.
Fasten off
On the right side
- Working on the sides/edges from last row of the collar towards the flare, join yarn with a slip stitch to the edge of the collar, ch 1, sc in first st, *Hdc in next, sl st in next, repeat from * to last stitch, sc, end, turn
- Ch 1, sc in first stitch, *sl st, Hdc, repeat from * to last st, sc
- Ch 1, sc in first stitch, * ch 5, skip 4 stitches, sc in next 8 stitches, repeat from * to last stitch, turn
- Ch 1, sc in each stitch across, (including the ch 5 spaces), turn
- Ch 1, slip stitch in each stitch across.
Fasten off, sew buttons on the left side, making sure to corresponds to the button holes on the right
Sew button on the right side.
Share & Worth Noting
Thank you for sharing my FREE patterns & tutorials. When you do, you support me & the blog, which makes it possible to continue sharing free content with you.
Not all content on this blog website is free, but the more you share, the more free content I will be able to share. Note that all premium content are ad free.
My crochet patterns can be used to sell handmade pieces. You are required to credit Joy of Motion/Janne Kleivset as the designer by linking back to My website: https://joyofmotioncrochet.com. You can not use my pictures when selling your handmade items. Finally, you can not resell, reprint or share any parts of my patterns as your own.

