

Want to learn how to crochet turning chains and all the details about it? Crochet turning chains refer to a specific type set of chain stitches used in the transition between one row/round and the next.
Whether you are crocheting in rows or rounds, learning how to properly create a crochet turning chains is essential.
In this blog post, I’ll cover everything from what a crochet turning chain is and how to do one for different types of stitches, answering common questions, along with materials needed and tips & tricks for mastering this important crochet technique!
Would you like to save this?
What are turning chains in crochet?
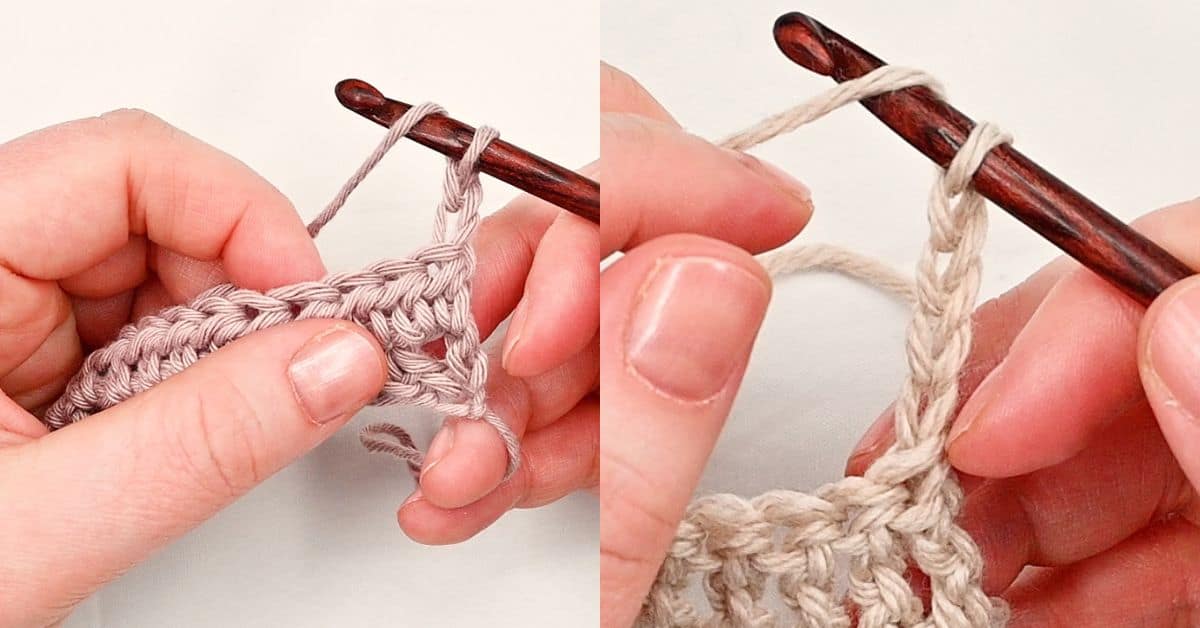
Turning chains in crochet is the first stitch of the row or round. This is most commonly chain stitches, and the length of the turning chain depends on the height of the stitch you are crocheting.
There are different ways to crochet turning chains, including if the turning chain counts as a stitch or not.
If the turning chain counts as a stitch, you will crochet the next stitch into the second stitch. However, if the turning chain doesn’t count as a stitch you will crochet the next stitch into the first stitch.
This also change how you use the turning chain at the end of the row or round. If the turning chain counts as a stitch, you will work into the last chain crocheted as a part of the turning chains, to keep the stitch count consistent.
But if you don’t count the turning chain as a stitch, you will not crochet into it when you come back to it on the next row.
In this tutorial we will show you both methods, including other alternative ways to start rows and rounds in crochet.

Turning Chains for Crocheting In Rounds
Many get confused about turning chains and if you can use the same technique if you crochet in rounds.
Yes, the turning chain techniques all work when you crochet in rounds as well, and can be called more of a starting chain, especially if you don’t turn your work at the end of the round.
When you crochet in rounds, you will in most cases slip stitch (sl st) into the top of the turning chain or first stitch after crocheting the final stitch of the round.
You will crochet into the top of the turning chain if the turning chains counts as a stitch, and you will crochet into the first stitch if the turning chain doesn’t count as a stitch.
Materials Needed
To crochet turning chains you can use any crochet hook size and weight yarn. If you’re following a crochet pattern, use the crochet hook and yarn suggested to get the correct gauge.
Save on Pinterest!

Alternative ways to start rows in crochet & crochet turning chains
There are several alternative ways to start rows in crochet, either with turning chains or other stitches.
- Turning chain counts as a stitch: Some crochet patterns instruct that the row of crochet stitches starts with turning chains, that doesn’t count as a stitch. In that case the next stitch is crocheted into the second stitch.
- Turning chain does not count as a stitch: Other crochet patterns may instruct that the turning chains counts as a stitch. In that case the next stitch is worked into the first stitch, the last stitch of the previous row.
- Work first stitch directly into first stitch: An alternative way to start a row in crochet is to work the first stitch directly into the first stitch. This technique works best for single crochet and half double crochet, as you don’t have to raise the height to accommodate for these short stitches.
- Wrap around technique: The wrap around technique is maybe one of the most complex techniques, where you crochet the chains and the first stitch of the next row at the same time. The positive is that it keeps the edges straight and eliminate any gaps. This technique doesn’t work for single crochet, but for the other basic crochet stitches.
- Stacked single crochet: The final technique is the stacked single crochet. It’s essentially single crochet stitches stacked on top of each other. It works well for half double crochet, double crochet, treble crochet and the taller crochet stitches.
Try all the techniques in the step by step photo tutorials below to find what your preferences is. As your confidence as a crocheter grows, you don’t necessary have to follow the pattern instructions when it comes to turning chains.
Troubleshooting Crochet Turning Chains: Gaps & Straight Edges
When it comes to to turning chains there are two common problems.
- Gaps
- Not getting straight edges
With the regular turning chains, with a given turning chain length for the most basic crochet stitches, you often end up with one of the problems.
If you count the turning chains as a stitch, you often end up with gaps.
If you don’t count the turning chain as a stitch, you often end up with crooked edges.
Here are some techniques to try to eliminate gaps and wavy edges:
- Crochet fewer chains: Try starting the row with fewer chains. As an example, start a row of double crochet stitch with 2 chains instead of 3.
- Try additional chains: Try starting rows with more chains. As an example, start a row of half double crochet with 3 chains instead of 2.
- Try a different technique: Try a different technique such as the stacked single crochet method, wrap around technique or working the stitch directly into the first stitch without chains.
The result you get may vary depending on how loose or tight you crochet. Because of that there’s no one solution to solve it for everyone.
It’s also a matter of what technique you prefer and feel most comfortable with.

The Different Types of Crochet Turning Chains
Beginners in crochet come across the term turning chains often already in their first crochet pattern.
You will have different number of chains needed for all the basic crochet stitches, including the single crochet stitch (sc), half double crochet (hdc), double crochet (dc) and treble crochet (tr).
Below you can find links to detailed step by step tutorials, with a photo and video tutorial for the different turning chains (us terms).
In the tutorials I have included alternative turning chain, like the standard turning chain, stacked single crochet, wrap around technique, as well as the number of chains needed to get to the height of the stitch.
You can also find the video tutorials on my YouTube Channel.
1. Single Crochet Turning Chains
Learn how to crochet turning chains for single crochet and how to start a row of single crochet. Learn all you need to know with this detailed step by step photo and video tutorial, including 3 alternatives.

2. Half Double Crochet Turning Chains
Learn how to crochet turning chains for half double crochet and how to start a row of half double crochet. Learn all you need to know with this detailed step by step photo and video tutorial, including 5 alternatives.

3. Double Crochet Turning Chains
Learn how to crochet turning chains for double crochet and how to start a double crochet row. Learn all you need to know with this detailed step by step photo and video tutorial, including 4 alternatives.
4. Treble Crochet Turning Chains
Learn how to crochet turning chains for treble crochet and how to start a row of treble crochet. Learn all you need to know with this detailed step by step photo and video tutorial, including 4 alternatives.

Stitch Abbreviations for the Crochet Turning Chains
When it comes to crochet abbreviations the turning chains have different ways to be written.
- To instruct turning chains the most common way to write it is:
- ch 1 or ch-1 for single crochet
- ch 2 or ch-2 for half double crochet
- ch 3 or ch-3 for double crochet
- ch 4 or ch-4 for treble crochet
- You can also come across the abbreviation t-ch or tch. This can be used both to instruct you to crochet turning chains, as well as to work into the turning chains on the next row or round.

Try the Different Technique and Make Your Choice
As you can see there are many ways to start a row and round in crochet.
It all depends on the type of stitches you are crocheting, as well as the height of the stitch.
There are also great alternative methods to turning chains in crochet, that reduces typical problems such as gaps and not getting straight edges.
Try the different techniques for each of the basic crochet stitches to find your favorite and stick to it for a professional result in the future.

