

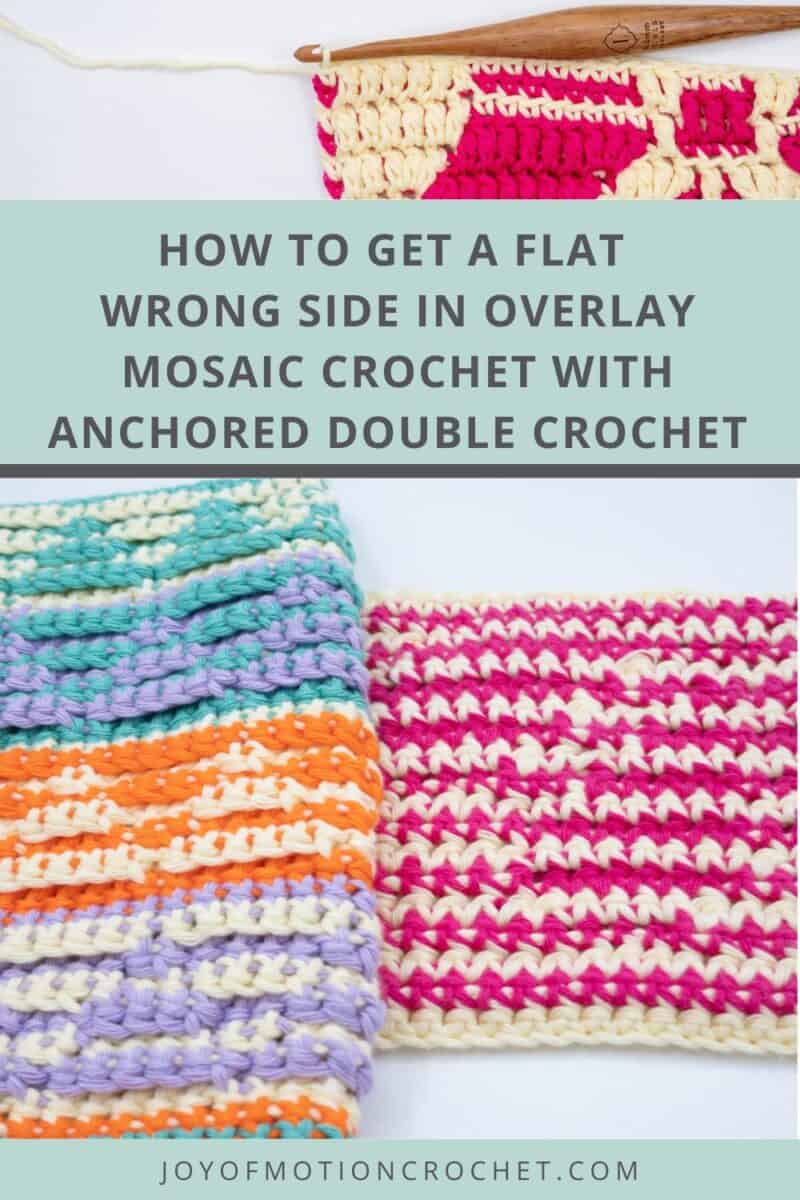
If you want to achieve a flat wrong side in overlay mosaic crochet, then you’re at the right place.
This technique involves crocheting the double crochet stitches a bit different that normal in overlay mosaic crochet & the result is a flat surface at the back instead of uneven ridges.
Having a flat backside on your mosaic crochet projects can be the nice finish you are looking for on your mosaic crochet projects.
The anchored double crochet stitch is just what you need to implement to get those results. Let’s dive into this technique.

Would you like to save this?
What is the Technique Used To Achieve a Flat Wrong Side in Overlay Mosaic Crochet?
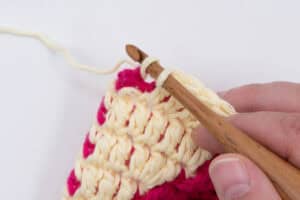
To crochet a flat wrong side in overlay mosaic crochet you will modify the double crochet stitch used in overlay mosaic crochet and crochet a anchored double crochet instead.
The anchored double crochet stitch is worked through the back loop of the next stitch before it is worked into the front loop of the double stitch two rows below.
This results in a smooth surface on the backside of the crochet project which can be great for some crochet projects using the overlay mosaic crochet technique.
Ultimate Guide to Overlay Mosaic Crochet
Like this? Get the ad-free version + 19 other crochet patterns & tutorials with the “Ultimate Guide to Overlay Mosaic Crochet”.
Learn more about the Ultimate Guide to Overlay Mosaic Crochet
When Can You Use The Anchored Double Crochet In Overlay Mosaic Crochet?
What’s great about the anchored double crochet is that you can use it in all overlay mosaic crochet patterns.
You don’t have to have special crochet pattern written to use the anchored double crochet, you can just swap it out with the long double crochet that is just worked into the front loop of the stitch two rows below.
One thing you need to be mindful about is that you may need more yarn if you use this technique than the pattern calls for.


How to Get a Flat Wrong Side In Overlay Mosaic Crochet with Anchored Double Crochet
Skill Level
Tools

Materials
Instructions
- Insert crochet hook in back loop of next stitch. This is the step where you anchor the double crochet to flatten the backside of your work.

- Pull up a loop.
- Yarn over.
- Insert crochet hook in front loop of stitch 2 rows below and pull up a loop.
- Yarn over and pull yarn through the first 3 loops on the crochet hook.
- Yarn over and pull yarn through last 2 loops on the crochet hook.


Pros & Cons To This Technique
While crocheting overlay mosaic crochet with a flat wrong side is great, there’s for sure some pros and cons to using this technique.
Here’s some great points to consider:
- Pros:
- You get a smoother surface and no ridges to get stuck on.
- The overall look is more aesthetically pleasing.
- Cons:
- Uses a bit more yarn.
- Takes longer to crochet with the extra step.
The pros and cons for sure are something to consider and the final and imporatnt question:
Will you see the wrong side of your finished crochet project when you use it?

Start Crocheting Overlay Mosaic Crochet With A Flat Wrong Side
Now that you’ve learned how to get a flat wrong side in overlay mosaic crochet, there’s time to try it in a few crochet projects.
Here’s a few mosaic crochet patterns for you to use it:
Test the technique in a few crochet projects & decide if it’s a technique you want to implement when crocheting mosaic crochet projects where the backside of you crochet projects is important as well.
Happy crocheting!

