

Are you ready to learn how to crochet the Quick Bubblepattern? It’s for sure an alteration of my favorite crochet stitch, The Bubblepattern. The Quick Bubblepattern is a beautiful crochet stitch, & I love the texture it gives any crochet project. I’ve never learned this stitch, but made it as an alteration of the original Bubblepattern to get the result I wanted at one point, & I’ll keep using it for current & future crochet designs.
If you have purchased one of my crochet patterns, you might want to learn how it is crocheted. The crochet patterns offers written text in addition to charts, however here I will share a step by step picture & video tutorial with you.
Today I suggest that you learn the stitch & then you should use it in a crochet project! You can make you own, but in the bottom of this post I have also included all crochet patterns that are using the Quick Bubblepattern!

OTHER CROCHET STITCHES YOU MIGHT WANT TO LEARN:
Before you start learning the crochet stitch for this post, I want to share other crochet stitch tutorials from Joy of Motion. Just click the link & open them in new tabs to learn them later.
Crochet Abbreviations
The Quick Bubblepattern is often abbreviated QB in crochet patterns.
Learn more about crochet abbreviations & find a complete list on our Crochet Abbreviations & Terms post.
MATERIALS YOU’LL NEED TO LEARN THE QUICK BUBBLEPATTERN:
Crochet Hook:
To follow this crochet tutorial you’ll need a crochet hook. When I crochet I usually use 2 types of crochet hooks. I’ve listed them below:
- Knitpro – Symphonie Rose Crochet Hooks – My first choice as of now is the Symphonie Rose Crochet Hooks from KnitPro. They opened my world to wood hooks & impressed me with their amazing lightness & how they feel in my hand. Even though they’re not padded, they never give me any strain while using them. I’ve only come across them in sets They are available here:
- KnitPro – Waves Crochet Hooks – Are the crochet hooks I use almost as my favorite. They are padded hooks & are comfortable to crochet with. They are a little heavier than wooden hooks, but the padded comfort is truly amazing. You can purchase these both in sets & alone. They are available here:
- Love Crochet
- Wool Warehouse
- Wool Warehouse (set)
- Amazon
- Amazon (set)
- Etsy
Yarn:
You’re going to need some yarn to follow this crochet tutorial to learn a new crochet stitch. I really do love purchasing my yarn online. Here’s my top yarn resources:
Crochet a blanket!
Use this crochet stitch pattern to crochet a blanket! Learn more about crochet blanket sizes & making one with any size crochet hook & yarn:
HOW TO CROCHET THE QUICK BUBBLEPATTERN – PICTURE GUIDE:
1. How to start

Since the purpose of this post is to learn the stitch I suggest that you start by making a small test square:
1. Chain 10 stitches, turn.
2. Single Crochet along chain row, turn.
Then you are ready to start learning how to crochet the Quick Bubblepattern!
(If you are uncertain about “Chains” check my “Beginners Guide to Crochet Part 1” – and for “Single Crochet” the “Beginners Guide To Crochet Part 2”.)
2. Draw up a loop
I have split the part “draw up a loop” in 3 pictures to show you as many details as possible! It’s really only 1 step.

2a. Insert hook in next stitch – from front to back.

2b. Yarn over

2c. Draw up a loop. You have now 2 loops on the hook.
3. Yarn over

Yarn over from back to front.
You now have 3 “loops” on your hook.
4. Draw up a loop
This is done the same way as step 2 (put hook through the same stitch, yarn over & draw up a loop). Showing you only 1 picture here.

Draw up a loop from the same stitch.
You now have 4 loops on you hook.
5. Yarn over

Yarn over.
6. Pull yarn through all loops on hook

Pull the yarn you just “yarn over” through all 4 loops on hook.

9. Repeat
Now you have finished one ” Quick Bubblepattern”. Now you repeat the ” Quick Bubblepattern” along the row. When you turn & crochet the second row you don’t need to chain, just turn & do a Quick Bubblepattern stitch in the first stitch (the last stitch you made on the previous row).
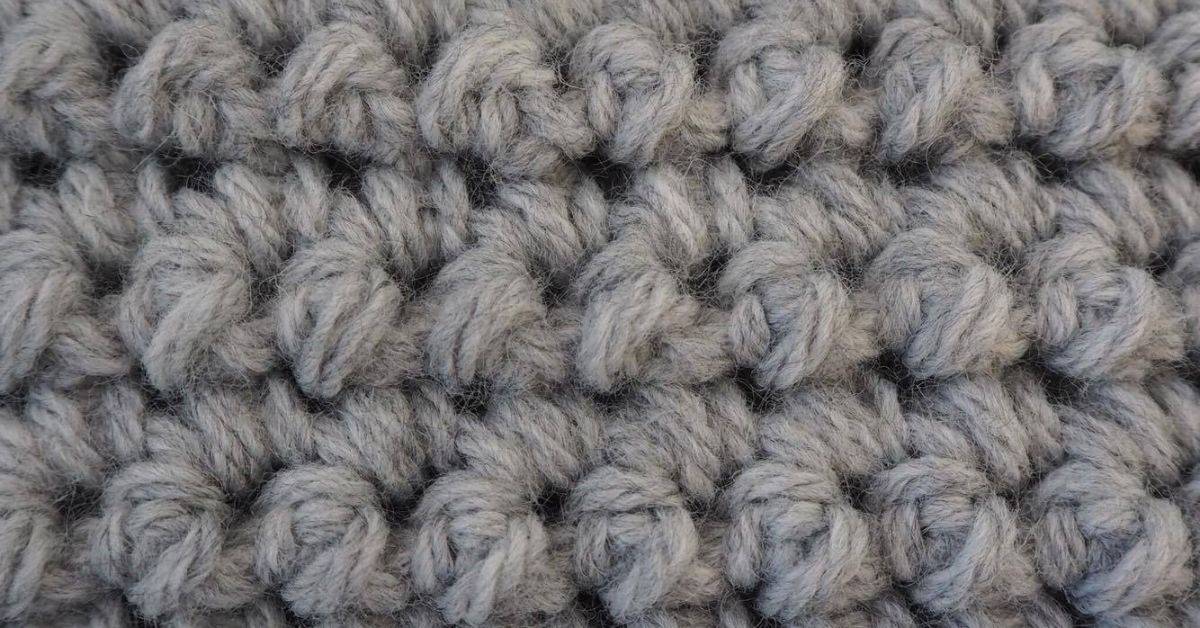
It should look like this when you’ve made multiple rows:

However if you are working in rounds, the stitch will automatically spiral & look like on these mittens:

HOW TO CROCHET THE QUICK BUBBLEPATTERN – WRITTEN GUIDE:
*in the next st, draw up a loop, yarn over, draw up a loop from same stitch, yarn over, pull through all* repeat.
Start rows with a Quick Bubblepattern Stitch directly in the last stitch from previous row.
HOW TO CROCHET THE QUICK BUBBLEPATTERN – VIDEO GUIDE:
This video shows you how to crochet the Quick Bubblepattern.
Compare this with the written instructions & you should have a feel about how it’s done.
CROCHET PATTERN DESIGNS USING THE QUICK BUBBLEPATTERN:
I hope you enjoyed learning how to crochet the Quick Bubblepattern. Comment below to let me know what you used the crochet stitch for, I’d love to see what you’ve made!

